Friday, November 8, 2019

Chickenhawks Over New Guinea #7

All,

1130 local time
22 May 1942
New Guinea

Greetings all, having just wrapped up the Coral Sea battles, I figured it's time to head back to my U.S. Army Air Corps fighter squadron, the 565th Tactical Fighter Squadron, better known as the "Chickenhawks." The last we saw of the Chickenhawks was back in February of 1942; they'd started out fighting the Japanese over the Dutch East Indies before falling back to Australia and becoming embroiled in the fighting over Darwin. After things quieted down there, they ended up moving over to Brisbane, where they had a quiet period of daily patrolling to bring in replacements and get them trained up. But they got word at the end of April that they'd be moving soon, and immediately after the Battle of Coral Sea they packed up and shipped out, heading up to Port Moresby on New Guinea, making Kila Kila Airfield, AKA "3 Mile Drome," their new home on 11 May 1942. They only had a couple days before they were called to action.

On 13 May, Captain Cotton led six P-40s against four Zeros and six Bettys. One Zero and one Betty were downed at the cost of three P-40s and 25/30 damage points on the New Guinea Harbor Facilities.

On 14 May, Captain Goode led a depleted flight of only four P-40s up against four Zeros and six Bettys, and it was an unmitigated disaster. All four US fighters were shot down, with Captain Goode and Lt O'Brien killed in action, while the enemy didn't lose a single aircraft! The Japanese bombers quickly finished off the Harbor Facilities, and pounded the Marshalling Area (22/30 damage points).

On 16 May, Major Jordan led the squadron aloft to intercept six Bettys escorted by four Zeros, but Lt Daniel was the star of the show. The Americans lost a single P-40, but they knocked down two Zeros and four Bettys, with Lt Daniel knocking down four of those aircraft and winning the Distinguished Flying Cross. The remaining two Japanese bombers jettisoned their bombs and returned to base, so no bombs fell on the Allied Marshalling Area (still 22/30).

On 18 May, 1st Lt Pace led a flight of four P-40s on escort duty for six B-25 Mitchells detailed to pound Wewak's POL storage tanks. They met five Zeros over the target, with all five being shot down, though two of those were actually by the bomber crews, who took heavy losses. While the Chickenhawks only lost one P-40, four of the six bombers were shot down, and they barely scratched the POL target (6/30 damage points).

On 19 May, two patrols ran into each other over No Man's Land, ending with each side losing a single fighter.

On 21 May, two young Lieutenants found themselves escorting a flight of five B-25 Mitchells over to Wewak again, where a pair of Zeros rise up to meet them.  Both Zeros were downed, for the loss of a single P-40s, and all five bombers made it, though they didn't score very well (only 12 more damage points, so 18/30 on the POL target).

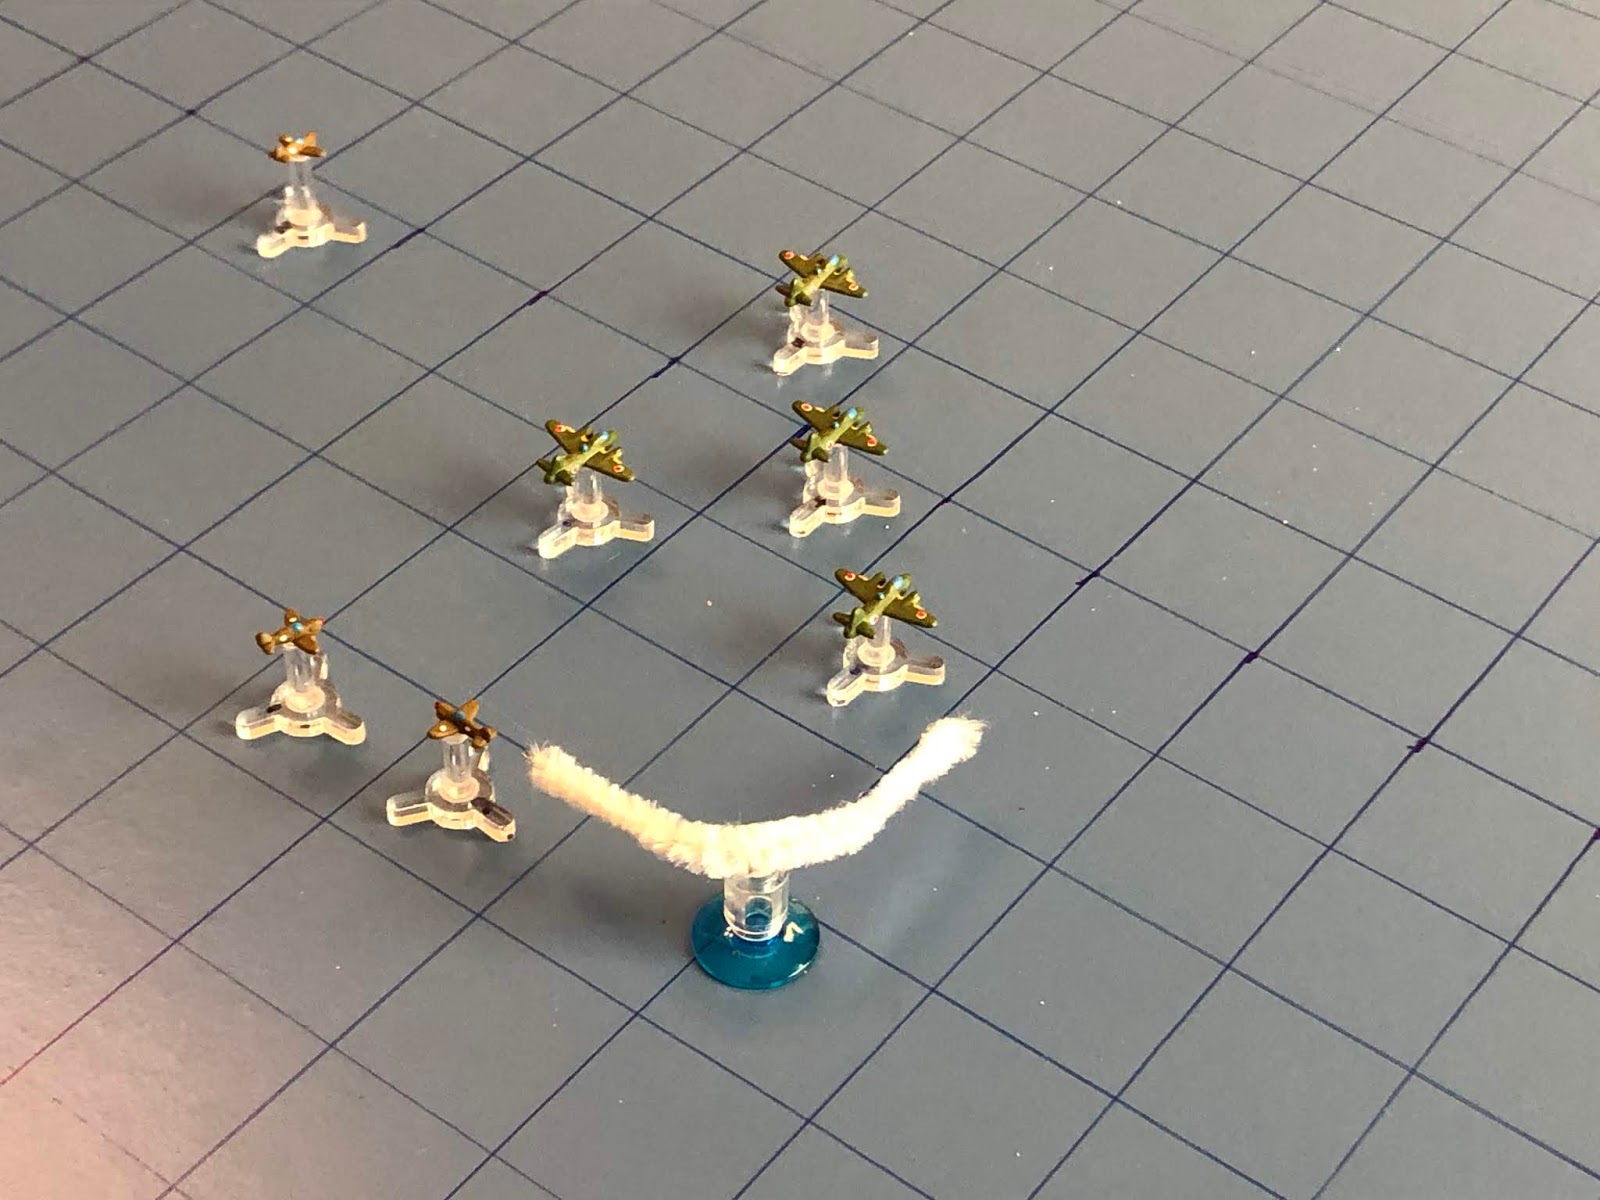
Now it's 22 May, and five Bettys are inbound, escorted by a single Zero!  1st Lt Daniel, now an Ace, leads aloft a pack of four P-40s, and their pilots are hungry!

This is my arena for aerial combat; simple, yet durable and, to me, beautiful (in a simple, durable way). I'm using tiny aircraft designed by my buddy Thomaston; not sure what size they are, just that they are much smaller than 1/600. They're 3D printed models that I mounted on cut-down bases from Litko, and I'm using a very simple rules system called "Battle of Britain," which I found for free over on The Miniatures Page (I've already played a good 20 or so fights with them). Left is north, with the Japanese strike group there, and the American CAP at right.
The US Combat Air Patrol, from top:

2nd Lt Sweeney, a Regular
1st Lt Daniel, an Ace

2nd Lt Becht, a Regular
2nd Lt Nagle, a Regular

Bomber targets are:
POL Storage (18/30)
Warehouse Yard
Wewak Airfield
The Japanese strike group, from top:

Zero 01, a Regular

Betty 06                 Betty 03
                Betty 04
Betty 05                  Betty 02

Targets:
Harbor Facilities: Destroyed
Marshalling Area: 22/30
Airfield
We skip straight through Turns 1 and 2 in order to bring you straight to the action.

The fight begins with Zero 01 cutting into Lt Daniel and opening fire, though he misses.

And the Japanese bombers push ahead.

*I'm not sure what the hell just happened.  The sequence of play is Escorts-Interceptors-Bombers, and I just moved the escort, then the bombers.  I've played about a hundred of these games now, how the hell did I screw up the sequence of play???

Lt Daniel pushes past Zero 01 to line up a shot on the Bettys.

As his wingman, Lt Sweeney, sweeps in and takes a frontal aspect shot on Zero 01...

The .50-cals hammer the Zero into dust!  And with that, the Japanese bombers have no fighter escort.  Way to go Lt Sweeney, and way to let the youngster handle your light work, Lt Daniel!

Lt Becht jinks in to go head on with the bombers.

As Lt Nagle bends around right.

The Japanese bombers begin marching south, right into the waiting guns of Lt Daniel, though he misses...

And then Lieutenants Sweeney (top right) and Nagle (bottom center) get their chances...

But they both miss, too, as the bombers keep coming, with Betty 03 going head to head with Lt Becht...

And Lt Becht becomes the first fighter pilot to knock down a Betty!

He immediately pushes his luck, running in to go head to head with Betty 05, but both miss!

Lt Nagle sputters right, too much in awe of all the aircraft and flying lead.

Lt Daniel slips right and pulls an Immelman to get in behind the bombers.

As Lt Sweeney pulls hard right to avoid a collision!

The Japanese bombers push south, and Betty 04 (with white marker) opens up with defensive fire on Lt Nagle (just behind her)...

Lt Nagle's aircraft is struck and is going down!  He bails out, but breaks an arm during his parachute landing.  Friendly natives grab him and return him to base, though he'll be out for a little over a month.

Lt Daniel comes right, ever so slowly...

As Lt Sweeney peels right, looking to make another run on the bombers.

And Lt Becht cuts hard right to come back around, nearly crashing into Lt Daniel.

And the bombers keep running.

Lt Daniel must be having engine trouble or something, because he's certainly not maneuvering particularly aggressively...

So Lt Becht takes up the slack, zooming in and cutting right onto Betty 06's tail.  He and the Japanese tail gunner open fire, but both miss!

And Lt Sweeney comes in for another run, lining up a shot on Betty 03.  His .50-cals thunder...

But fire from the Japanese tail gunner throws his aim off, and he cuts left.

The Japanese bombers push south, and Lt Sweeney (top left) is again subjected to defensive fire, but the Japanese miss.

Lt Becht again runs straight in on Betty 06...

And this time Betty 06 goes down!

And then Lt Sweeney jinks over in front of him, getting back onto Betty 03's tail...

Splash another Japanese bomber!  But the defensive fire got Lt Sweeney too, they shot each other down.  The P-40 catches fire and begins going down; Lt Sweeney fights to right the ship, but it's not happening, and flames are licking at the cockpit.  He manages to bail out, and he's rescued by friendly forces, but he's got some bad burns and will out for more than two months.

Lt Daniel pulls up behind his comrades...

And that's enough to convince the Japanese bomber pilots to break off!  They jettison their bombs and head for home.

Lieutenants Daniel and Becht form up for the ride home, but it's a bit bittersweet.  They knocked down the only Japanese fighter, and forced the bombers back after shooting down three of them, but they lost two of their own, to defensive fire from the Japanese bombers!  But the good news is that the Allied Marshalling Areas were untouched by Japanese bombs, to kudos to the Chickenhawks.

2nd Lt Sweeney scored two kills, but was shot down and is out for 70 days
1st Lt Daniel failed to score
2nd Lt Becht scored two kills
2nd Lt Nagle was shot down and is out for 40 days

The Americans are going back on the offensive, B-25s are loading up, hoping to not only get to the target area, but maybe actually hit something, too!  Coming your way.

V/R,
Jack

No comments:

Post a Comment