All,
It's 2030 on 6 January 1942, and 1st Platoon is looking for the exit. Alone and cut off in southern Luzon, a Marine Provisional Rifle Company faced off against much superior Imperial Japanese forces. The Marines put up a valiant defense, and they would likely have been completely annihilated had the Japanese not been more focused on by-passing them on their way to the capital city of Manila. Following a series of fights on Horseshoe Ridge, the platoon has suffered more than 50% casualties, and their commander has now come to the decision he must seek an escape from the Philippines for his men and himself. On the run, they ran into a small group of Marines living on rumors of a US Navy ship lying concealed in a cove to the southeast.
Captain Moon and Sgt Carlson kept the Marines moving east on the southern coast of Luzon, but soon they came to a bridge at a small fishing village. Captain Moon wanted to avoid enemy contact at all costs; the Marines were unable to skirt the village to the south due to the ocean, but scouting parties sent north were unable to find a suitable crossing as well.
Captain Moon turned to Sgt Carlson: "well, Cody, I guess we're crossing here." So the Platoon sat tight until nightfall, then sent a squad forward to clear the area before the main body moved to cross.
Overview of map, north is right. The (fictional) village of Begate is at center, with the river just below it, running north to south. The Marines are entering from the west (top), the Japanese will be spread throughout the village and on the east (bottom) side of the river. The Marine will send a squad forward to secure the crossing; they've got to have a bridge as they're carrying all their wounded. The table is 6' x 4', though we're only using about 4' x 3', and my son and I are playing co-op as the Marines against the Japanese in 15mm, using Ivan Sorensen's rules, "Five Men at Kursk."

The opposing forces, with US on the right and (potential) Japanese on the left. Finally got the Type 95 tank in the picture. The US force is all from Eureka Minis, while the Japanese are Eureka except for the tank and the three Type 92 Machine Gun teams, which are from Peter Pig. You can really see how much the platoon has suffered, down from 33 able-bodied Marines to 21 (after receiving almost seventeen replacements), out of mortar and machine gun ammunition, low on food, water, and medical supplies.
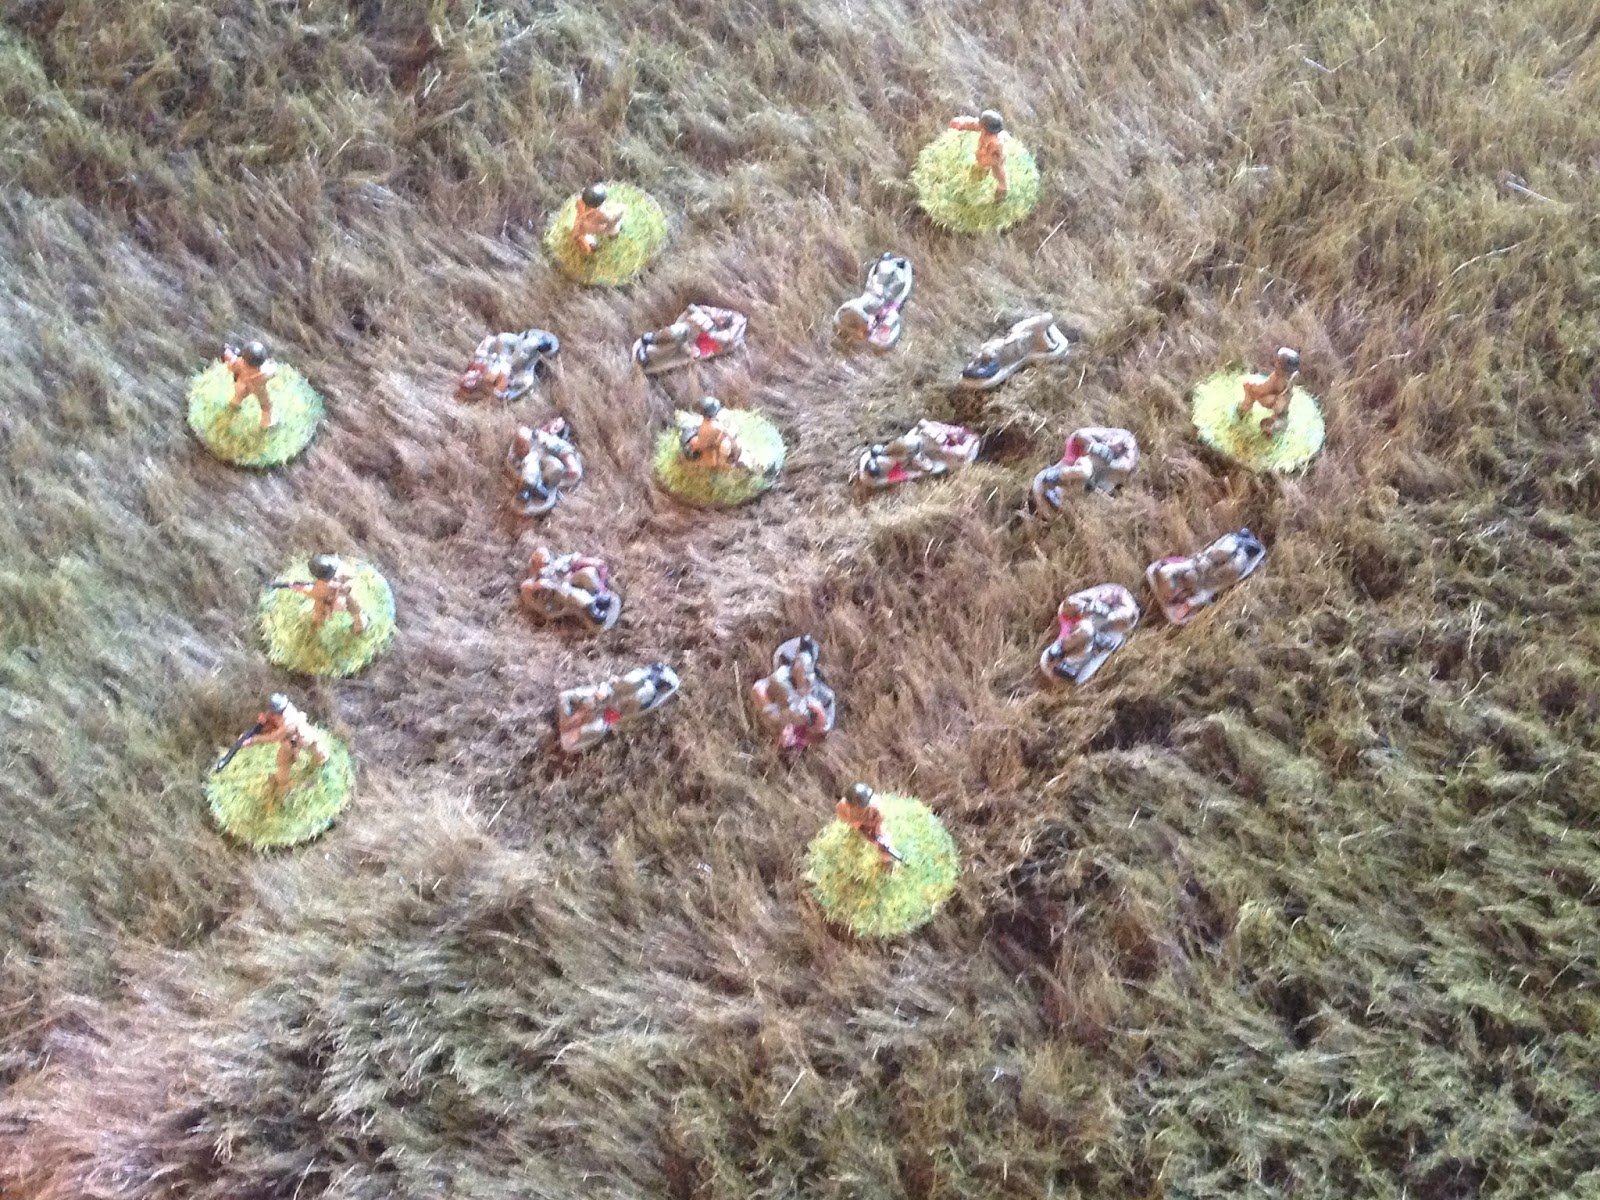
The force: Sgt Carlson, the Platoon Sergeant, leading Sgt Thomas and 1st Squad ahead of the main body, a total of eight Marines.
Starting at bottom right: Sgt Carlson (carrying pistol, but using a Thompson SMG), Sgt Thomas (Tommy Gun), PFC Kozerski (Tommy Gun), Pvt Munoz (Browning Automatic Rifle, or 'BAR'). From top right:Pvt Walter, Pvt George, Pvt Robertson, and Pvt White, all armed with Springfield '03 bolt action rifles.
I rolled up the enemy force and came up with a nine-man Japanese squad, which includes a Type 99 light machine gun (bottom center right) and a 50mm grenade discharger (AKA, "knee mortar," at center left).
The Marine platoon moving west (right) to east. The approach a knoll, where Captain Moon calls a halt. 2nd Squad, the sniper, and the mortar and MG teams have been carrying the casualties (far right), so 1st Squad assumes security (top left to top center left) while Captain Moon and Sgt Carlson (center) look over the situation.
The casualties are having a rough time.
With 1st Squad providing security, Capt Moon and Sgt Carlson (bottom center) look out at the village of Begate (top left).
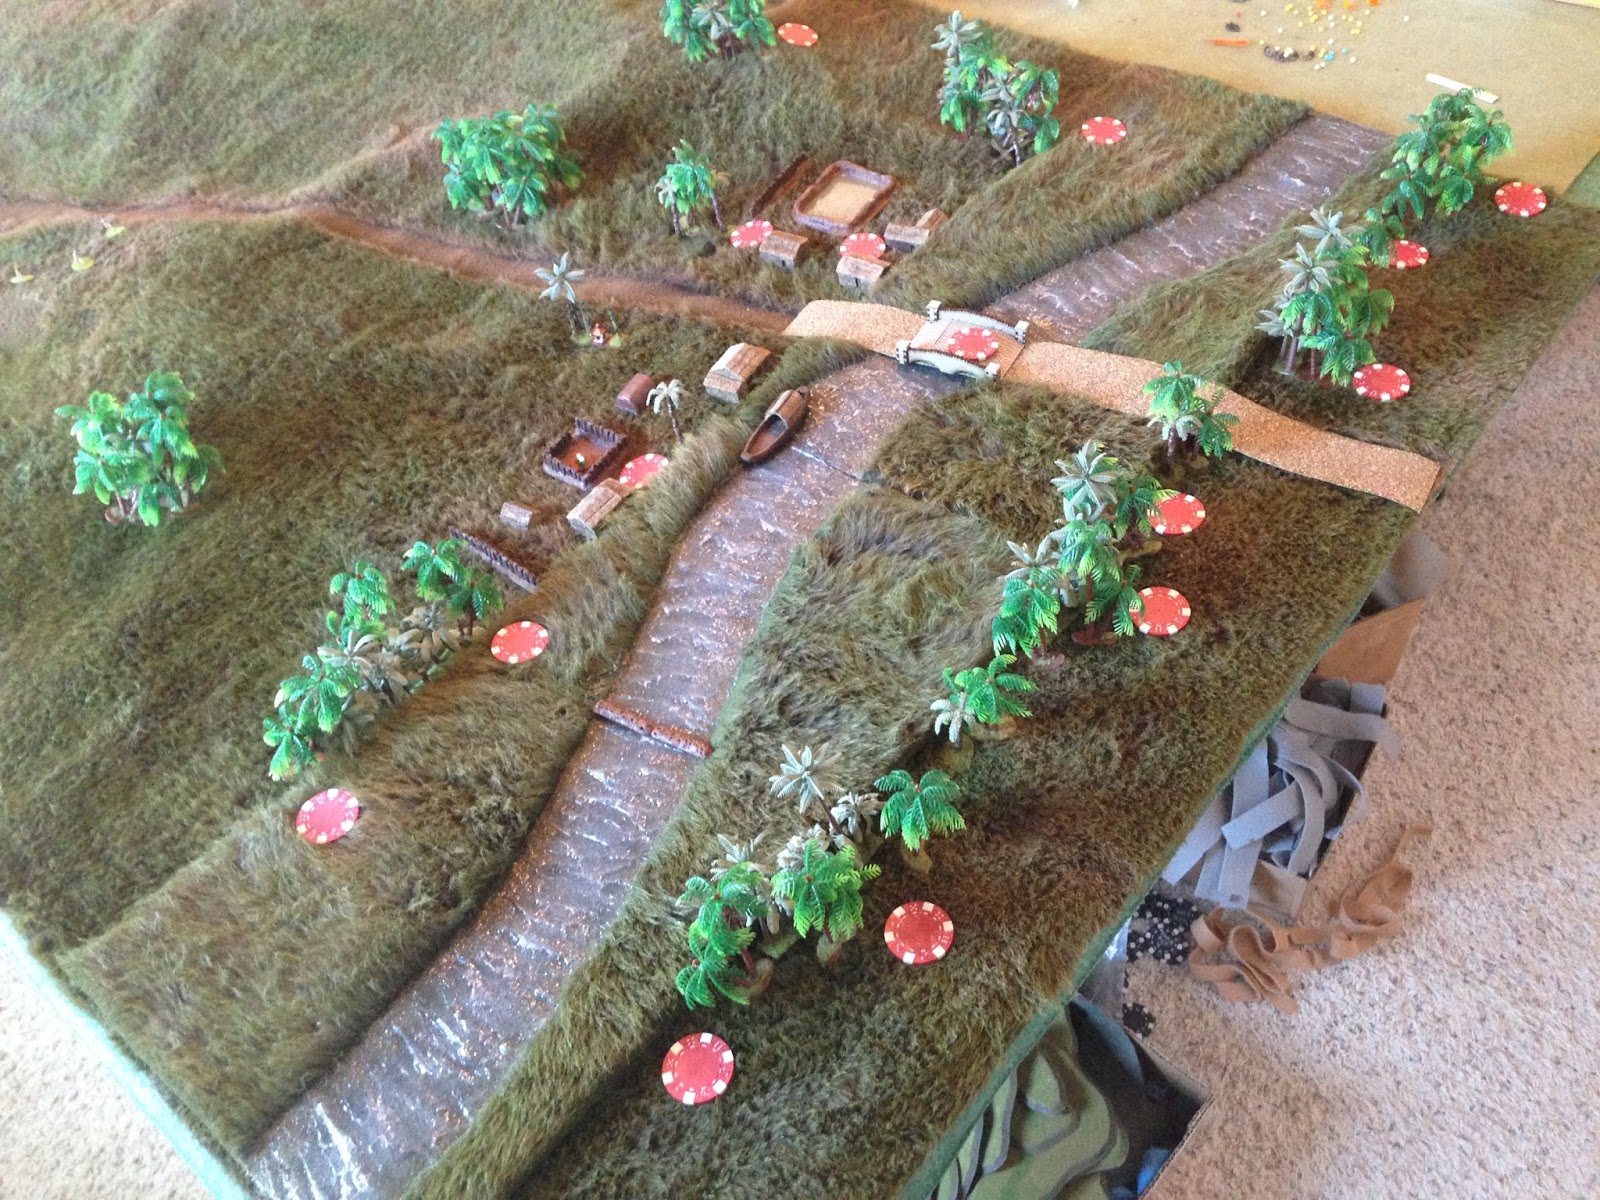
A look at the map from west to east, from behind the Marines. You can see Japanese blinds (red poker chips) in and around the village.
A look at the Japanese end of the table, showing the enemy blinds. This is the first outing of the river set I bought with the teddy bear fur mat. While the river looks fantastic in and of itself, there is a problem: laying it on top of the regular, 6' x 4' mat, there is quite a ridge from the mat up to the river, a good 1/2 or 3/4 of an inch.
The Marines split up and push forward, Sgt Carlson leading a group on the left (bottom center left), towards the main bridge, while Sgt Thomas leads the other group (far right) towards a small foot bridge (the foot bridge is from Jimmi at Flashpoint Miniatures, top right).
On the left, Sgt Carlson leads the Marines ever closer to the bridge.
While on the right, Sgt Thomas and his crew near the foot bridge.
The Japanese troops, all nine of them, are placed on the board. There are three on the east (bottom) side of the river, one in the north (bottom right) and two in the south (far left). There is one Japanese sentry on the bridge, one to his left, and four to his right.
The Japanese in the north, on the west (Marine) side of the river. There are Japanese at bottom center, to his top right, at far left, and to his top right. Sgt Carlson and three Marines can be seen at top center.
Looking north to south; there is a Japanese at bottom left, while the four enemy soldiers from the last pic are at right.
Looking at the south, on the west (Marine) side of the river. The foot bridge is at bottom right, a single Japanese sentry at bottom left. The main bridge is just off camera at top right, while Sgt Thomas and three Marines can be seen at center/top left.
Looking southeast to northwest, with the Japanese soldier from the previous photo at far left. You can can see two of his compatriots on the east side of the river at bottom center/right.
On the left, Sgt Carlson and his men creep forward in the pale moonlight of the warm Filipino evening. Shadows cast by the swaying palm fronds, the grim darkness of the abandoned village, and the shimmer of moonlight off the gently lapping waters of the river create a surreal scene. There is a stir in the darkness ahead...
"Banzaii!!!!" A Japanese soldier standing post near a palm tree and retaining wall (bottom left) spots movement in the dark and charges at it, bayonet glinting in the moonlight! Sgt Carlson looks on in stunned disbelief.
Sgt Carlson raises his Tommy Gun and fires...
The rounds zip by into the darkness, and two bodies crash together and fall to the ground.
But only Sgt Carlson gets back to his feet!
While his Marines are still trying to figure out what the hell just happened, Sgt Carlson moves up to the retaining wall (right, with a Japanese soldier below him, between two huts and just left of the fish farm pond). But the enemy sentry on the bridge (bottom left) spots him and fires
The 6.5mm round from the Arisaka slaps into the retaining wall; Sgt Carlson (far right) returns fire on the enemy soldier on the bridge (far left), pinning him.
Sgt Carlson ducks behind the wall to reload (center), while Pvt Walter (top right) moves up, spotting the enemy soldier at bottom left and firing.
Walter misses, and as he chambers another round, Kozerski moves forward (top center). The enemy soldier (bottom center) returns fire, but he misses too.
Kozerski (top left) fires on the Japanese troop on the bridge (bottom right), missing.
Pvt George moves to high ground (top center right).
Where he (top right) fires on a Japanese soldier (bottom left, with Sgt Carlson, Kozerski, and Walter above him), missing.
Man, games are a lot slower using bolt action rifles and not using the 'return fire' mechanism.
From the Marine right, Pvt Robertson (bottom left) fires his rifle in support of Sgt Carlson and his boys (top center), pinning a Japanese soldier.
But a Japanese soldier on east bank of the river (bottom left, with a buddy at bottom right) spots Robertson as he moves up (top center) and fires, knocking Robertson down.
With Robertson knocked down at top right, Sgt Thomas moves up (bottom left).
But the Japanese sentry on the Marines' far right (bottom left) spots him (top right) and fires.
The Japanese (top left) misses, but so does Sgt Thomas (bottom right), who's using a damn submachine gun...
With Sgt Thomas and the Japanese soldier exchanging fire (far right and bottom center), the BAR man, Pvt Munoz, dashes right (top left) and fires, pinning the enemy soldier.
Sgt Thomas (bottom left) surveys the battlefield as Pvt White moves over to check on Pvt Robertson, but Robertson is unconscious (top right).
White (bottom left) then fires to the north (top center), missing.
Back on the Marine left, the Japanese sentry on the bridge (bottom left) opens fire with his rifle, knocking George down (top right) and forcing alter to fall back (center top)!
Here you can see the Japanese soldier Sgt Carlson dispatched in hand to hand combat (center left), with Walter cowering next to him (red bead), and Pvt George knocked down at top right.
The Japanese soldier in the village (not the one on the bridge) charges, the second to confront Sgt Carlson (center, with Walter cowering at top center).
Sgt Carlson, the brute, slays a second Japanese soldier with his bare hands!
From the east side of the river, the Japanese knee mortar (bottom left) fires on Kozerski and Walter (top right).
While his buddy moves right, taking up a hidden firing position (bottom right, knee mortar at far left)
On the Marine left, a Japanese soldier moves up on the east side of a coconut grove (bottom center). Sgt Carlson (top left) spots him and cuts loose with his Tommy Gun, while the Japanese at far right creeps forward.
Sgt Carlson's target is dropped by .45 caliber slugs (bottom left), but the other Japanese troop dashes ahead (top right, just above the trees).
The enemy soldier pulls up (bottom right) and fires on Sgt Carlson (top left), knocking the mighty Platoon Sergeant down!
While in the northeast, the Japanese light machine gunner gets into position. Sgt Carlson was just knocked down at top center.
On the Marine right, Pvt White (top left) spots the Japanese LMG and fires, missing. The Japanese soldier cuts loose with a long burst of fire.
Rounds zip by as Pvt white grabs Robertson, then dashes for the cover of a retaining wall, suppressed (bottom left, from top right).
Close in on the Marine right, the pinned Japanese sentry on the extreme flank (bottom left) fires again on Sgt Thomas (right), knocking him down. Pvt Munoz (top left) sees the flashes of gunfire...
And he (bottom left) empties a 20-round magazine into the Japanese soldier, killing him.
Walter and Kozerski flinch (bottom right, Walter is hidden by the palm tree) as the Japanese knee mortar round crashes behind them.
But with Sgt Carlson (far left) and Pvt George (top center right) both knocked down, and Pvt Walter cowering (red bead at left), things are not looking good on the Marine left. Pvt Kozerski (behind the tree next to Walter) spots the guy that knocked down Sgt Carlson (bottom right) and opens fire, pinning him. He then rallies Walter, but only gets him up to pinned.
"I need to go check on Sgt Carlson, cover me!"
PFC Kozerski dashes up to the retaining wall (center), trying to get to the Platoon Sergeant (bottom left), with Walter (top right) banging away with his Springfield.
But the Japanese LMG (bottom center) spots Kozerski (top center left) and opens fire, knocking him down!
So Walter hauls his sorry ass up to check on Sgt Carlson and PFC Kozerski...
But a Japanese soldier in the southeast (bottom left, with knee mortar off camera to left) spots Walter (top right) and fires...
Driving him back, suppressed (red bead at top center, from far left)!!!
Back on the right, Pvt White collects his wits after dodging Japanese machine gun fire, then checks on Robertson, and he's good, back in the fight. You can see the automatic rifleman, Pvt Munoz, at top right, and Sgt Thomas is off camera to left, near the footbridge.
Pvt Munoz (bottom left) slaps a fresh magazine into his BAR and fires on the Japanese LMG (top right), putting him out of the fight!
Munoz moves north (center, from top left, with White and Robertson at bottom center).
The Japanese soldier on the bridge tries to be sneaky, sneaking forward very sneakily (bottom center right), but Pvt White (top left) spots him and fires, knocking him down!
While the Japanese soldier on the Marines' far left (bottom right) begins creeping up towards Sgt Carlson, Kozerski, and Walter (center). But with White shooting at and pinning the Japanese at far left, the Marine next to him, Robertson (top left) spots this new enemy threat and fires, knocking him down too!
Wow, some very lucky dice rolling. If I'm honest, it's dark and I probably shouldn't have let Robertson fire across the table like that. Even if he could see the enemy soldier, there's no way he'd be able to make out whether it was a Marine or a bad guy, and even if he could, there's no way he would fire across his own lines, risking hitting Sgt Carlson, Kozerski, and Walter, like that. But hey, it's a game, and I wasn't about to allow that one Japanese guy to overrun my left flank with one man! Remember, there are only four Marines over there, and three are knocked down and one suppressed, so no is in fighting shape.
Back in the southeast, a Japanese rifleman (bottom center) fires on Sgt Thomas, Pvt White, and Pvt Robertson, but misses everything!
With the enemy guy that just fired at bottom center, the Japanese knee mortar (bottom left) fires on Robertson and White.
The round hits a bit short, in a coconut grove. Pvt Munoz is at top right.
Back on the left, Pvt Walter (red bead) successfully self rallies.
With Robertson and White at bottom center, Pvt Munoz sprints right (top left).
While Robertson and White (top right) fire across the river at an enemy rifleman (bottom left), missing.
As Robertson (top right) moves up, the Japanese (bottom left) returns fire, pinning him.
But White (top right) continues banging away with his rifle at the enemy soldier (bottom left).
Forcing him to fall back (red bead at bottom left, from far right).
White then moved up to Robertson.
But the enemy mortarman (bottom center) was watching and fired his rifle (top left).
The bad guy misses, and White unpins Robertson. Then he turns to check on Sgt Thomas, who was knocked down: he's back on his feet, walking wounded.
The Japanese knee mortar (bottom left) fires on the trio of Marines (center top).
Munoz (bottom left, with Sgt Thomas, White, and Robertson hidden by the trees at top left) spots the enemy mortar and fires (top right), but misses.
The enemy rifleman in the southeast (bottom right) self rallies as Munoz' rounds zip past the Japanese knee mortar (far left).
While the Marine automatic rifleman missed, clearly his fire had an effect on the Japanese mortarman, as the round landed in the river.
Munoz (bottom left) reloads and continues pouring fire into the Japanese mortar position (top right)...
And he's rewarded with a yelp as the Japanese mortarman is knocked out of the fight) bottom left)! Sgt Thomas leads Robertson and White across the foot bridge (left), as the last remaining Japanese soldier (bottom right) prepares to die for the Emperor...
The enemy rifleman moves up...
And Sgt Thomas guns him down, game over, the Marines secured a crossing for the main body. Sgt Carlson and his men moved up across the main bridge, made sure the area was clear of enemy soldiers, then took stock of the situation. "Where's Private George?" Pvt Walter replied that he was hit back on the knoll in the northwest; Sgt Carlson sent White and Robertson to take care of George, and he sent PFC Kozerski back to Captain Moon to let the Skipper know it was safe to bring the platoon forward.
The Marines got a move on, looking to get clear of the crossing before dawn brought more Japanese troops. It took awhile, but ultimately Capt Moon and Sgt Carlson were able to locate the US Navy, and make their way out of the Philippines. But it was a case of out of the frying pan and into the fire: the Navy deposited the raggedy, worn out Marines in the Dutch East Indies, which just so happened to be Imperial Japan's next big offensive.
Thus ends our fights in the Fall of the Philippines, with the Marines escaping only to take part in the Fall of the Dutch East Indies, which will be the next set of five to seven fights.
V/R,
Jack