All,
It's 2245 on 25 December 1941, and 1st Platoon is finally in possession of Horseshoe Ridge, but for how long is anyone's guess. Yesterday afternoon Captain Moon led 1st Platoon, with a big assist from a National Guard M-3 Stuart, in a successful assault to take Horseshoe Ridge. Once the Japanese were evicted, Capt Moon and Sgt Carlson consolidated into a small, 360 degree perimeter. But later that evening Major Ford, their Company Commander, came up, with good news and bad news. The good news was that 3rd and 4th Platoons were stood down, and their men were fed into 1st and 2nd Platoons to bring them back up to strength. With that, 1st Platoon was ordered to hold the entirety of Horseshoe Ridge. The bad news was that General Parker, the US South Luzon Force commander, needed his tank back. Also, Major Ford was taking 2nd Platoon and heading west, assuming a defensive position on a small hill overlooking a bridge, with the understanding that the Marines were not likely going to be able to hold for long, and would soon need to retreat to the west, making their way to Cavite and/ore Manila, to link-up with the rest of the South Luzon force and maybe even the rest of the US troops on Luzon, now withdrawing into the Bataan Peninsula.
With that, you need to understand we're reaching a dark time in the campaign: in real life, the main US force on Luzon is about to voluntarily bottle itself up in the Bataan Peninsula, where it will put up a brave and dogged defense, but ulimately will fall back until there's no more room to fall back, then capitulate. Immediately following that, the Japanese will pound McArthur's headquarters, the island fortress of Corregidor (across from the Bataan Peninsula, in Manila Bay), then launch an amphibious assault that, for all intents and purposes, ended the US resistance in the Philippines in April 1942.
So, the 1st Platoon is but a microcosm of this overall situation. They have taken Horseshoe Ridge and been reconstituted, victories at the tactical level. But the overall situation is that their time in the Philippines is coming to a violent close. While they have a full complement of troops, the food, ammo, and medical supplies they have on hand is all they'll ever have; the platoon is severely outnumbered, surrounded, and cut-off. The only reason they've even lasted this long is because the Japanese have, in the overall scheme of things, been ignoring them, rushing past them from, east to west, to capture Manila.
The time is drawing near where the Platoon will cease to be a coherent fighting force, and more a band of fugitives searching for a means to escape the Philippines.

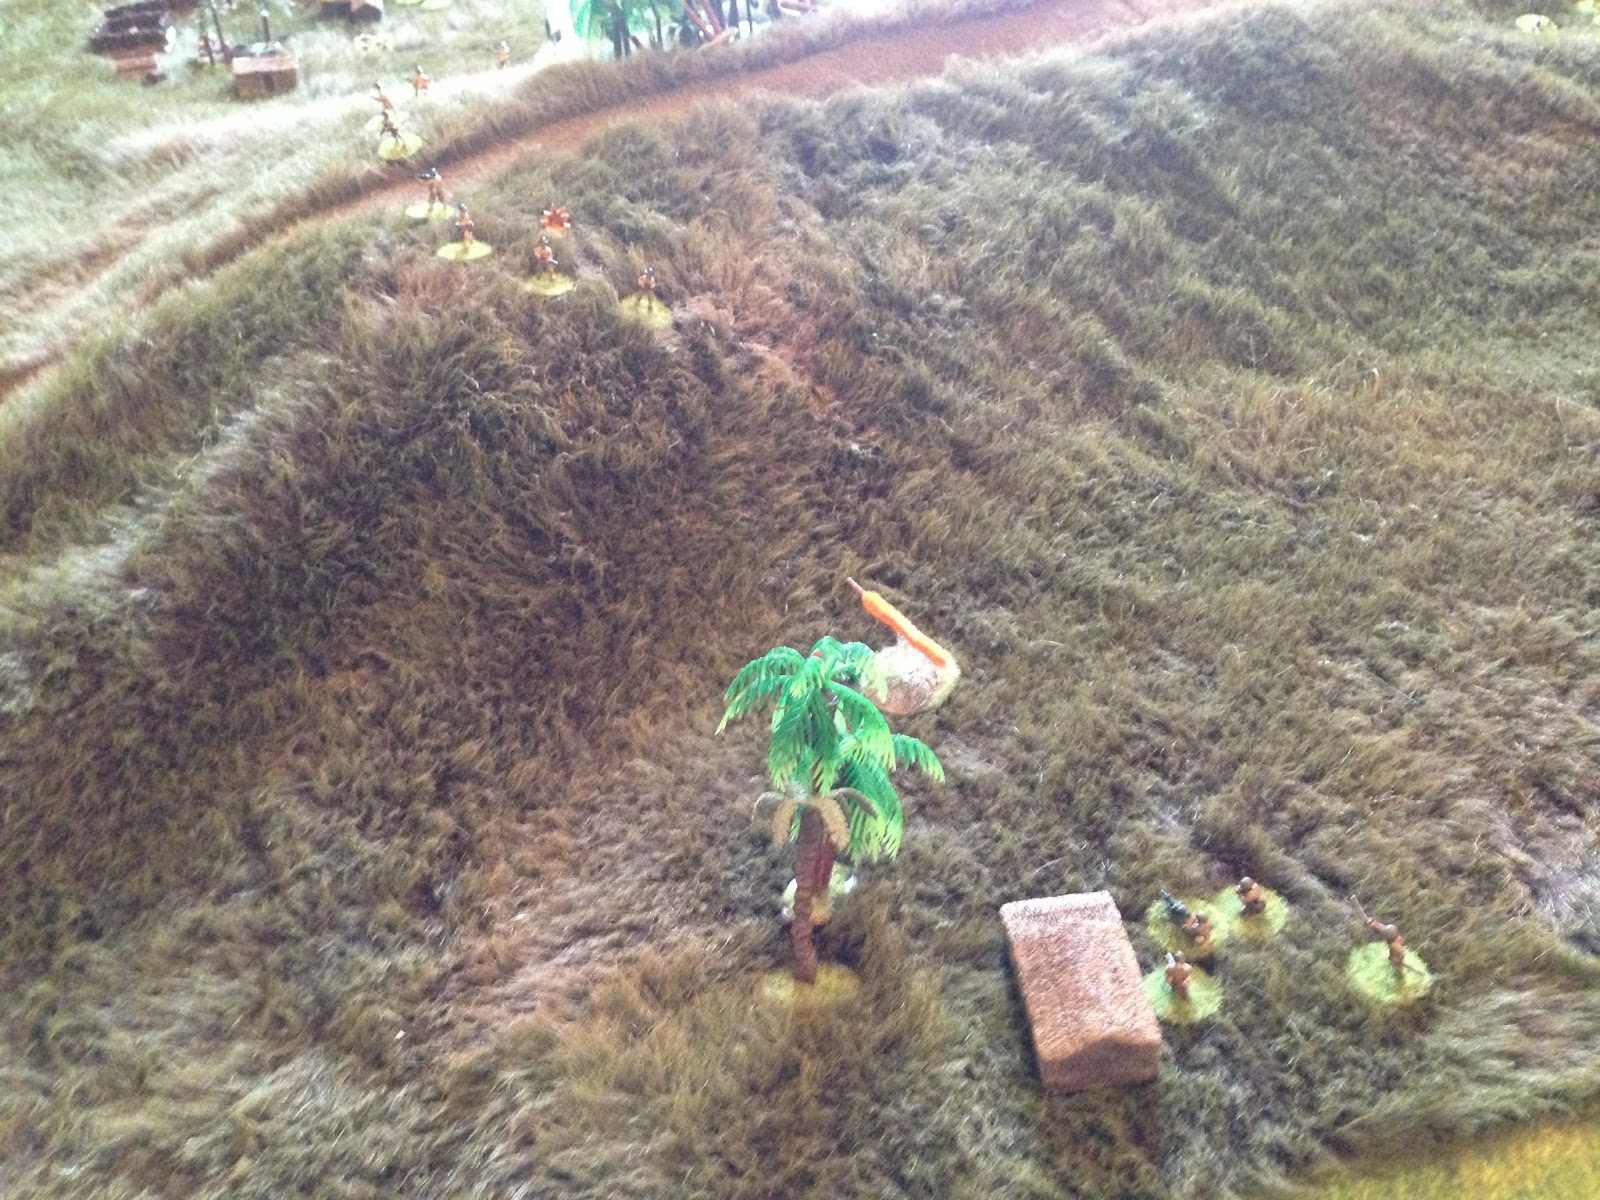
Overview, north is to top left, the entirety of Horseshoe Ridge is displayed, the mass at center, running west (bottom left) to east (top right). The previous three fights took part on the eastern end of Horseshoe Ridge, at top right, and with the Platoon assaulting the west end of the ridge, at center. The Platoon linked up with the Company CP off camera to bottom center several miles, then came back and finally took the ridge. The Marines, as per their orders (and due to the uncertain disposition of the enemy) are occupying the ridge in its entirety, in a 360 degree perimeter, though it is not a continuous line as they don't have enough troops. The Japanese will be attacking from all points of the compass. The table is, once again, 6' x 4's, and my son and I are playing co-op as the Marines against the Japanese in 15mm, using Ivan Sorensen's rules, "No End In Sight."

The opposing forces, with US on the right and (potential) Japanese on the left. Finally got the Type 95 tank in the picture. The US force is all from Eureka Minis, while the Japanese are Eureka except for the tank and the three Type 92 Machine Gun teams, which are from Peter Pig.
The US Marine platoon, a provisional unit of non-infantry types thrown into an infantry role and now finding themselves in combat. After four fights with moderate casualties, the Platoon has been brought back up to strength by feeding in replacements from two other beat up platoons. So, Captain Moon and Sgt Carlson are back up to three eight-man squads, each led by a Corporal, an M1917 water-cooled machine gun team, a mortar team, and a sniper (sharpshooter is a better descriptor, I suppose).
The Japanese will be placed on 'blinds', so I don't usually have any idea what's going to show up. But this time, every single troop and piece of gear shown above will be in the fight; the Japanese are going all out to re-take Horseshoe Ridge. They have available: four 9-man rifle squads (each has an LMG and a knee mortar), three 7.7mm Type 92 machine gun teams, a 70mm howitzer, two snipers, two officers (complete with Samurai swords), and a Type 95 tank.
Well, as we're nearing the end, this fight will be a bit different. What we're witnessing is an all-out attack on the Marines atop Horseshoe Ridge. Every single Japanese troop and piece of gear shown above will be on the table, and, should they lose a lot of folks, they will even receive reinforcements by reconstituting destroyed Japanese units.
I'll put the Marines into their defensive positions on the ridge, then place the Japanese blinds 360 degrees around the ridge, then flip them over and place all the Japanese troops. Then the fight will begin, with command activation immediately beginning on cards.

Overview of the table, with all forces placed on the table. The Marines are on the ridge at center, and everything on the perimeter of the table is Japanese. The Marine position is simple: 1st Squad is at the west end of the ridge (center left, fanned out just below the clump of trees at center). 2nd Squad is in the center, facing north (top), sitting between the two clumps of trees. They have the 60mm mortar team sited in right behind them. The Command Post (Capt Moon, Sgt Carlson, and the sniper) are just to their right (just left of the third clump of trees, at center right top). 3rd Squad is on the east end of the ridge, just on the other side of the clump of trees from the CP, facing east (right). Lastly, the MG team is is just right of 3rd Squad, on the finger jutting out to the south (center top right).
In the west, the blinds have been cooperative with the Japanese, allowing them to mass a significant force, with support. They have three rifle squads (bottom left, far left, and just to the right of the village at top left), their 70mm Howitzer (top left), and a sniper (on the left side of the tree clump at top center). They are supported at bottom center and far right, by two MG teams, a Lieutenant, and another sniper.
They also have a decently powerful supplementary attack force on the top right (northeast) corner of the table (top center right), where they have a rifle squad, an officer, an MG team, and a Type 95 tank!
If you haven't figure it out yet, the Japanese are serious about taking Horseshoe Ridge ;)
The Marines either need to hold the ridge, or escape the ridge.
A close up of the ridge: 1st Squad at bottom left, 2nd Squad and the mortar team at top center, the CP just to their right, 3rd Squad at top right, and the MG team to their right.
Looking north to south at 2nd Squad (bottom), the mortar team (center), and the CP (left). 3rd Squad is off camera to left, 1st Squad off camera to right.
Looking southwest to northeast: the MG team (bottom center, with 3rd Squad at right, the CP at center bottom, 2nd Squad and the mortar team above them, and 1st Squad at top left.
In the south, the Japanese are set up to support the assault in the west: two MG teams, an officer, and a sniper. The sniper is barely visible at top right. The Japanese 1st MG team is up there, then 2nd MG team is at bottom, with the officer.
The with 2nd Japanese MG team at top right, the Japanese 1st Squad is lined up in the southwest (bottom left, eyeing 1st Squad at top center).
Looking west to east, with the Japanese 1st Squad off camera to right, we see the Japanese 2nd Rifle Squad (bottom right), the 70mm Howitzer (bottom left), and the Japanese 3rd Rifle Squad (top left).
I still can't believe how fortunate the Japanese were coming off the blinds; they're really loaded up in the west and northeast, as opposed to being spread all over the place, as I was hoping...
From behind the Japanese field piece (bottom center), looking at targets atop Horseshoe Ridge: 1st Squad at top center, 2nd Squad at top left.
The Japanese force in the northeast: an officer, a tank, an MG team, and a rifle squad.
Another look at the Japanese northeast force (bottom), with 3rd Squad at top left (the US MG team is off camera to their left), and 2nd Squad at top right.
The southeast. There is a single Japanese soldier, a sniper (far left) here. The US MG team is above him on the ridge (center top, with the CP above them and 3rd Squad right of them). As luck would have it, there is really no one for the MG team to engage; but, being clever as I am, the MG team is sited so that it can actually turn around and face Japanese coming from the west (top left). This will be key later in the fight.
I was going to write about the Japanese plan of attack, but it's pretty self explanatory given their deployment. Time to fight!
It's Christmas night, about an hour from midnight. The Marines are in their holes atop Horseshoe Ridge, at 50% (half watching, half sleeping), though finding it hard to sleep owing to the fierce growling in their bellies. Christmas supper wasn't much of an occasion: the Platoon was running out of food, and although some local Filipinos bravely and compassionately ventured up the ridge to bring some food and drink, it was nowhere near enough to fill the bellies of thirty-three hungry Marines.
At about 2230, the sleeping Marines were roused from their slumber by the sound of vehicle engines to the northeast. Squad leaders quickly worked up and down their lines to make sure everyone was awake and alert: "I think this is it, fellas." Eyes strained to identify threats in the darkness, and the mortar team stood by to fire illumination rounds at the first sign of contact. Soon the Marines began to hear the shuffle and clank of men picking their way forward in the darkness, and it was close. Suddenly the still night air was shattered...
In the west, by the crack of the Japanese 70mm Howitzer (bottom left) firing on 1st Squad (top right).
The round missed, but was close enough to pin Pvt Glanville (top center). Cpl Grimsley, 1st Squad's leader, spotted the enemy and shouted "Japs!!!" 1st Squad unpins Glanville, then opens fire on the Japanese 2nd Squad (bottom left), killing one soldier and pinning two more.
After hitting the Japanese 2nd Squad (bottom left), Cpl Grimsley had 1st Squad (top) shift fire to their left and open up on the Japanese 1st Squad (bottom right), killing two and pinning one! Buy from off camera to right...
The Japanese MG Team 2 (bottom right) opened fire from 1st Squad's (top left) flank, pinning three Marines.
The 60mm mortar team (just off camera at top right) begins popping flares, illuminating the area around Horseshoe Ridge.
The US sniper, PFC Bussey (top left, next to Capt Moon and Sgt Carlson) spots the Japanese 2nd MG team (bottom right) and opens fire, killing one and pinning one.
In the southwest, the Japanese 1st Squad rallies its men and fans out, but Marine fire kills another of its men, and so it can't really get going up the ridge.
To their left, pretty much the same thing happens for the Japanese 2nd Squad, though it suffers a pin rather than kill, from Marine reaction fire.
Wow, I've really been lucky so far, the Japanese have had absolutely horrible activation rolls with their howitzer, MG team, and two rifle squads.
In the Marine center, Cpl Dishman and 2nd Squad (top right) spot the Japanese 3rd Squad (bottom left) and open fire, killing two men!
Back in the south, it's all the Japanese Lieutenant can do to unpin the gunner of MG Team 2.
On the opposite side of the ridge, the second Japanese sniper (in the north, bottom left, with the Japanese 3rd Squad at bottom right) opens fire on 2nd Squad, pinning Pvt Dixon (top left).
Looking north to south on the western end of the table, the Japanese 3rd Squad (bottom right, with their 2nd at far right and their 1st at top center right), opens fire on 1st Squad (top left), hitting Pvt Brooks.
Then the Japanese squad leader double times his squad up the damn ridge, getting almost on top of 1st Squad (top right). Marine fire (from 1st Squad and 2nd Squad, at top left) only managed to pin a single enemy soldier.
With Japanese 3rd Squad charging up the hill at bottom left, practically on top of 1st Squad (bottom center), the Japanese MG Team 1 (top right) fire clip after clip from its Type 92 MG into 1st Squad...
Pvt Highsmith (center bottom), Pvt Ryan, and Pvt Esiason (both at bottom right) are all hit by the fire from behind, while PFC Givins is pinned and forced to fall back (top right).
Capt Moon (top center left) hollers at Cpl Duncan's mortar team (top left): "Get that damned machine gun!!!" Cpl Duncan gets the tube on line and fires five rounds at the Japanese MG Team 1 (far right, with MG Team 2 at bottom right and US 1st Squad beat up at bottom left).
Out on the southern finger, Cpl Brown makes an observation to his fellow machine gunners (bottom center, with 3rd Squad at bottom right): "Boys, I don't believe we got us any Japs out front of us." He orders the gun to turn around and face west (top). They not only do that, but they get the gun set up and into action, taking the Japanese 1st Squad (top left, with the US 1st Squad at top center) under fire, pinning three Japanese.
The Japanese southern sniper (bottom center left, with Japanese MG Team 1 at bottom left) opens fire on the Cpl Brown's MG team (center top right), but misses twice!
My luck is holding...
"More Japs!" screams Cpl Kelly, 3rd Squad's (bottom left) leader, in the east. "And they've got a @#$%ing tank!!!" His men open fire down the northern slope, killing two Japanese and pinning one.
My fire dice have been pretty good, too.
But the Japanese MG Team 3 (bottom center) immediately returns fire, pinning three Marines.
The Captain turns to his Platoon Sergeant: "Dammit, Cody, we're getting hit hard at both ends. You move to the west and help out 1st Squad, I'll head over here and help 3rd."
Capt Moon dashes over to 3rd Squad (center left, from far right), rallying three Marines.
And then ordering 3rd Squad (top right) to fire on the Japanese 4th Squad (bottom left) again, pinning two more Japanese.
But then the stubby little Japanese tank gets moving up the ridge, spraying machine gun fire. Halfway up it halts, then fires it's 37mm main gun into 3rd Squad's position. PFC Pinkett and Pvt Harris are hit, and four Marines are pinned, including the Captain!!!
With their tank pounding 3rd Squad (top left; this photo is looking west to east), the Japanese officer in the north (bottom right) rallies the men of the Japanese 4th Squad, then order them to fire on 2nd Squad (top center left), hitting Pvt Fulcher and pinning three other Marines!
Dammit, this means the Japanese 4th Squad can move up the ridge unmolested by Marine fire, as all the Marines with LOS are either hit or pinned.
With their MG (bottom left) and tank (center) still hammering away, the Japanese officer leads his 4th Squad up the ridge (center) at 3rd Squad (top center, with 2nd Squad at far right), and they make it almost into 3rd Squad's positions.
Sgt Carlson, ordered west to help 1st Squad, is in an impossible situation: things are falling apart at both ends of the line! He quickly weighs his options: if I go west, I may be able to help 1st Squad, but then 3rd Squad and the Captain may be overrun. If I go east, I can for sure help out the Captain and 3rd Squad, but 1st Squad might gets snowed under. But I gotta help the Skipper, and we gott a do something about that damn Japanese tank; if it gets up here it can roll straight across the ridge, hitting our boys from behind.
So the choice was easy: Sgt Carlson sprints to the 3rd Squad position (bottom center) and gets to work. He helps the Captain and rallies two other Marines, and checks on Pvt Harris: he's badly wounded and (should the platoon survive) will need to be evacuated.
Thus starts a long string of very bad casualty rolls for the Marines...
Sgt Carlson, busy checking and rallying, hears a series of screams coming from just below the crest; 'dammit, I've heard that before,' he thinks to himself. He screams out a warning: "HERE THEY COME!!!"
BANZAII!!!! The Japanese officer leads their 4th Squad (right) up the northeast side of the ridge, looking to close the distance to 3rd Squad. Thank goodness Sgt Carlson came over and got several of the pinned Marines back in the fight! The Marines open up with defensive fire at point blank range!
Two Japanese fall and another is pinned, but then the two sides clash in melee, and the Marines come out on top! The Japanese squad is eliminated to a man, though the cost to the Marines is heavy: Sgt Carlson, Cpl Kelly, and Privates Lathon, Buck, and Krumrie all go down in the hand-to-hand fighting!
In the south, the US mortars impact all around Japanese MG Team 1, pinning one man.
Well, that sucks. The mortars aren't accurately reflected, as I thought it would look funny. Two of the mortar rounds, by my deviation/distance rolls, actually landed right on top of the Japanese. But my firepower rolls were horrendous, getting only one pin out of eight dice!!! And that was using 1-2 pin, 6 kill!!! So, rather than show two rounds landing right on top of the Japanese, but only one man wounded, I backed off some of the mortar impacts to make it look a bit more reasonable. This would become a theme of the game, my mortar fire, which I was relying on so heavily, pretty much being a complete let down...
All that, and it's just the end of Turn 1!
Turn 2 begins back in the west, with the Japanese 2nd Squad (bottom, with their 3rd Squad most of the way up the ridge at left) rallying itself and opening fire on 1st Squad (top), and the fire is devastating.
The Squad leader, Cpl Grimsley, is hit, as is Pvt woods, while Pvt Glanville is pinned and driven back to PFC Givins (top right, from bottom, where the rest of 1st Squad is, and the Japanese 3rd Squad coming up at far left). The situation in the west is desperate: the only Marines of 1st Squad that are not hit (Givins and Glanville) are pinned. 1st Squad's casualties are lying there bleeding in their holes, ripe to be rolled up by the Japanse, who have two MGs, a field gun, a sniper, and three rifle squads levied against them.
I really don't see how I can get to those casualties, even if I had moved the Platoon Sergeant this direction. I am now seriously doubting my ability to hold the ridge, and I'm starting to look for an escape route. I'm happy I've already got my mortar and sniper working over the Japanese machine gun teams in the south, as that seems to be the way to go. There's no way we can get off to the west (severely outnumbered), the north (pinched between two enemy forces), or the east (chased down by the enemy tank), so the south it is. Unfortunately, my sniper and mortar fire was less effective then I'd have liked, managing only to pin the two enemy MG teams. Better luck in firing this turn may see the Marines beginning to make their bread.
In the Marine center, PFC Bussey (top left), the sniper, again fires on the Japanese MG Team 2 (bottom right). This time he knocks off their Lieutenant and pins the two remaining gun crew members. Good, but I need more than that, Bussey!
Back on the west end, the Japanese 3rd Squad activates (left). They rally and begin moving up the ridge; fierce Marine fire from 2nd Squad (off camera to top left) sees the enemy suffer a number of pins and one man killed, but the Japanese squad leader is able to keep them moving, albeit in fits and starts. Ultimately, the Japanese 3rd Squad invests the northern side of the west end of Horseshoe Ridge. Givins and Glanville (top right) look on in horror as the Japanese reach their buddies, Cpl Grimsley, Brooks, and Woods, and finish them off (left side of the trail). Highsmith, Ryan, and Esiason are lying wounded on the right side of the trail (bottom right).
On the west end of Horseshoe Ridge, the Japanese Lieutenant and 4th Squad have just banzai charged their way to oblivion against 3rd Squad (top left). But the Japanese MG Team 3 (bottom right) keeps up the fight, pouring fire into 2nd Squad (top right)
Pvt Billups (far left) is hit, while Cpl Dishman and Pvt McNair are pinned and driven back (two yellow beads at center top) next to the mortar team.
Back with 3rd Squad, Captain Moon sets about cleaning up the mess: he rallies the few remaining members of the squad, then sets them to checking on the wounded, and it's not good.
Sgt Carlson is okay, walking wounded, but Cpl Kelly and Pvt Buck are dead, while Pinkett, Lathon, and Krumrie are all hit bad enough they require evacuation.
I told you my casualty rolls were terrible this game. And yeah, I cheated a little bit: I didn't roll 'man for man' to check the casualties. I had six casualties, so I rolled six dice, and gave Sgt Carlson the best result (the only result that allowed any of the Marines to stay in the fight).
The survivors get to work: with the Japanese MG Team 3 (top right) hammering 2nd Squad (just visible at top left), the Captain gets 3rd Squad to fire on the Japanese machine gun, killing one man.
But as 3rd Squad (top right) is firing on the Japanese MG (bottom left), the Type 95 tank waddles forward and sticks its snout right into the squad (right center).
The Japanese tank lurches to halt and fires its main gun, but it goes long and only pins Pvt George.
Back in the south, the Japanese MG Team 2, under the eye of the US sniper, only manages to rally (bottom right, with MG Team 1 being pounded by the US mortars at top right, and the southern sniper above them).
Back in the west, Sgt Carlson and Pvt Skow charge the Japanese tank. The tank's machine gun rattles...
Skow is pinned (left), but Sgt Carlson reaches the tank and climbs on the back deck. He fishes a grenade off his web gear and pulls the pin, but he can'[t get the damn hatch open!!!
In the center, Cpl Dishman unpins himself and two others, and starts ordering men to check on the casualties. Again it's not good: Pvt Billups is dead, and Pvt Fulcher is badly wounded, needs to be evacuated.
That's a lot of 5s (evac) and 6s (KIA)...
2nd Squad (top right) also trades fire with the Japanese northern sniper (bottom left), to no effect.
Cpl Dishman, still under sniper fire (off camera to bottom left), stands up and orders his men (bottom right) to fire on the Japanese MG Team 3 (top left), and they put the gun out of action!
2nd Squad (top center/right, with the 60mm mortar behind them) continue firing on the Japanese northern sniper (bottom left).
They pin him (bottom left), but he unpins and returns fire, to no effect.
Simultaneously, in the south, the US MG team (bottom right) turns the gun on the Japanese southern sniper, mowing him down.
See, trying to clear the escape route. I need the mortar team and our sniper to take out the two enemy MGs in the south.
The MG decides to help out: they fire on the the Japanese MG Team 2 (top left).
The kill the gunner and force the assistant to fall back (bottom left, from explosion at top center).
And then they finish up by raking the Japanese 1st Squad (top left), killing one and pinning one! Quite a round of fire! You can see the wounded from 1st Squad still on the west end of the ridge (top center), and 1st Squad's survivors, Givins and Glanville, at center top right, as the Japanese 3rd Squad peaks around the left side of the trees at top right. PFC Bussey, the US sniper, is at far right.
The sole survivor of the Japanese MG Team 2 rallies, but can't get his legs to work to get back to the gun.
In the west, Givins and Glanville (top right) fire on the Japanese 3rd Squad (center and left), hoping to drive them back and get back on the western spur to save their wounded buddies (bottom right). But they only manage to kill one Japanese soldier before running out of steam...
Things are no better in the east: Pvt Skow (center) unpins...
Then dodges more machine gun fire to join Sgt Carlson on the Japanese tank, but they still can't get the hatch open!
Big decision: I'm not sure if it's true or not, but I'm starting to feel like, despite how bad my troops are beat up, that I might actually hold the ridge. If that's true, then my mortar's priority target should be the Japanese howitzer. But I still have this sneaking suspicion that I may need an escape route. So I decide to keep the mortar team (bottom left) firing on the Japanese MG Team 1 (top right), to clear the escape route. The mortar team fires three more rounds.
With rounds in the air, the Japanese MG Team 1 (top right) unpins and fires on 1st Squad's survivors, Givins and Glanville (bottom left).
Both Marines are pinned and forced to fall back (left, from explosion at top right).
But this movement takes Givins and Glanville (top left) into the guns of the Japanese 3rd Squad (bottom right), who immediately spot the cowering Americans and open fire!
Givins is shot (bottom right), and Glanville is again forced to fall back (yellow bead at center, next to 2nd Squad and the mortar team).
And then things get really ugly...
With friendly forces kind of stalled out, but more or less in possession of the western end of Horseshoe Ridge (off camera to top right), the Japanese Howitzer (bottom left) goes to work in direct fire, putting three 70mm high explosive rounds into 2nd Squad's positions (top center).
Pvt Dixon is hit and McNair and McNair and Wilcots are pinned (bottom center).
While Glanville is driven back again (top left, from far right).
Back down-slope in the west, with the Japanese 2nd Squad at far left, the Japanese howitzer hammering away at top left, and the Japanese 3rd Squad atop the ridge at top center, the Japanese 1st Squad (bottom left) rallies itself and begins moving forward, but doesn't get far due to US MG fire (off camera to far right).
Again US mortar rounds impact all around the Japanese MG Team 1, and again they manage only to pin one man!!!
Again the mortar distance/deviation rolls put rounds right on top of the damn enemy gun, and again my firepower rolls sucked ass!!! That really, really, really sucks!!! It was a big deal: you see what that damn Japanese howitzer did to 1st Squad and is doing to 2nd Squad; the mortar should be firing there. But I left it on the enemy MG team for a second round of firing, a total of 8 60mm rounds, and I still haven't even dropped a single man, much less knocked the gun out!
Thus ends Turn 2.
In the east, the Japanese tank fires its machine gun, pinning Captain Moon and Pvt George.
Then it shimmies and shakes off Sgt Carlson and Pvt Skow (far left) and begins moving right, hoping to reach some friendly faces. But all of a sudden it finds itself in the midst of a bunch of men on foot; the tank slows to see what's going on, right between the US sniper (just above the tank) and the US mortar team (and Glanville, who's pinned. 2nd Squad can be seen at bottom left).
The sniper, PFC Bussey, dashes towards the tank, drawing enemy fire...
But he reaches the back deck! He grabs a frag, pulls the pin...
Then shoves it through the hatch and dives off! Several seconds later there is a muffled explosion and the enemy tank lurches to a halt, smoke billowing from every crack and crevice!
PFC Bussey (top left) is feeling so saucy, he even fires a round at the Japanese MG Team 1 (bottom right), pinning a man.
But that damn Japanese field piece (bottom left) goes to work again, pounding 2nd Squad with more 70mm HE rounds.
Pvt Wilcots is hit (bottom center, next to Fulcher) and McNair is driven back, next to Glanville and the mortar team, which gets two of its men, Seals and White, pinned.
The Japanese howitzer then shifts fire left, landing a shell near Cpl Dishman (yellow bead at left), pinning him.
Cpl Dishman (bottom right) immediately gets to work: he rallies himself and McNair (top left), then orders McNeil and Allen to move left, out of the line of fire (far left). Cpl Dishman move right...
To check on his wounded: Pvt Wilcots is dead, and Dixon is severely wounded, needs to be evacuated.
Cpl Dishman then drags Dixon out of the line of fire (top center, from bottom right).
Cpl Dishman regroups his men (center bottom) on the east side of the palm grove, out of the enemy howitzer's fire.
In the south, with the west end of Horseshoe Ridge (off camera to left) in Japanese hands, the Japanese MG Team 1 has no target. They rally, then begin moving up (left, from right), dodging fire from PFC Bussey (US sniper, off camera to top left).
With Bussey lying in the grass just above the burning tank, Pvt Glanville (bottom left) opens fire on the Japanese MG Team 1 (top right), but he misses.
The US MG team (bottom center, with Bussey at top right) fires on the the Japanese MG Team 1 (far left).
One Japanese gunner is killed at far left, while his partner is pinned and driven back to far right.
Cpl Brown then turns the US machine gun on the Japanese 3rd Squad (top center), atop the west end of the ridge, dropping one enemy soldier.
A little further west (Japanese MG Team 1 is off camera to top right), the last crew member of Japanese MG Team 2 creeps forward (center), trying to get back to the gun and get it into action. But the US sniper, PFC Bussey (off camera to top) spots him, fires, and drops him!
Sgt Carlson (pointing guy at center left) sprints west down the road, arriving at the mortar team and rallying Seals and White.
Time to change targets: with Japanese MG Team 2 out and Japanese MG Team 1 down to one man (both off camera to left), Sgt Carlson orders Cpl Duncan (bottom left) to reorient to the northwest and fire on the Japanese howitzer (top right). Cpl Duncan's team gets two rounds off.
Cpl Dishman's 2nd Squad is sheltering from the Japanese piece behind the trees at bottom center, just off camera to bottom, and you can see the Japanese 3rd Squad (and one US casualty) just right of the trees at top left, and their 2nd Squad at top center.
With the US mortar team pumping rounds at top left, the Japanese 3rd Squad begins creeping up the north side of the clump of trees at the west end of Horseshoe Ridge (center).
Cpl Duncan's mortar team (top right) pops two more 60mm rounds out at the Japanese howitzer (bottom left), the rounds passing over the Japanese 3rd Squad (far right). I've been pretty lucky that the Japanese 2nd Squad (bottom right) and 1st Squad (off camera to bottom far right) have barely gotten off their starting positions.
Back in the east, Pvt George (left, next to the Captain, who's still pinned (yellow bead) rallies, but that's all the remains of 3rd Squad (George and Skow, bottom center) can manage.
In the west, the Japanese 2nd Squad moves forward very sluggishly, finally making it to the base of the ridge (bottom center, with their 3rd Squad at top center).
As the Japanese 2nd Squad is struggling its way forward at left, the Japanese 3rd Squad similarly struggles its way up the ridge (center and bottom center). But its struggles have a simple explanation: the US MG team (off camera to right) continues to hammer away at it, pinning one man and knocking another out of the fight.
In the north, the remaining Japanese sniper dashes left (top left, from bottom right).
The Japanese sniper (bottom center) then takes up position and fires on Pvt Skow of 3rd Squad (top left, with 2nd Squad at top center), pinning him.
Captain Moon sees the problem in the north (top right), but figures Skow and George can handle it themselves, he's got more pressing issues. The Skipper dashes left to Cpl Brown's MG team (bottom left).
He has them (bottom right) continue to fire on the Japanese 1st Squad (top left), but they only manage to pin one soldier.
The US mortars land all around the Japanese howitzer, dropping one of the three crew members. Well, at least the mortar finally whacked someone. Only took thirteen rounds...
And that's the end of Turn 3.
In the center, Glanville moves west (center, from top left) trying to get to his wounded buddy, Givins (white bead at right), but there's a problem: "Japs!!!" Glanville spots the Japanese 3rd Squad (bottom right), heretofore hidden by the trees, who spot him at the same time and open fire, hitting him!
The Japanese, now discovered, rush forward, where they finish off Givins (casualty figure at bottom right).
The Japanese continue to push forward (right, not yet close enough for a Banzai charge), but Marine react fire from Sgt Carlson and the mortar team (top left) drops two of them, leaving only three (the guy at center is Glanville).
The Japanese and Marines exchange more fire: another Japanese soldier goes down, and Pvt Seals (of the mortar team) is hit.
Hearing the commotion, Cpl Dishman leads 2nd Squad through the trees (center, from off camera to top left, with Sgt Carlson and the mortar team at top right), though Japanese fire pins PFC McNeil.
2nd Squad (top left) fires on the last two Japanese (right), pinning them.
With the Japanese pinned (left), PFC Bussey (bottom right) scurries over and fires twice, dropping both enemy soldiers!
Bussey then sprints through enemy gunfire to check on the wounded Glanville.
He's hit pretty bad, going to need to be evacuated. Behind them, Sgt Carlson checks on the mortar team's Pvt Seals, and he's okay, just walking wounded.
Suddenly, the sounds of engine noises are heard again...
This time in the west! A Japanese tank is moving up the west end of the ridge, leading a whole platoon of infantry, and it sounds like more tanks are coming up behind it!!!
At this point we've pretty much fought ourselves to a stalemate, with the Marines holding the east end of Horseshoe Ridge and the Japanese holding the west side. And if the fighting to a draw is not bad enough, the Marines find themselves holding the wrong end of the ridge, cut-off from the rest of the company about a half-mile away to the west. So I decide to move into campaign narrative mode, ergo the Japanese reinforcements.
The Captain sees the writing on the wall: he has the MG team (bottom left) hammering the west end of the ridge (top), and orders the Platoon to form up on the east end of Horseshoe Ridge, do a quick headcount to make sure they've got as many of their Marines and as much of their gear as possible (he knows they'll be forced to leave some casualties behind), and get the heck outta Dodge.
With the MG still firing at top left, the rest of the platoon falls back, and it's ugly. The HQ section (Captain, Platoon Sergeant, and sniper) are still together, as are the MG and mortar teams (they've got one walking wounded), but 1st Squad is totally out of able-bodied men, while 2nd Squad has only four and 3rd Squad only two! Casualties-wise, they manage to drag back seven badly wounded men and the bodies of five of their dead comrades.
Captain Moon (bottom center) to Sgt Carlson (bottom left): "Alright Cody, we gotta move. Get some security up front, then one man per wounded, and I'll bring up the rear with the machine gunners. Leave the dead."
"What!!?? Sir, we can't!"
"Calm down, Cody, get a hold of yourself, man! I understand exactly what you're getting at, but look around! We barely have enough men to carry the wounded, there's no way we can carry our dead out, and there's no time to bury them."
"And what about 1st Squad!? We still have wounded layin' out there in the grass!"
"@#$%dammit, I know that! And what exactly do you propose I do? The Japs are going to get them and there's nothing I can do about it! But we can keep the Japs from getting the rest of our Marines, if we move now, so let's go."
Sgt Carlson dropped his head, tears in his eyes. He wiped them, then got back to his feet. "Aye-aye, Sir," and he dashed right.
Sgt Carlson organized the remaining men and gave them their orders.
And they began descending the eastern slope, down from Horseshoe Ridge, in order to live to fight another day.
While back on the west end of the ridge, the advancing Japanese move up, capturing the wounded Privates Highsmith, Ryan, and Esiason.
The fight started at 2245 on Christmas night, it was now about 0230 in the morning on 26 Dec 1941. After almost three hours brutal fighting the Japanese had lost thirty-seven men and a tank, while the Marines suffered eight men killed, three wounded and captured, and seven badly wounded. On the good side of things, recognizing their Marines:
-PFC Bussey was awarded the Navy Cross for his singlehandedly destroying an Imperial Japanese tank, destroying an enemy machine gun nest, ending a Japanese assault with precision marksmanship, then advancing under enemy fire to evacuate a wounded Marine. Bussey also received a battlefield promotion to Corporal.
-Cpl Dishman was awarded the Bronze Star for valor for leadership under fire that saw him rally then move his Marines out of the field of fire of an Imperial Japanese field piece, then moving back into the enemy howitzer's field of fire to check on his wounded Marines, dragging one to safety.
Captain Moon halted the Platoon at about 0330, after about an hour of marching southeast, busting out a map and huddling with Sgt Carlson. "Now what, Sir?" "Cody, now we run. We need to put as much distance between us and the Japanese. And we're cut off, so we need to give ourselves the option of an escape route. We can either move west then northwest, towards Cavite and Manila, or south towards the coast. I figure moving towards Cavite and Manila puts us as having to pass through the whole Jap Army, including the guys from Horseshoe Ridge looking for us. I figure we move south, see if we can link up with other US forces that were by-passed, get some news on the overall situation, then see where we go from there." Sgt Carlson nodded his agreement, and they got the men moving south.
They marched until sunrise, then laid up in a coconut grove, where the bone-tired Marines tried to find something to eat, tend to their wounded, and get some rest. As soon as the sun went down, the Marines continued south. They marched for several more days, finally reaching the village of Pagbilao, in a bay on the southern coast of Luzon, on 30 Dec 1941. The Platoon stayed in cover on the outskirts of town, spying a Japanese patrol. When it finally departed the village to the east, Captain Moon took two Marines and entered Pagbilao. Despite the recent Japanese presence, the villagers were still very pro-American; when Captain Moon explained their situation, the villagers welcomed them in, feeding and caring for their wounded, and hiding the platoon.
The following day, New Year's Eve 1941, a band of four Marines stumbled into the village from the west: it was a Sergeant and three men, of their company! They passed on what they knew: Major Ford was killed and most of the rest of the company was wiped out the same time 1st Platoon lost Horseshoe Ridge. The Sergeant, Sgt Thomas, and three Marines found themselves cut off. They began moving southwest, noting a tremendous amount of Japanese activity to the north, between them and Cavite/Manila. The Marines ran into a motley group of Army and Navy supply personnel, aircraft mechanics, and radar troops under the command of an Army Air Corps Captain, intent on making for Manila. Sgt Thomas and his Marines declined the offer to accompany them north, but the Captain said the war was not going well.
The Army Captain told Sgt Thomas Hong Kong, Singapore, Wake Island, and Guam had all been attacked, and the Allies were getting their butts whooped, and good. And while McArthur had withdrawn the defenses into the Bataan Peninsula to hold out until reinforcements arrived, there were no reinforcements coming, pretty much all the Army Air Corps aircraft in the Philippines had been destroyed, and almost all the Navy ships had already pulled out for the Dutch East Indies.
Captain Moon shared a furtive glance with Sgt Carlson, then turned his gaze back to Sgt Thomas. "Well boys, the way I see it, we've got to get out of here. With no air force, no navy, and no reinforcements, this isn't going to end well, and I'm not spending the rest of this war in a POW camp." Sgt Thomas shared his reason for moving east/southeast: he'd spoken to some Filipinos a few miles west that told him there was a US Navy ship laid up in a cove to the east. The ship had engine problems and couldn't leave with the rest of the Navy, so it had been hiding, nestling up against the shoreline with camouflage netting over it, while the crew worked to repair the engines. "Sir, that's our ride outta here."
"Is that true, Sergeant Thomas?" "Sir, I have no idea, but right now, it's the only decent option." "Here, here, Sergeant, I do believe you're correct." Sgt Thomas and his three Marines joined 1st Platoon, and the following day, New Years, 1942, the Marines began working their way east along the coast, searching for this mythical US Navy vessel. Three days into their trip and they'd spotted Japanese patrols several times, but managed to dodge them and continue on their journey. But a couple days later, on 6 January 1942, the Platoon found itself staring at a swift-moving river. The Platoon halted a few hundred yards west of the bridge: "that's a lot of open area, and it would sure stink getting caught on that bridge. We can't go right; getting caught in the ocean would be even worse than getting caught on the bridge. We'd better go left."
The platoon holed up and sent a group of five men north (left) to scout up that side of the river; they returned several hours later. "Sir, there's two problems: the farther north we go, the more Japs we see. And we went a couple miles, didn't see another bridge or a place to ford. That damn river actually gets deeper and faster!'
Captain Moon turned to Sgt Carlson: "well, Cody, I guess we're crossing here." So the Platoon sat tight until nightfall, then sent a squad forward to clear the area before the main body moved to cross. Which is the next fight.
V/R,
Jack