All,
It's 1530 on 24 December 1941, and 1st Platoon is tasked with taking Horseshoe Ridge, again. The good news is that the platoon has gotten plenty of water and some hot chow, and five of their men have recuperated well enough from their injuries to rejoin the unit. The bad news is they're heading back to Horseshoe Ridge, where twice they've battled the Japanese, taking heavy casualties.
Sgt Carlson: "Horseshoe Ridge again, eh Sir?" "Yes Cody, Horseshoe Ridge. Ours is not to reason why, young man," Capt Moon said with a smile.
"Christmas Eve, eh Sir?" "Aye. It will be all the merrier when we're sitting atop Horseshoe Ridge, manning our machine guns, with visions of sugarplums dancing in our heads," the Captain laughed. "We'd best get to work."
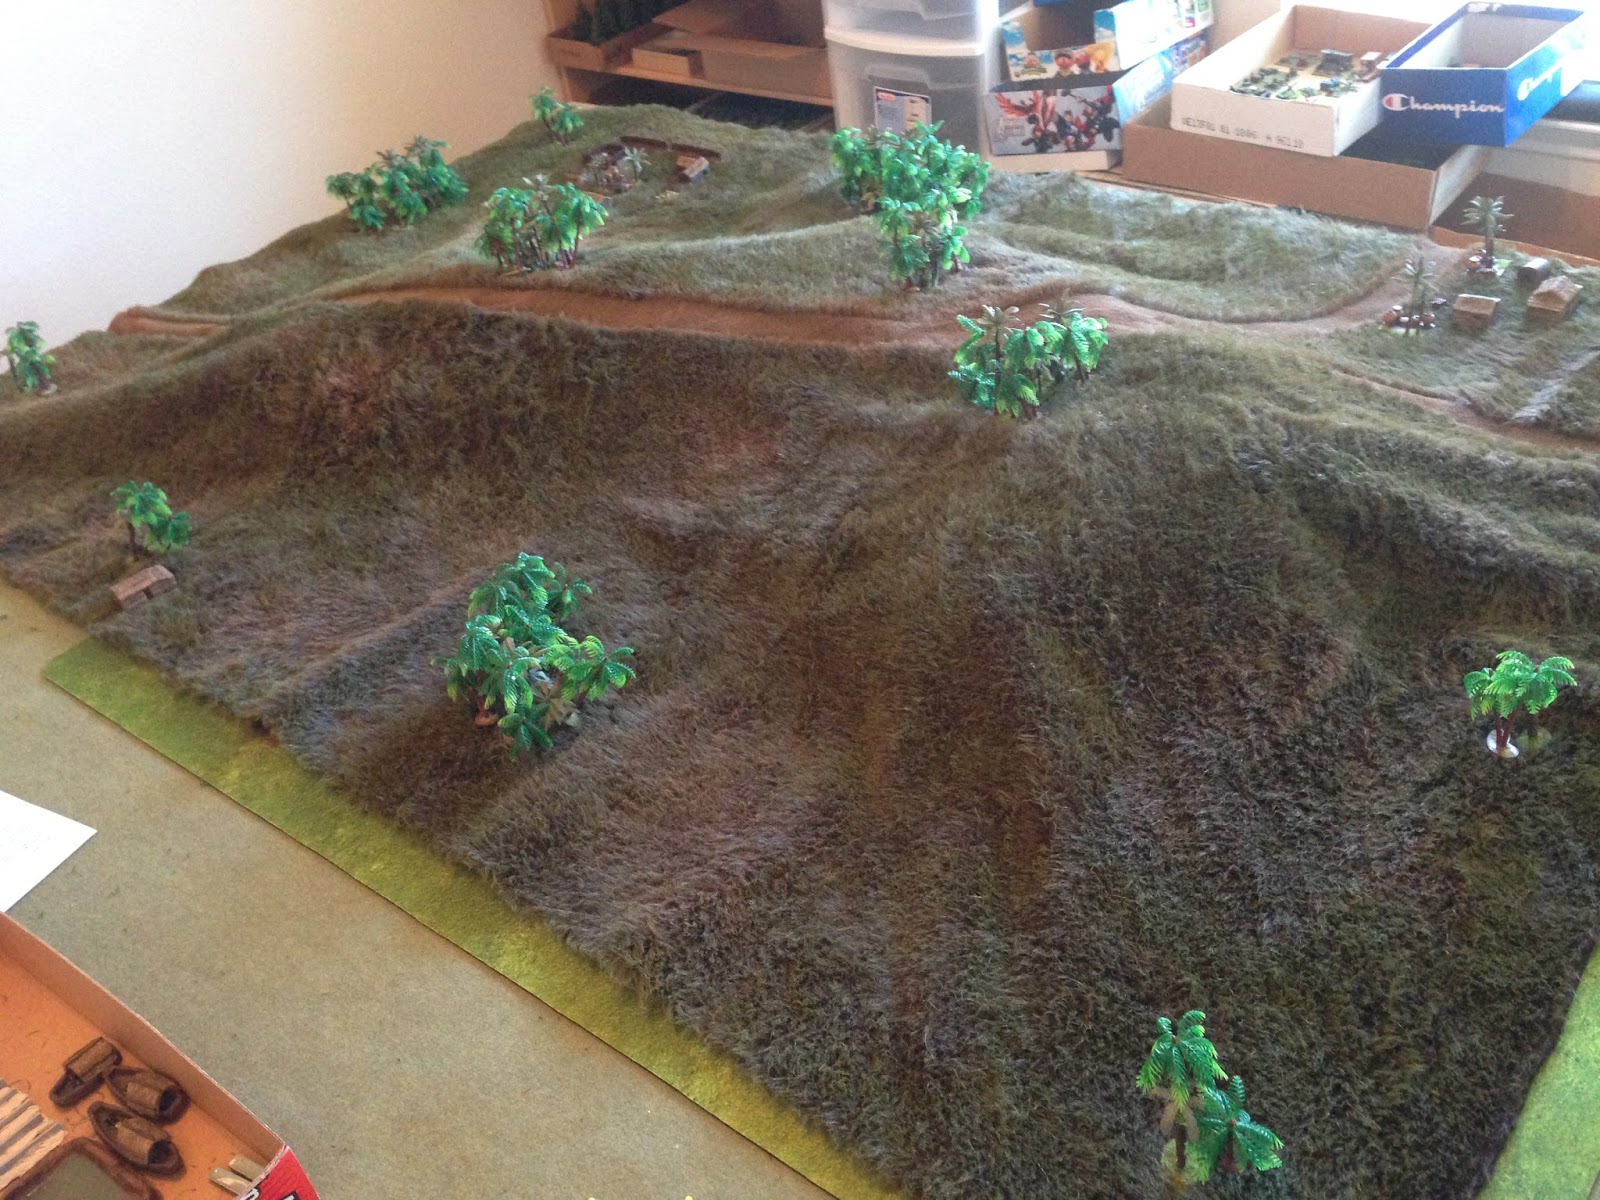
Overview, north is to top left, the entirety of Horseshoe Ridge is displayed, the mass at center, running west (bottom left) to east (top right). The previous two fights took part on the eastern end of Horseshoe Ridge, at top right. The Platoon linked up with the Company CP off camera to bottom center several miles, and now is making a push to take the ridge again. The Marines will enter from the west, the Japanese will be on and around the ridge. The table is, once again, 6' x 4's, and my son and I are playing co-op as the Marines against the Japanese in 15mm, using Ivan Sorensen's rules, "No End In Sight."
The table, looking northwest to southeast.
Looking southeast to northwest.
Looking northeast to southwest.
The hamlet in the northeast.
And the hamlet in the northwest, complete with goat.
The opposing forces, with US on the right and (potential) Japanese on the left. Finally got the Type 95 tank in the picture. The US force is all from Eureka Minis, except for the tank, which is from Zvezda, while the Japanese are Eureka except for the tank and the three Type 92 Machine Gun teams, which are from Peter Pig.
The Marine 1st Platoon, reorganized again: Platoon Commander, Platoon Sergeant, two-man M-1917 water-cooled machine gun team, three-man 60mm mortar team, an M-3 Stuart of the Army National Guard's 194th Tank Battalion, and two seven-man rifle squads. The Company Commander, Major Ford, promised help after he tracked down the rest of the platoons. Guess he hasn't found them yet...
The Japanese will be on 'blinds', so I don't have any idea what's going to show up. But I know what they have available: four 9-man rifle squads (each has an LMG and a knee mortar), three 7.7mm Type 92 machine gun teams, a 70mm howitzer, two snipers, two officers (complete with Samurai swords), and a Type 95 tank. Some, none, any, or all could show up on the table, I have no idea.
The table, north to top left, with all the US troops placed (left) and Japanese blinds on the table (red poker chips, seven total).
The Marine force, from left: Plt Sgt with mortar and MG teams, 1st Squad, the National Guard tank, the Captain, and 2nd Squad. The Plt Sgt will set the mortar and MG teams up on the left to provide supporting fires, while the rest of the platoon push up Horseshoe Ridge. Once atop the ridge, the plan is to come on line, wheel 45 degrees to the left, and push down the length. The machine gun will have to displace forward to support, the mortar will remain in place.
The US left: mortar team at bottom left, Sgt Carlson above them, and the MG team in front of him. To their right is 1st Squad, then the tank.
The US right: the tank is at top left, then Captain Moon is at center, with 1st Squad behind and to his right.
Looking northeast to southwest at the Japanese blinds, Marines visible at top right.
Looking southeast to northwest, Marines at top left. Let the games begin!
We start on the US far left, where the mortar team and the machine gun team both manage to get into position AND get set up, with a little help from Sgt Carlson. He would prove extraordinarily motivational in this afternoon's fight.
With the support element at far left, PFC Grimsley manages to get 1st Squad up the ridge a considerable distance, doing a good job of staying on the correct axis of movement despite the steep slope.
On the right, Cpl Dishman and Captain Moon manage to get 2nd Squad a fair ways up the west end of Horseshoe Ridge.
And it's time to take a look at the first two blinds.
Top left is a dummy, but top right is a Japanese Type 92 heavy machine gun (7.7mm).
The MG pops a few rounds off at 2nd Squad, but they're quite surprised to see Americans this far east, and miss!
Sgt Wyche, the tank commander, finds a spine he believes will carry hit tank up to the top of the ridge and begins picking his way forward, between 1st Squad on his left and 2nd on his right. The Marine MG team is visible at top left.
But we've got more Japanese blinds to deal with.
Sgt Carlson (bottom left, next to MG team, with 1st Squad at right) screams out: "Japs!!!' An enemy rifle squad and officer appear out of the clump of trees at top left.
The squeeze a few rounds off at 1st Squad, but hit nothing.
Looking west to east from behind 2nd Squad, we've got three more blinds to deal with. The one at right is a dummy, but the one on the finger, jutting out south from the ridge (top center)...
Looks like something's up there (top left).
The Japanese 70mm howitzer. However, it's facing east, and will take a minute to get turned around and faced at the Marines.
So far, with 1st Squad at bottom right, we've got a Japanese officer leading a squad at bottom center, an MG at top right, and a howitzer at top center left. Still need to deal with the blind in the hamlet at far left top.
Which is a second Japanese rifle squad. Well, all blinds are off the table and all troops are on, time to get down to business.
In the southeast, the Japanese MG team (bottom right) puts quite a few rounds in 2nd Squad's direction (top left), but no effect as the Marines are doing an excellent job of staying behind the cover of a spine running down one of the fingers.
Apparently the Japanese are really juicing for a fight: the howitzer crew practically picks the field piece up and turns it around, facing the Americans.
And not just turned it around, but they crank out two HE shells at 2nd Squad! Very impressive leadership from their gun captain!
But while it's no fun having a howitzer firing at you, the real storm brewing is in the northwest, where a Japanese Lieutenant and rifle squad popped up, almost in the Marines' lap. The Japanese Lieutenant screams "Fire!!!" His squad cuts loose at point blank range on 1st Squad, but manage only to pin a single Marine.
Terrible shooting, but you know what time it is...
BANZAI!!! The Japanese squad breaks cover, looking to close with 1st Squad (bottom right).
But the Japanese Lieutenant's (center top) fanaticism is matched only by his own impatience: he should have kept firing to pin more of the Marines of 1st Squad (right), and given some serious consideration to the fact the Marines had a heavy machine gun nearby (bottom left), now with perfect enfilading fire.
Okay, so for all youse guys thinkin' I cheated, eh-eh. First, I rolled dice to see what the Japanese were going to do: charge, fire and charge, sit tight and fire, fire and fall back were the options. They got 'fire and charge.' Then I rolled to see who they would charge, 1st Squad or the MG team, and they got 1st Squad. Then they shot, but rolled terribly and managed ZERO hits and only one pin; this, combined with the enfilading fire from the MG team, meant the Marines' defensive fire was going to be punishing.
And it was: the Marines of 1st Squad stand their ground as the Japanese Lieutenant leads what's left of his squad forward. Marine defensive fire cut down six of the ten Japanese soldiers, and pinned two more! Brutal hand-to hand fighting breaks out!
The Japanese are eliminated to a man, while the Marines have two men go down: Privates Glanville and Lathon.
As much as that turn of events did not favor the Japanese, I'm still surprised at how light I got off, particularly given how traumatized I've been by Banzai charges in the past three games... And I'm about to get off even lighter!

In the northeast, the Japanese rifle squad in the hamlet has heard all sort of commotion and gunfire, but can't see anything. They know there is a friendly squad in the west (top right; they don't know the squad just Banzai'ed itself to death), but are not sure what to do. They know they're not gonna just sit tight and wait for the Americans; the options are to move west and reinforce the friendly squad, or move up the ridge, then move west. In the end, the Japanese squad leader doesn't like the idea of potential fratricide or having his fire masked if he moves straight west, and the last thing he wants is for Americans to be above him, shooting down on his squad like fish in a barrel. So he orders his men up the hill, but they don't get far as the slope is particularly steep on this side.
Back on the US right, the two Japanese howitzer shells fall. One is waaaay long (bottom left), but the other hits at the end of the line, pinning Pvt Wortham (yellow bead).
On the US left, PFC Grimsley shakes the cobwebs out, still surprised he's alive after dealing with the Japanese Banzai charge. He quickly unpins three Marines, then has them check the two wounded men.
Incredibly, Pvts Glanville and Lathon are both good to go, back in the fight! (I rolled boxcars!) PFC Grimsley gets them moving up the ridge, but he's screwing it up, pinching too far in too soon (they're moving too much to top right, should be more to top center; yes, sometimes I even roll to see what my guys are doing, how the squad leaders interpreted 'my' orders).
Then a feat that will go down in the annals of wargaming history.
Now, the MG team has two leaders for all intents and purposes right now, PFC Brown and the Platoon Sergeant, Sgt Carlson. Anyway, Sgt Carlson looks at the MG team: "wow, that was intense boys, but he gunned them Japs down, didn't we?" "Yeah Sarge, we sure got'em!" "I guess we should move up, support 1st Squad.
So Sgt Carlson, PFC Brown, and Pvt Mathews pack up the M-1917 water-cooled machine gun (from bottom left), throw the components over their shoulders, and begin double-timing up the ridge (center) to catch up with 1st Squad (right). But, moving so quickly in the tall grass and straining under the load, they weren't paying much attention...
Sgt Carlson looked up, struggling under the weight of the tripod and extra ammo; "Halt! Halt, we've gone too far!" Sgt Carlson, Brown, and Mathews looked around; "Sarge, we (center) passed 1st Squad (bottom left)." "Yeah, we did. Shut up and get the gun set up."
They moved from the far edge of the map all the way to the top of the ridge, AND managed to get the gun set up, ready to fire. Very impressive leadership; expect no less from Marines.
It was at that point that Sgt Carlson (bottom left) realized they may have gone a bit too far, a bit too fast; "boys, I think that's a Jap howitzer (top center)."
On the Marine right, Captain Moon hollers at Cpl Dishman to move 2nd Squad right, but keep them down behind the finger (right).
And then the Old Man sprinted forward to get a look at the situation (top left). He signals the mortar team instructions to fire on the Japanese howitzer (off camera to top center). Cpl Dishman (bottom right) see this and hollers out: "Sir, what about that damn Jap machine gun!!??" (off camera to right top)
The Captain (top left) hollered back, "Don't worry, Corporal, I've got a plan. Sergeant Wyche, if you don't mind."
The M-3 Stuart opens fire with its machine guns on the Japanese MG (top center, with 2nd Squad at bottom right).
Two Japanese go down, and the survivor is pinned.
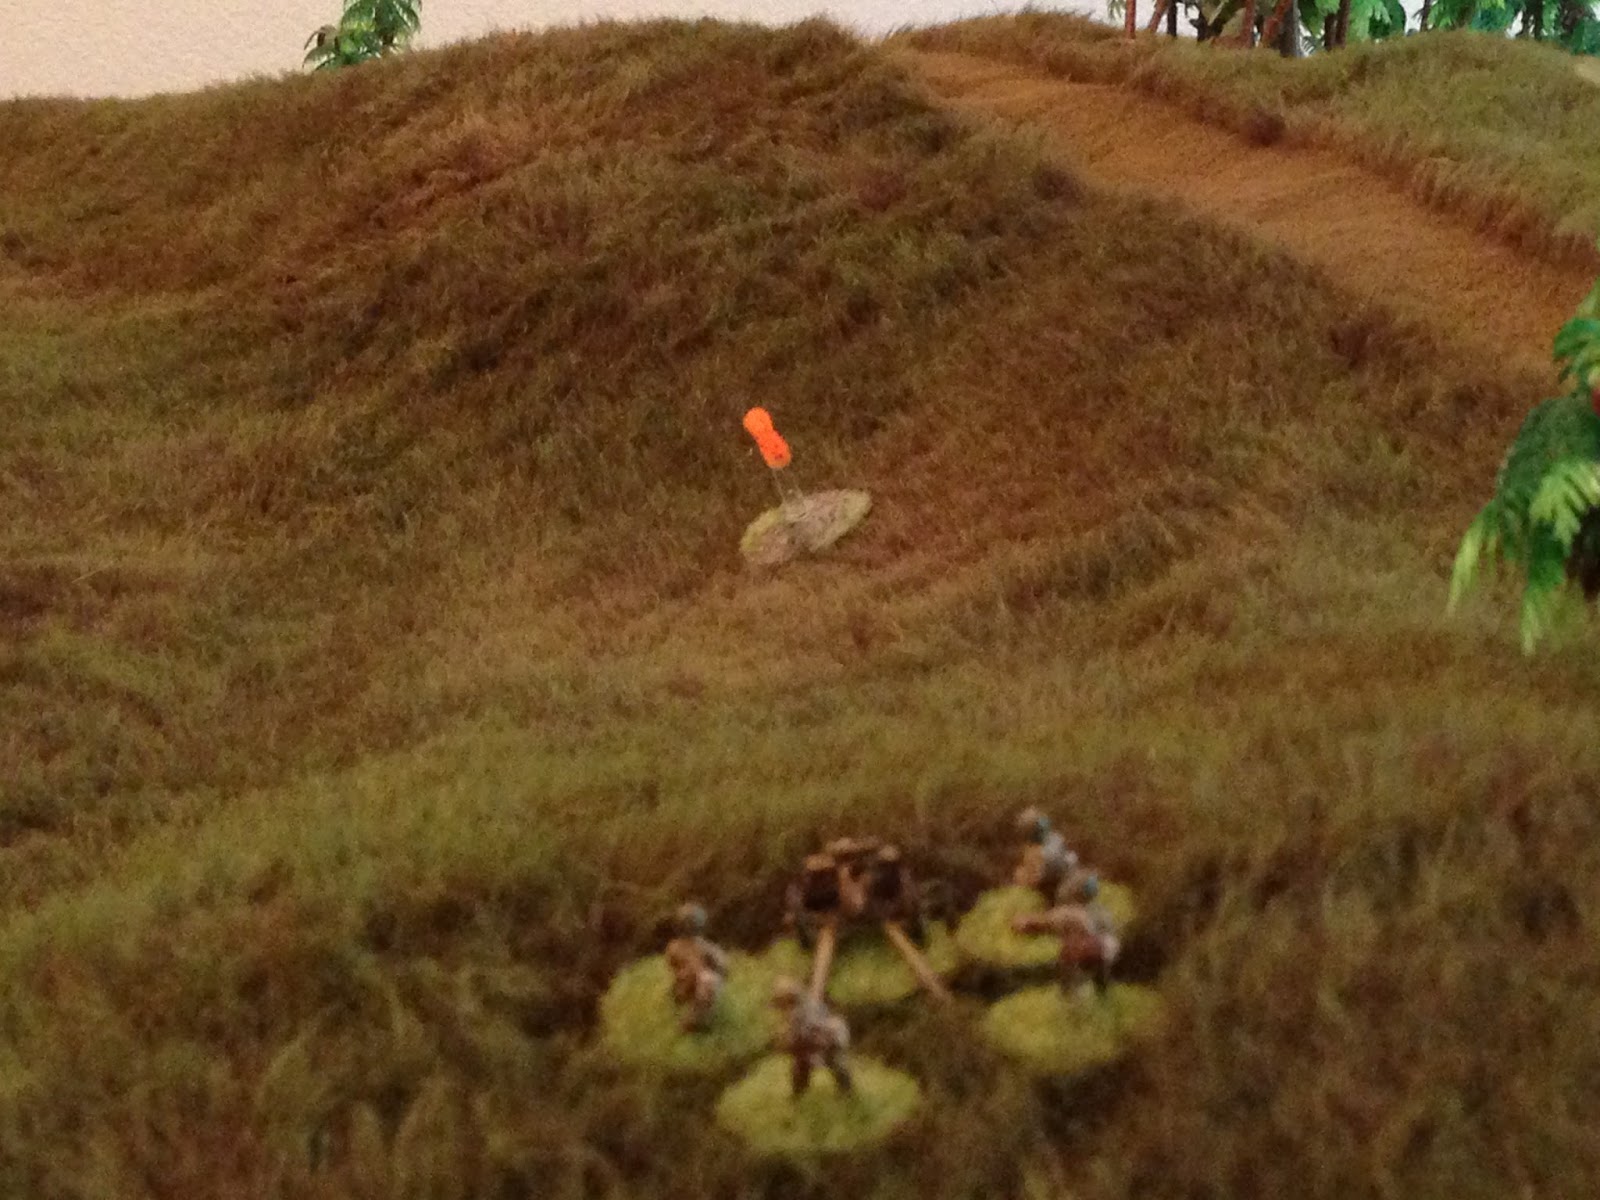
And then Cpl Duncan (bottom right) got the 60mm mortar into action, firing three rounds at the enemy howitzer (top left, with MG team next to the orange tracer and 1st Squad just right of them).
Intended impact points.
In the northeast, the Japanese 2nd Squad keeps pushing up the ridge, having a very difficult time. 1st Squad is just visible on the slope at top right, and the US MG team is behind the trees at top center, while the Japanese howitzer is just off camera to the left.
With the Japanese 2nd Squad at far right, the enemy gun crew commander (bottom left) lets out a yelp: "crank the gun down, crank the gun down, there's an American tank!" They get the gun barrel leveled and fire a 70mm HE round at the M-3 (top left).
The round is just off target, but the Japanese fail to get off another shot.
I felt like that was a key point in the fight; I was giving the howitzer a decent shot at knocking out the thinly armored Stuart, but they only managed to get one shot off before failing orders. Now they're staring at the tank, the US MG team, and the US mortar team.
Seeing their howitzer miss, and down to one man, the Japanese machine gunner (bottom right) unpins and fires on the Stuart, forcing Sgt Wyche to drop into the turret and button up (pinned).
There was no chance for the Japanese MG to damage the tank, but I gave it the possibility of 'pinning' and even driving the tank back (with multiple pins). With the tank pinned, I rolled to see if he would keep firing on the tank, or move to 2nd Squad.
The Japanese machine gunner then turned the gun on 2nd Squad (bottom left) and raked the Americans.
It's not Pvt Wortham's day: the only man in the squad to be pinned by the howitzer, he's knocked to the ground by the machine gun fire (white bead), while three other Marines are pinned (yellow beads).
Then the US mortars start landing.
One...
Two...
Three. Dammit!!! One crewman is pinned.
This really pissed me off: the rounds were walking up to the piece perfectly, and to tell you the truth, the third round actually landed smack dab in the middle of the crew. But then I rolled firepower, and all I got was 1 pin! That is, I rolled a total of 10 dice, got one 1, zero 2s, and zero 6s. So, rather than show the round as hitting directly on the gun but no real casualties, I decided to back the impact off to make it look more plausible.
Sgt Wyche and the boys in the tank are still a bit shook up, apparently. They mange to unpin, but don't get anything else done.
Cpl Dishman unpins the men of 2nd Squad, then has a Marine check on Wortham, but he's hit pretty bad and is going to require evacuation.
Cpl Dishman has the BAR gunner, Harris, and two Marines (left) lay down fire on the Japanese MG (top right), while he leads two more forward (bottom center).
Cpl Dishman gets closer (far right), but then they see the automatic rifleman already knocked off the last Japanese gunner.
And then Sgt Carlson once again does his job like an animal: having humped that damn gun all the way up the ridge, at the double time, and set it up, they put it to good use. They feed belt after belt into the gun, pouring lead into the Japanese howitzer crew.
And they're just decimated: three Japanese gunners are killed outright, the fourth is pinned and then driven back.
That was an incredible five rounds of machine gun fire!
While the gun (center right) is punishing the Japanese gun crew, PFC Grimsley finally gets 1st Squad up on top of the ridge. They get a bit strung out, with a group next to the machine gun and a group further ahead, at the treeline (top center).
PFC Pinkett (bottom left) called out: "Hey Grimsely, we got company! Japs coming up the backside of the ridge!" (Japanese 2nd Squad at top center)
Sgt Carlson (center) moves over and gets the rest of 1st Squad on line, then orders them to open fire on the Japanese squad.
The Japanese are caught out, utterly exposed and and strung out and exhausted from climbing up the steep slope. Five of them fall, and three more are pinned.
In a moment of youthful exuberance, Captain Moon mounts Sgt Wyche's tank and orders him forward up the trail towards the east end of the ridge, as the machine gun team looks on.
But it's overtaken by events, the Japanese have fled, driven from Horseshoe Ridge! Captain Moon and Sgt Carlson meet up in the middle: "Superb job, Cody, you really carried the day there, broke the Jap's back!" "Aww, shucks, Sir, it was nuthin'." They quickly consolidated their force and established defensive positions oriented east, prepared for the Japanese counterattack that was sure to come.
A few hours later, about 1900, Major Ford showed up with the rest of the company. "Well Moon, would you like the bad news or the worst news? The bad news is, we've got to release the tank, it's needed to the west. The worst news is, the tank is needed in the west because this morning the Japanese landed more troops at Lamon Bay."
"Sir, where's Lamon Bay?" "It's behind us, Moon, to the west. That's why they need the tank back there. That's right, we've got Japs behind us and in front of us, probably north and south of us too, if that makes you feel any better."
"What are our orders, Sir?" "Our orders remain the same, take and hold Horseshoe Ridge, until something better comes along. Now for some good news; well, sort of. I have with me 2nd, 3rd, and 4th Platoons. They're all pretty beat up, so here's what we're gonna do: we're going to cannibalize 3rd and 4th so I we can bring 1st and 2nd up to full strength. You're getting replacements, should be able to bring you back up to full strength. So, with that, I need you to hold Horseshoe Ridge with 1st Platoon, and you're going to have to defend the whole ridge, 360 degrees, there's Japs everywhere. I'm going to take 2nd Platoon and move about half a mile down the road to the west; there's a hill there, overlooks a bridge over a river, can't find a name on the map (real life note: I looked on Google Maps and found a river, but can't find a name, just that it begins or ends at the "Alitap Falls"), but if we gotta fall back we gotta fall back to the west, and I don't want to have to fight the Japs for the bridge. Those are your orders."
"Aye-aye, Sir." Capt Moon and Sgt Carlson reorganized the platoon, working in the replacements, then sited them in a 360 degree perimeter atop Horseshoe Ridge, then waited for the Japanese counterattack. It came the following night, Christmas.
V/R,
Jack


Great writeup. Interesting stuff. I am going to have to try out the Company Command rules here some day.
ReplyDeleteThat teddy bear fur mat looks absolutely fantastic. Looks like you put some real work into it.
Thanks Dale, I appreciate it! Company Command is my favorite, but this is actually "No End In Sight," pretty cool in their own right.
DeleteRegarding the fur, not a lot of time, a lot of money: I bought it off eBay!
V/R,
Jack