All,
1130 local time
13 May 1942
New Guinea
Greetings all, having just wrapped up the Coral Sea battles, I figured it's time to head back to my U.S. Army Air Corps fighter squadron, the 565th Tactical Fighter Squadron, better known as the "Chickenhawks." The last we saw of the Chickenhawks was back in February of 1942; they'd started out fighting the Japanese over the Dutch East Indies before falling back to Australia and becoming embroiled in the fighting over Darwin. After things quieted down there, they ended up moving over to Brisbane, where they had a quiet period of daily patrolling to bring in replacements and get them trained up. But they got word at the end of April that they'd be moving soon, and immediately after the Battle of Coral Sea they packed up and shipped out, heading up to Port Moresby on New Guinea, making Kila Kila Airfield, AKA "3 Mile Drome," their new home on 11 May 1942. They only had a couple days before they were called to action, air raid sirens warning of incoming Japanese aircraft called the Army pilots to their planes, with six of them getting aloft to intercept the enemy.
The Americans are facing Japanese fighters of the Tainan Kokutai based at Lae, New Guinea. I created a table and rolled up the Japanese pilot skills; they have eighteen fighter pilots, ranked as follows:
2 Natural Born Killers
2 Aces
8 Veterans
5 Regulars
1 Rookies
The Americans have:
2 Aces
2 Veterans
7 Regulars
7 Rookies
I plan to play out my (semi-)normal series of seven fights. I've created a table that I roll on to determine if its a fighter sweep, Americans defend, or Japanese defend.
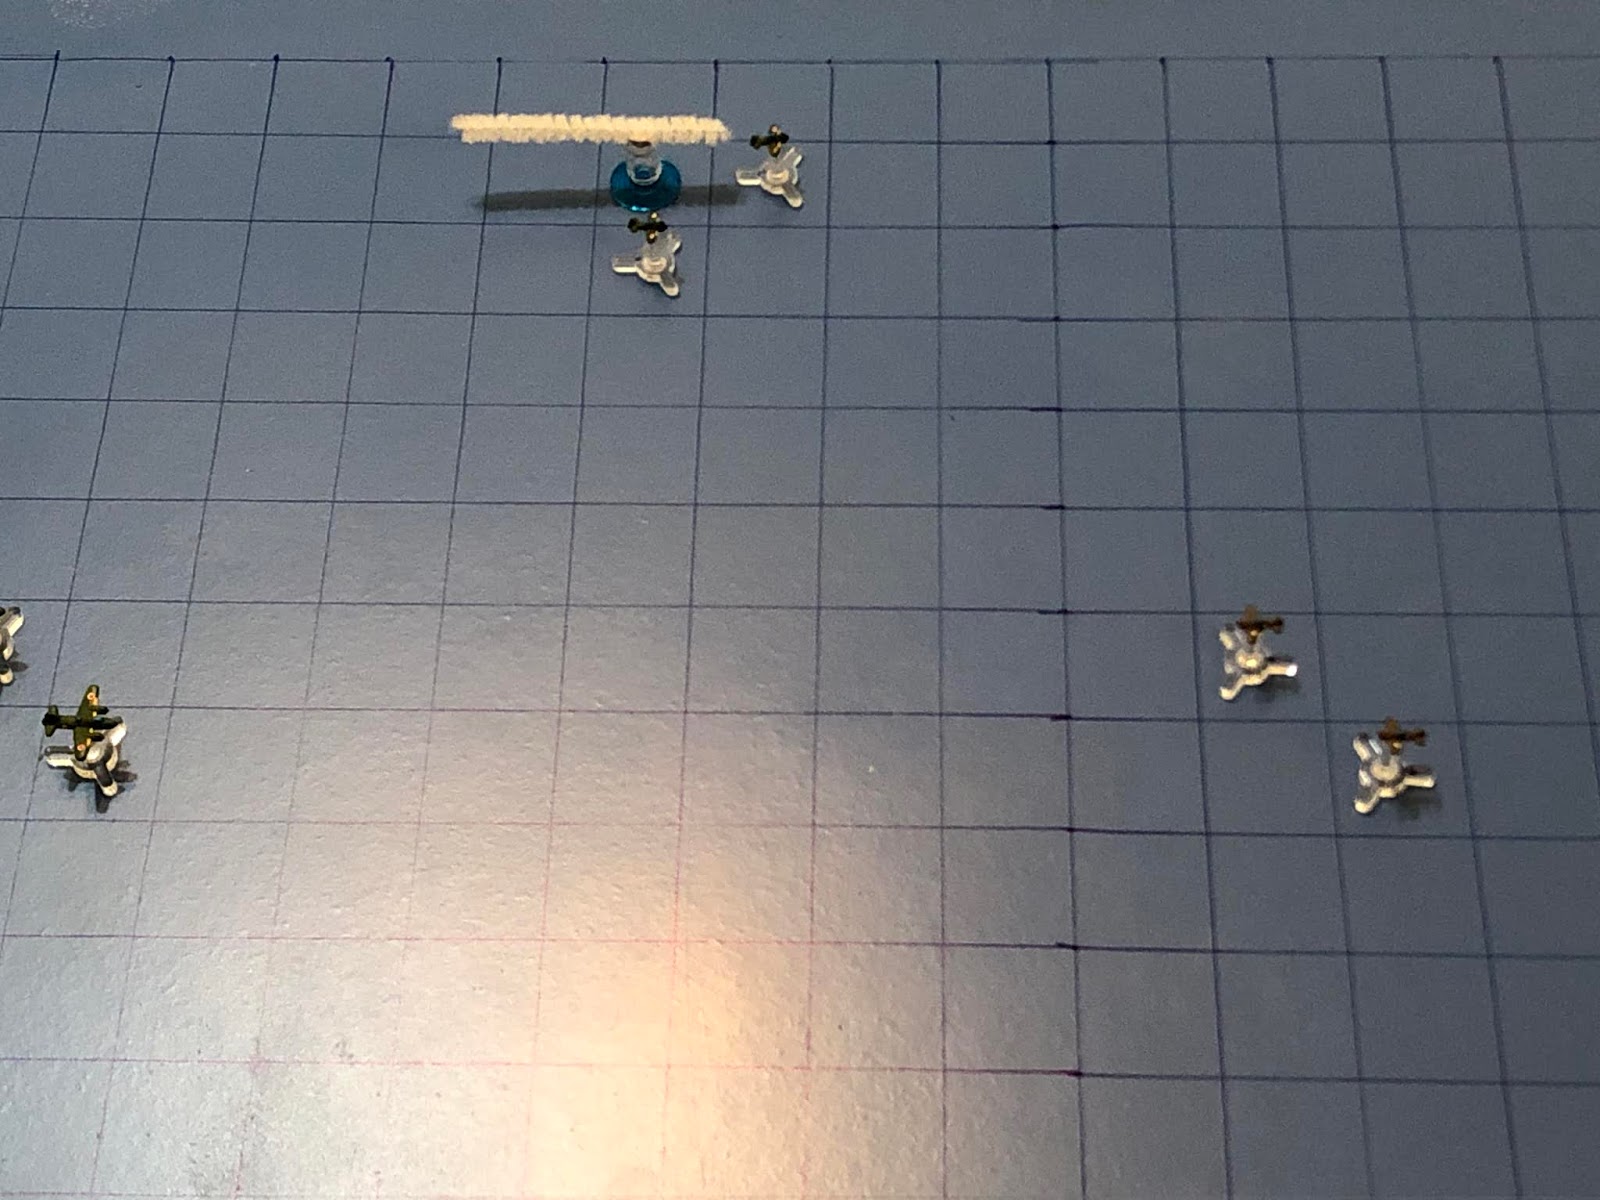
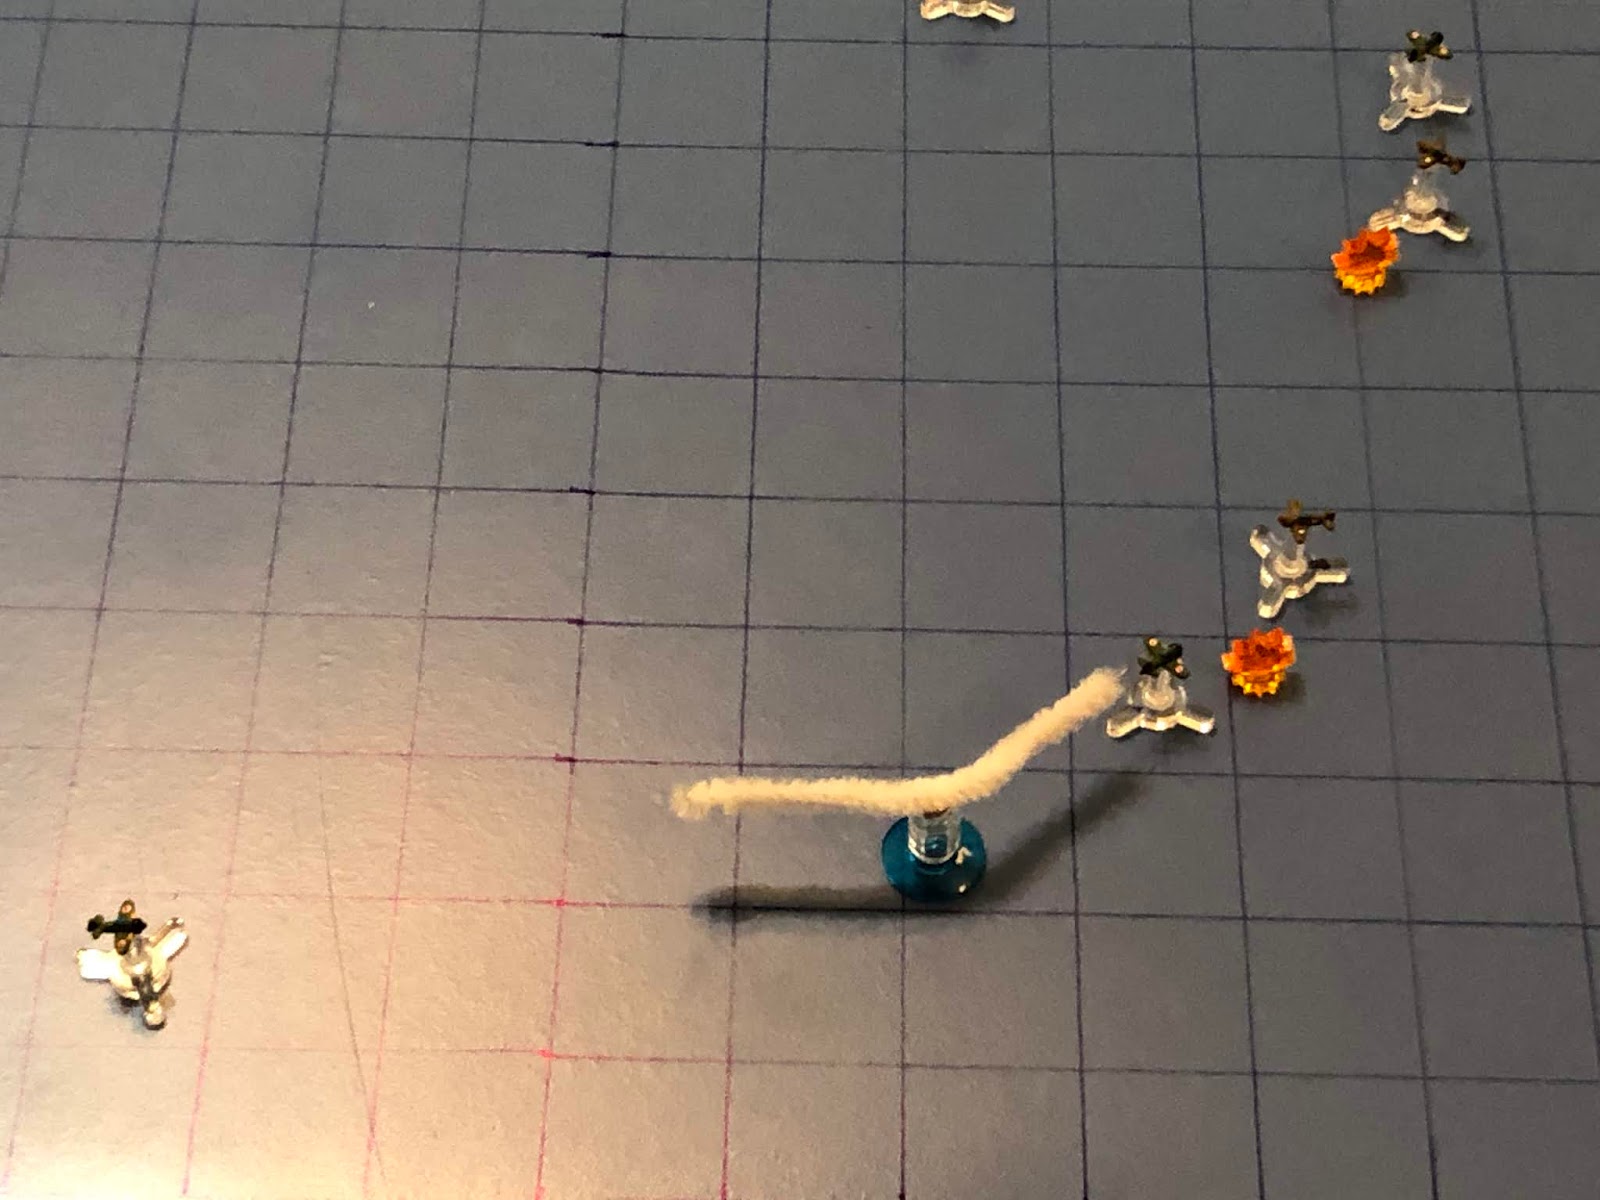
This is my arena for aerial combat; simple, yet durable and, to me, beautiful (in a simple, durable way). I'm using tiny aircraft designed by my buddy Thomaston; not sure what size they are, just that they are much smaller than 1/600. They're 3D printed models that I mounted on cut-down bases from Litko, and I'm using a very simple rules system called "Battle of Britain," which I found for free over on The Miniatures Page (I've already played a good 20 or so fights with them). Left is north, with the Japanese strike group there, and the American interceptors at right.
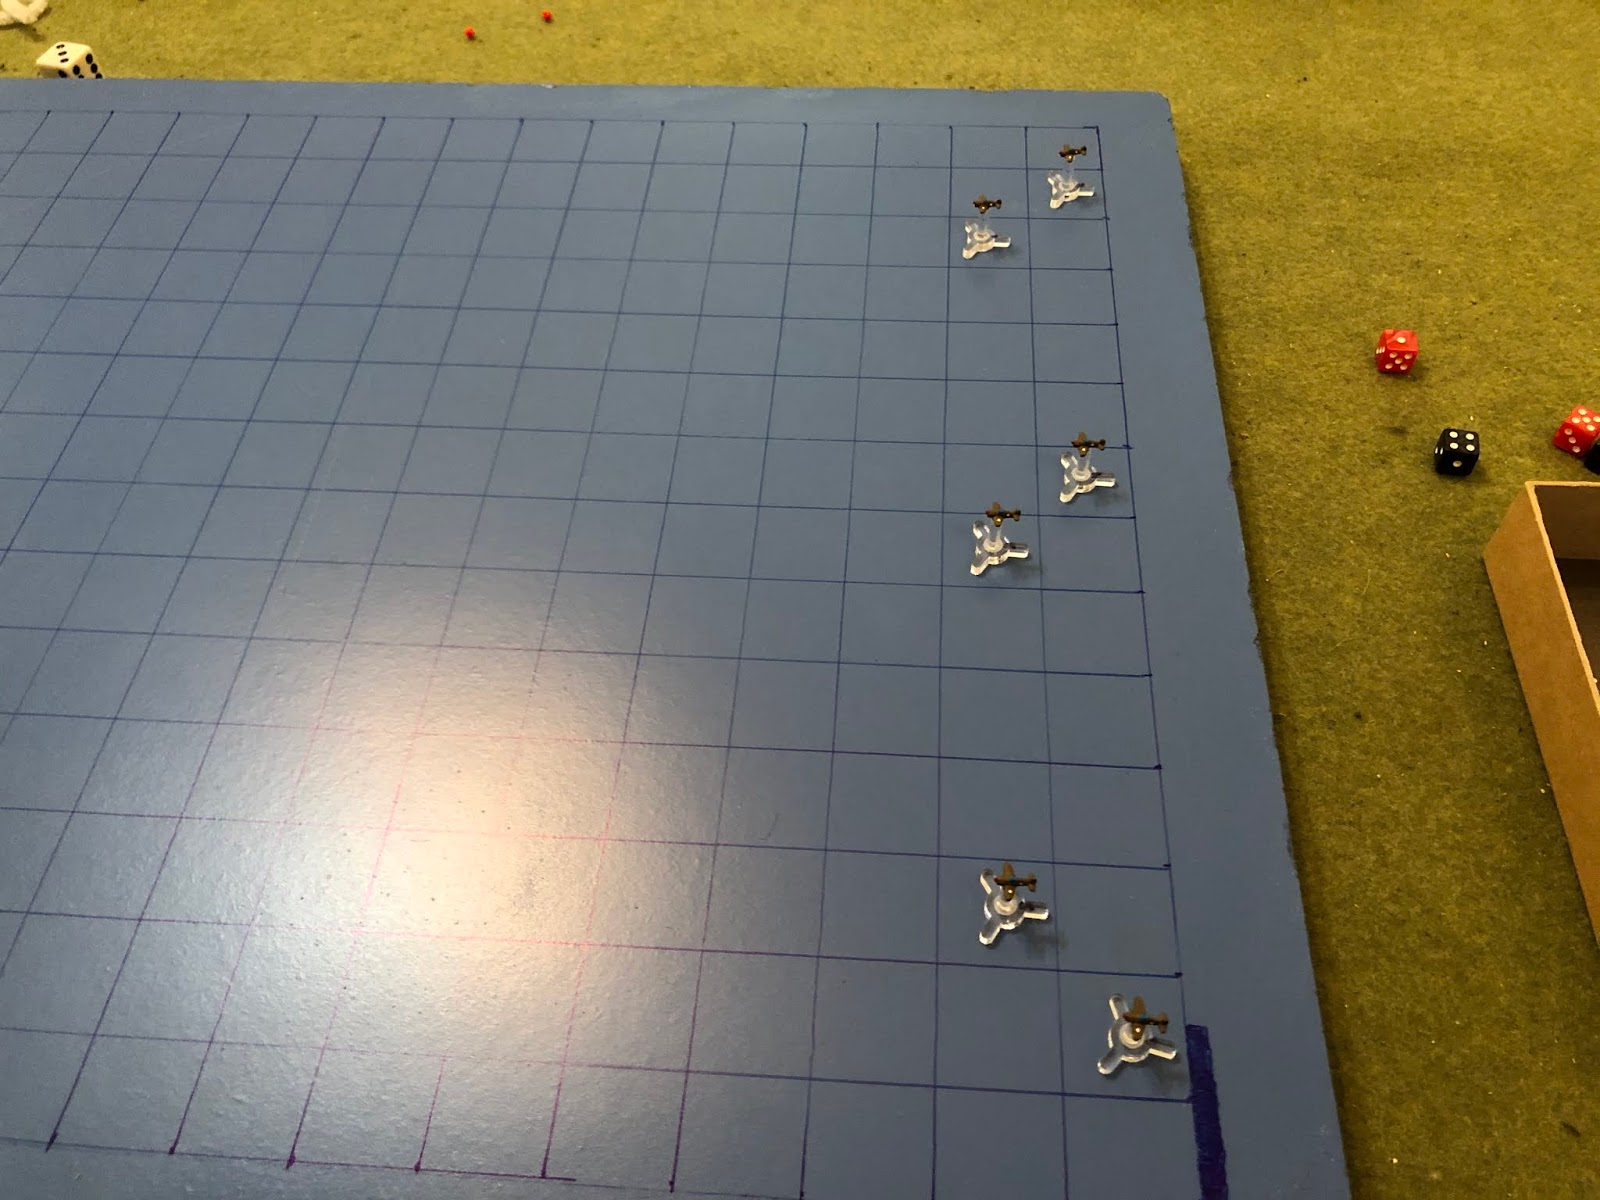
The US interceptor group, from top:
2nd Lt Becht, a Rookie on his first combat mission
2nd Lt Sanders, a Regular with no kills on two sorties
2nd Lt Mercereau
, a Rookie on his first combat mission
Captain Cotton, a Veteran with four kills on three sorties
1st Lt Kimble, a Veteran with three kills on two sorties
2nd Lt O'Brien, a Rookie on his first combat mission
The Japanese strike group, from top:
Zero 02, a Regular
Zero 01, an Ace
Betty 06 Betty 03
Betty 04 Betty 01
Betty 05 Betty 02
Zero 03, a Veteran
Zero 04, a Regular
The Japanese are targeting the following locations for destruction this week:
1. Harbor Facilities - 0 pts damage
2. Allied Marshalling Area
- 0 pts damage
3. 3 Mile Drome
- 0 pts damage
*Each target can take 30 points of damage before being destroyed.
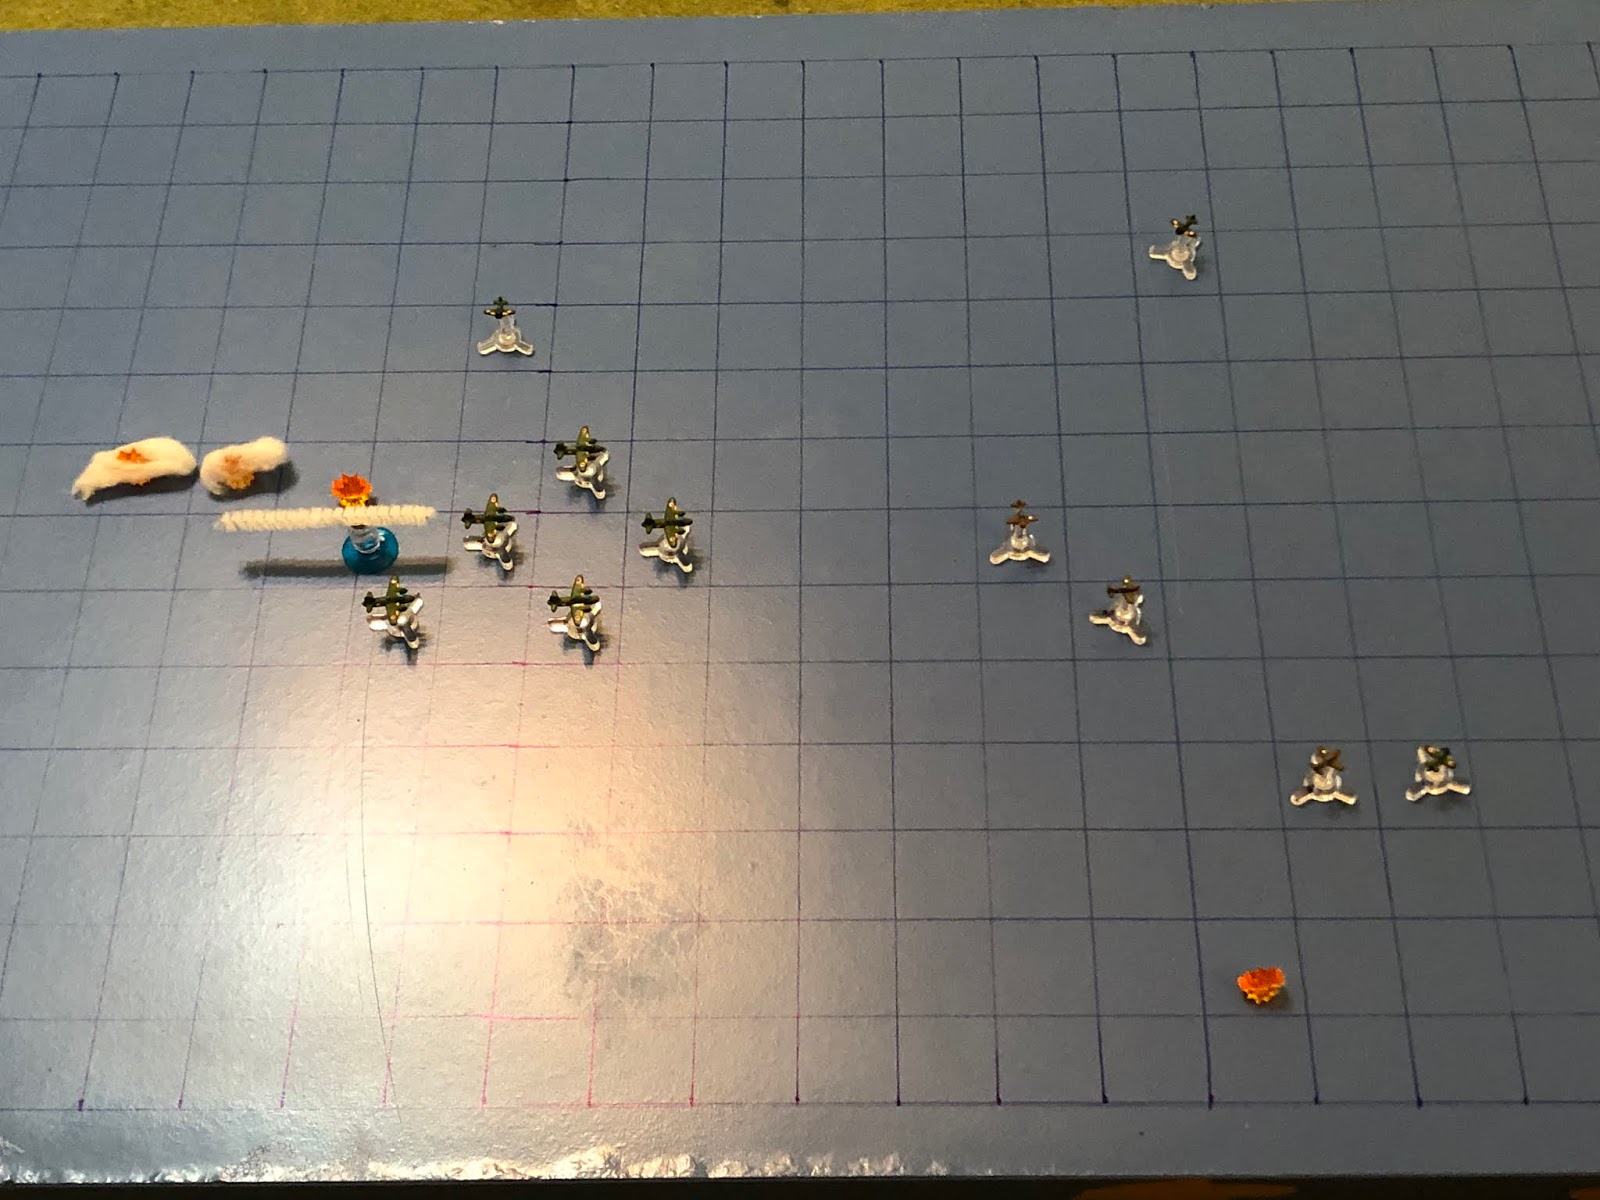
We fast forward through Turns 1 and 2 in order to bring you straight to the action!
Zero 02 pulls alongside his flight leader...
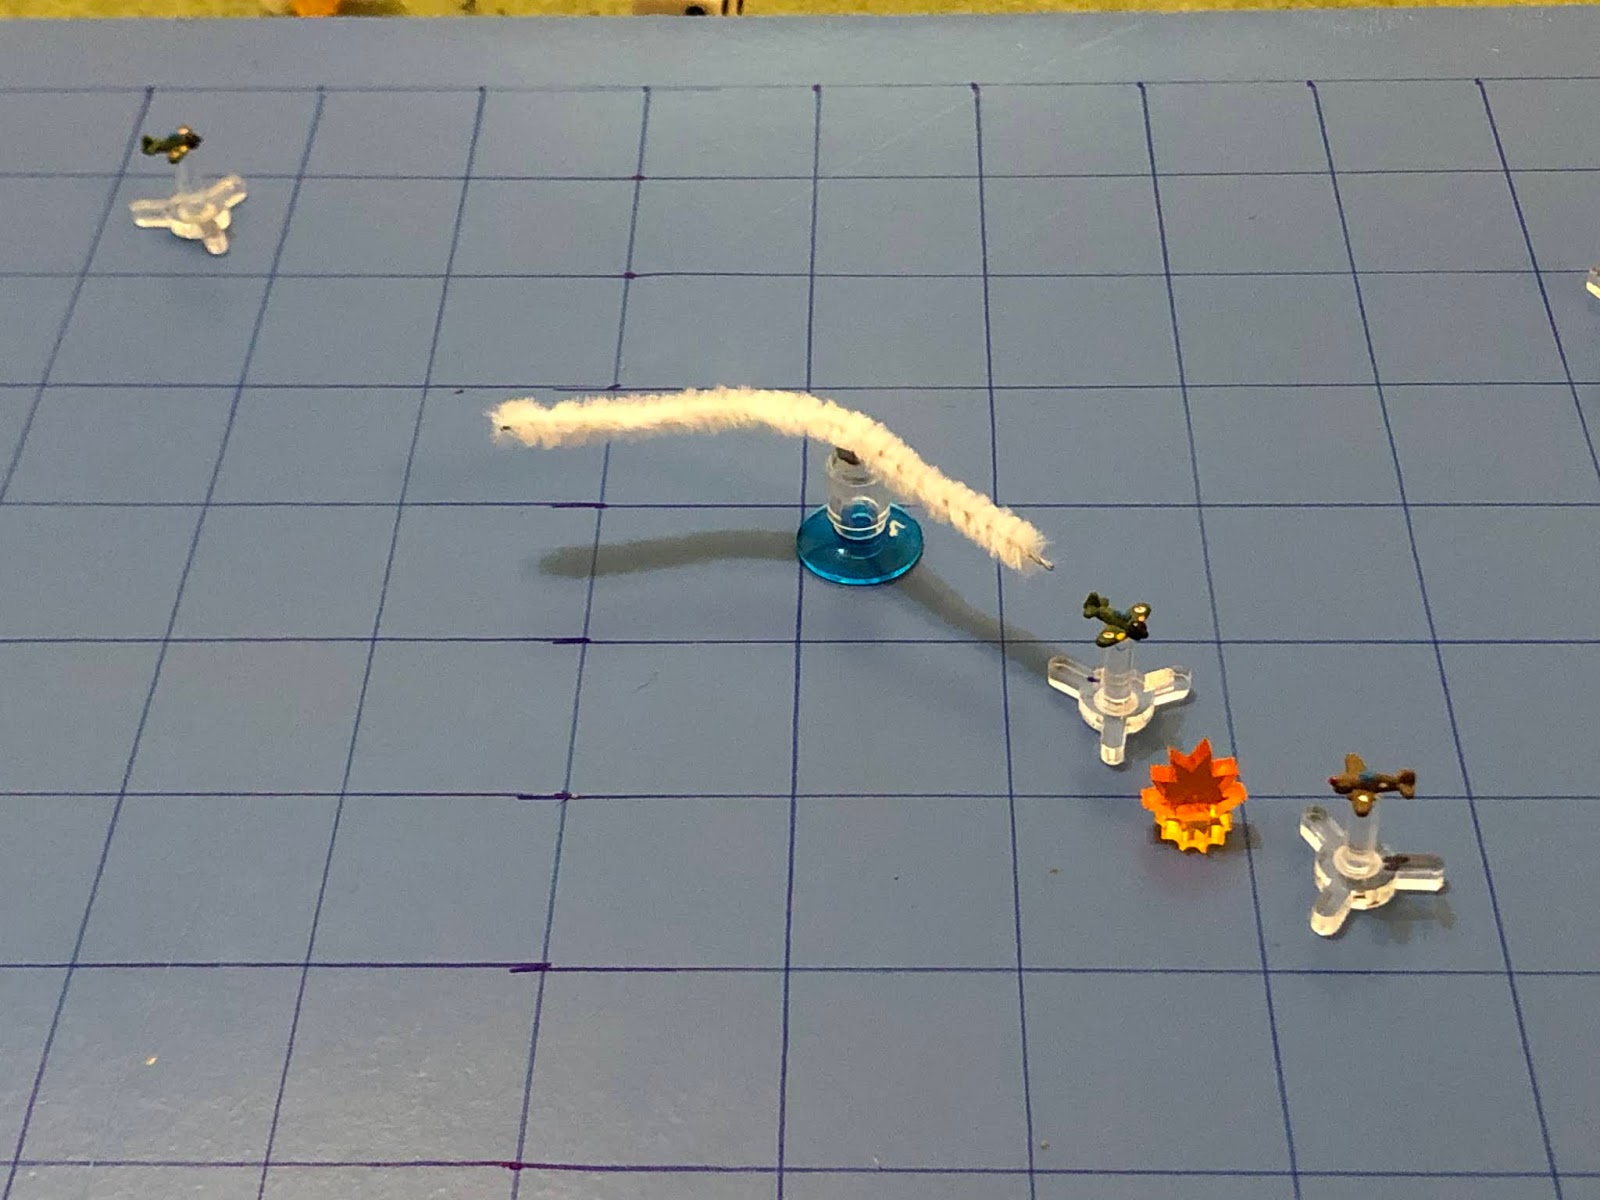
Who immediately cuts right and makes a high-side run on Lt Mercereau. The Japanese Ace's 20mm cannons thunder away at the hapless P-40 Warhawk...
Hammering it into pieces. With his aircraft coming apart, the rookie American pilot bails out, but he takes shell splinters in his leg on the way. Friendly troops rescue him from the jungle and carry him to safety, but his wounds will keep him out for a couple months.
While at the bottom, Zero 03 and 04 just sorta cruise along, waiting to see what the Americans have in store for them.
Lt Becht cuts left, eyeballing the Japanese Ace (far left)...
While Lt Sanders cuts hard left, onto Zero 01's tail, and opens fire, though his aim is off and his tracers fail to find the mark!
Captain Cotton comes right, looking to hem in the enemy Ace, though he probably just got himself in big trouble...
So Lt Kimble jinks over to help.
As Lt O'Brien sputters along.
And the Japanese bombers push towards their targets.
Zero 02 hangs out, supporting his flight leader (center bottom, with Lt Sanders on his tail).
As the Japanese Ace jinks over and makes another high-side run, this time on Captain Cotton.
But Zero 01's fire misses the Yank, and he cuts left.
Zero 03 moves in, then cuts left, opening fire on Lt Kimble...
Enemy tracers find their mark, damaging Lt Kimble's aeroplane, as the Japanese Veteran flashes past.
Zero 04 cuts left and swoops in to finish Lt Kimble off...
But he misses and cuts right to avoid a collision.
Lt Kimble flips a U-turn and heads for home, his P-40 too damaged to be of any more use in this fight. Typical Army...
Lt Sanders cuts right, looking to get after the Japanese bombers (far left), perhaps a bit premature with all these Japanese fighters still lurking around.
Lt Becht comes left and makes his own high-side run on Zero 01, but the Japanese Ace easily shrugs him off.
As Captain Cotton cuts hard left, looking to get after Zero 04 (bottom center left).
And Lt O'Brien continues to sputter along, playing in his own world.
Enemy bombers closing!
Zero 02 cuts hard right, looking to keep Lt Sanders (right) off the bombers.
As Zero 01 shoots past Lt Becht...
Then performs an Immelman to get on his tail!
As Zero 03 does the same thing, pulling alongside Captain Cotton.
And Zero 04, confident his tail is covered by his flight leader (top center left), pulls right and goes after Lt O'Brien, opening fire at point blank range!
He misses Lt O'Brien's aircraft (bottom center left), but then cuts left onto Lt Kimble's tail, where he again pulls the trigger...
"All Savoy callsigns, that dirty rat just shot down Lt Kimble's damaged aircraft! He was just tryin' to return to base, I can't believe that bastid!" Lt Kimble did manage to bail out, but, like Lt Mercereau, he will be out a couple months while recovering from his wounds.
Lt Becht, infuriated, runs straight in on Zero 03's tail, guns blazing...
And curses under his breath as the Zero goes down in flames!
Lt O'Brien cuts right, into Zero 04.
As Captain Cotton cuts hard left to help him (bottom center right) out.
And Lt Sanders frees his mind of Zero 02 (top center) and runs straight in on Betty 03, dodging defensive fire as he makes his firing run.
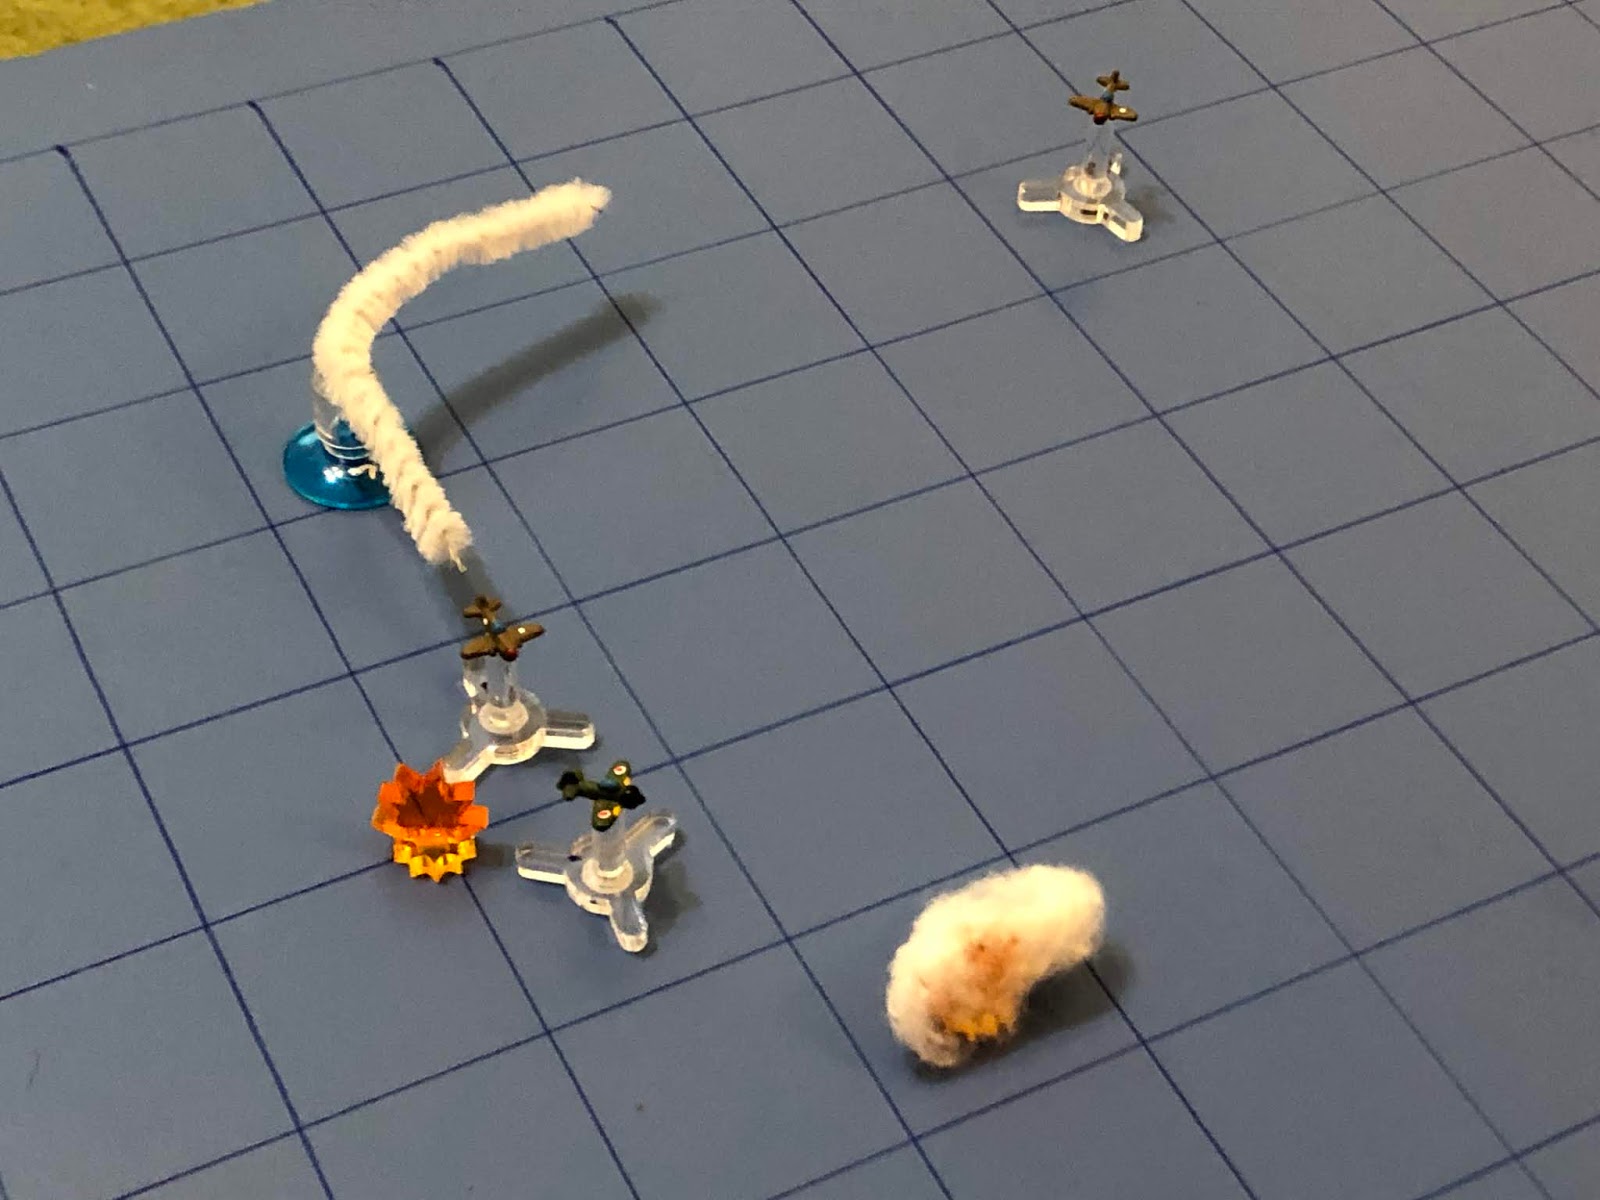
Lt Sanders' aircraft shudders as it's hit by fire from Betty 03, and he curses as his own rounds miss, but he's got no time to think on it, he's suddenly face to face with Betty 06, taking defensive fire from her AND Betty 03...
Lt Sanders manages to shoot down Betty 06, but as soon as he realizes it, he also realizes his P-40 is on fire and he has to bail out! He parachutes away safely, but it takes him a few days to find his way back to the base, so he's out for about ten days totally.
And the Japanese Betty bombers continue their march on the target.
Zero 01 cuts left, where the enemy Ace opens fire on Lt Becht's tail...
The P-40 immediately belches fire and begins streaming black smoke, but stays aloft as the Japanese Ace comes left, almost nose-to nose with Captain Cotton!
The threat to the bombers (Lt Sanders) gone, Zero 02 cuts left to help his flight leader.
As Zero 04 performs a Split-S to reverse course.
But finding themselves in a three vs three situation with one of their own damaged and five bombers still in the air, Captain Cotton orders his charges to disengage and head for safety!
Wow, that was quick and ugly... One Zero and one Betty down for three P-40s down and one damaged. These Chickenhawks had led a charmed life back when the Japanese were just vanilla, no skill pilots, but just like the Killer Pelicans figured out, it's a whole different ballgame when the enemy is sporting Aces and Veterans (much less NBKs!) in an aircraft superior to their own. And the Chickenhawks are not even getting the deflection shot advantage the USN and USMC pilots get, so they're in for a bit of tough sledding, probably all the way until the P-38 Lightning makes its debut.
Here's how it turned out:
2nd Lt Becht becomes a Regular, getting his first kill on his first mission!
2nd Lt Sanders got a kill, but was shot down and is out until 23 May 1942
2nd Lt Mercereau got shot down and wounded on his first mission and is out until 13 July 1942
Captain Cotton failed to score
1st Lt Kimble was shot down and wounded and is out until 13 July 1942
2nd Lt O'Brien failed to score, but survived his first mission and is now a Regular
The five remaining Japanese Betty Bombers reached the Harbor Facilities and struck hard, nearly knocking them out of the fight, a massive 25 points of damage! So, not exactly a resounding success for the Chickenhawks in their first fight over New Guinea.
More to come!
V/R,
Jack