All,
We're here, it's finally begun, my 15mm campaign to follow a platoon of Marines through WWII in the Pacific, 1941 to 1945, from the Philippines to Okinawa. I'm playing with toys from Eureka and Peter Pig, using Ivan Sorensen's "No End In Sight" ruleset (modified a bit), with some campaign help/structure from Joe Legan's "Platoon Forward." Here's the situation:
Our beloved Marines were living the Life of Reilly in and around Shanghai, China, with the 4th Marine Regiment. Life was good until the clouds of war darkened the horizon, and the decision was made to withdraw 4th Marines from China to the Philippines (arriving 30 Nov 1941). General McArthur placed the Marines on the island fortress of Corregidor, across from the Bataan Peninsula in Manila Bay. The overall US plan for the defense of Luzon was to fall back into the Bataan Peninsula in order to shorten lines of communication, as well as to be able to fall back on stockpiled supplies and munitions, and hold out until reinforcements from the US would arrive to relieve them.
4th Marines arrive in the Philippines not in good shape, soft (well, relatively soft, still tougher than Army ;) ) from years of garrison duty. It was quickly reorganized and set about a brisk, aggressive program of training in anticipation of invasion by the Japanese. Additionally, a large number of rear echelon Marines were formed into bodies of combat troops, the units were known as Provisional Rifle Companies. We are following one such platoon from a Provisional Rifle Company, this one led by Captain Moon, a career supply officer, and his Platoon Sergeant, Sgt Carlson, a Motor Transport Mechanic NCO. The Provisional Rifle Company commander, Major Ford, requested permission from Col Howard (CO of 4th Marines) to take his Marines to the field for training, and his wish was granted on 6 Dec 1941.
The Marines immediately moved to a training area about 100 miles southeast of Manila, on an isthmus between Lopez Bay and Tayabas Bay. They were there, merrily training on patrolling, company in the assault, company in the defense, land navigation, etc..., on 8 Dec 1941 when Pearl Harbor was bombed and the war started for the United States (yes, 8 December, they're in the Philippines). But, due to the confusion and chaos, no one notified Major Ford; the Company found out it was at war by listening to an AM radio, on 10 December!!! Communications was finally established with 4th Marines HQ back on Corregidor on 11 December, though no orders were provided. Major Ford immediately went to 50% alert, curtailing training and establishing rudimentary positions, as well as looking to establish a means of resupply. Japanese forces had already landed on northern Luzon, seemingly a world away from the cast-offs of the Provisional Rifle Company. But on 12 Dec 1941 Japanese forces landed at Legaspi on southeast Luzon, a little more than 100 miles from Major Ford's company; they immediately began moving northwest towards the capital city of Luzon, with the Company standing pat, square in their way.
Luckily, local Filipinos were aware of the Japanese landings at Legaspi and informed Major Ford, who immediately called it in to 4th Marines HQ, who let him know they were already aware of that information. Major Ford: "Well, thanks for the heads up, then." His orders were to use his company to fight a delaying action, holding up the Japanese southern landing force (of unknown strength) for as long as possible, not becoming decisively engaged, but progressively falling back to the northwest to Cavite (just south of Manila), at which time 4th Marines HQ would see to the Company's evacuation to Corregidor, to join the rest of the regiment. Major Ford knew the task was ridiculous; while he didn't know the Japanese force's strength, it was safe to assume the Japanese wouldn't waste so much effort without bothering to land something at least ten times the size of the Marine force.
Major Ford's immediate concern was that the isthmus was only about five miles wide, but his Marines were on flat ground, and there was plenty of jungle and only about 130 officers and men to cover it. He immediately resolved that he needed to get positions established on high ground, where they could see the enemy. He called his platoon commanders together and they conducted a map study; a few miles east of their current position were a pair of hills, one in the north, one in the south, which looked to afford good defensive positions and observation. The Major looked at his four platoon commanders; "we must act quickly." "Shall we conduct a reconnaissance, Sir?" "Negative, we don't have time, we move at first light."
The plan was for Captain Moon's 1st Platoon to move up the central road, take the fork to the left (north) at a small (fictitious) village known as Dadangan, then move another mile and take up positions on Hill 439, barring the northern route. 2nd Platoon would take the flat in between, while 3rd Platoon would man positions on Hill 375 in the south, and 4th Platoon would remain to the west as reserve, which is where the Company Command Post would be as well.
Captain Moon and Sgt Carlson looked the map over; they noted that the area on the approach to Dadangan had a barren ridge to the north and a bald hill to the south, and it was quite a funnel, with not a lot of cover Capt Moon: "get the squad leaders together, Cody, we need to get them briefed. We break camp in the morning, on the march by sunrise. Hope it goes well."
Overview of table, north is to top left, with the village of Dadangan at top right. It's 0830 on 13 Dec 1941, and Captain Moon's 1st Platoon enters the table at bottom center left, via the dirt road, moving east towards the Filipino village. The ridge on the left is Hill 100, the knob at top right is Hill 125. Mostly open grasslands, with some coconut palms scattered here and there. The table is 6' x 4', a drastic change from my norm of playing on 2' x 2' tables!
But the reason I'm playing on such a large table is because my Christmas present arrived and I was looking to show it off. Sure, my tables will never match the Panda's, but I'm getting closer! More and more I'm finding I've got all the figures I'll ever need (too many, actually!), so my money is going to improving my terrain. I got this off the company "Builderama" on Ebay; pretty expensive, but it's beautiful and I couldn't be happier with it. I've got some other stuff from the same company, which will soon grace the table.
Looking from northwest, across Hill 100, to southeast, with Dadangan at top left and Marine entry point at far right.
Looking southeast from Hill 125 to northwest at Hill 100, Dadangan at far right.
Looking northeast from Dadangan to southwest.
Looking down the road from the Marine entry point at Dadangan (top center), with the mass of Hill 125 at top center right. Yeah, I just shelled out a bunch of money on new hills, then I buy a new mat and put towels under it. Looks great though, doesn't it? ;)
Same pic as above, just from ground level. You can see the ridge of Hill 100 at top left, and Hill 125 at top center right.
The village of Dadangan, with eight huts, an animal pen (no animals, I forgot my goat again), and a fish farm pond.
The opposing forces, with Japanese on left and Marines on right. The entire US force shown (three rifle squads, a sniper, a .30 cal MG team, a 60mm mortar team, and a Platoon Commander and Platoon Sergeant) will be on the table. The Japanese will be on 'blinds' in accordance with Joe Legan's "Platoon Forward," so I don't have any idea what's going to show up.
The US Marine platoon, a provisional unit of non-infantry types thrown into an infantry role and now finding themselves in combat. Three eight-man squads, each led by a Corporal, an M1917 water-cooled machine gun team, a mortar team, a sniper (sharpshooter is a better descriptor, I suppose), then the Captain and the Platoon Sergeant.
Like I said, Japanese from Eureka (except the three MG teams, which are Peter Pig), and I have no idea what's going to show up on the table for this fight. But I know what they have available: four 9-man rifle squads (each has an LMG and a knee mortar), three 7.7mm Type 92 machine gun teams, a 70mm howitzer, two snipers, two officers (complete with Samurai swords), and a Type 95 tank (the only thing not pictured, I just put a wash on it and it's still drying). Some, none, any, or all could show up on the table, I have no idea.

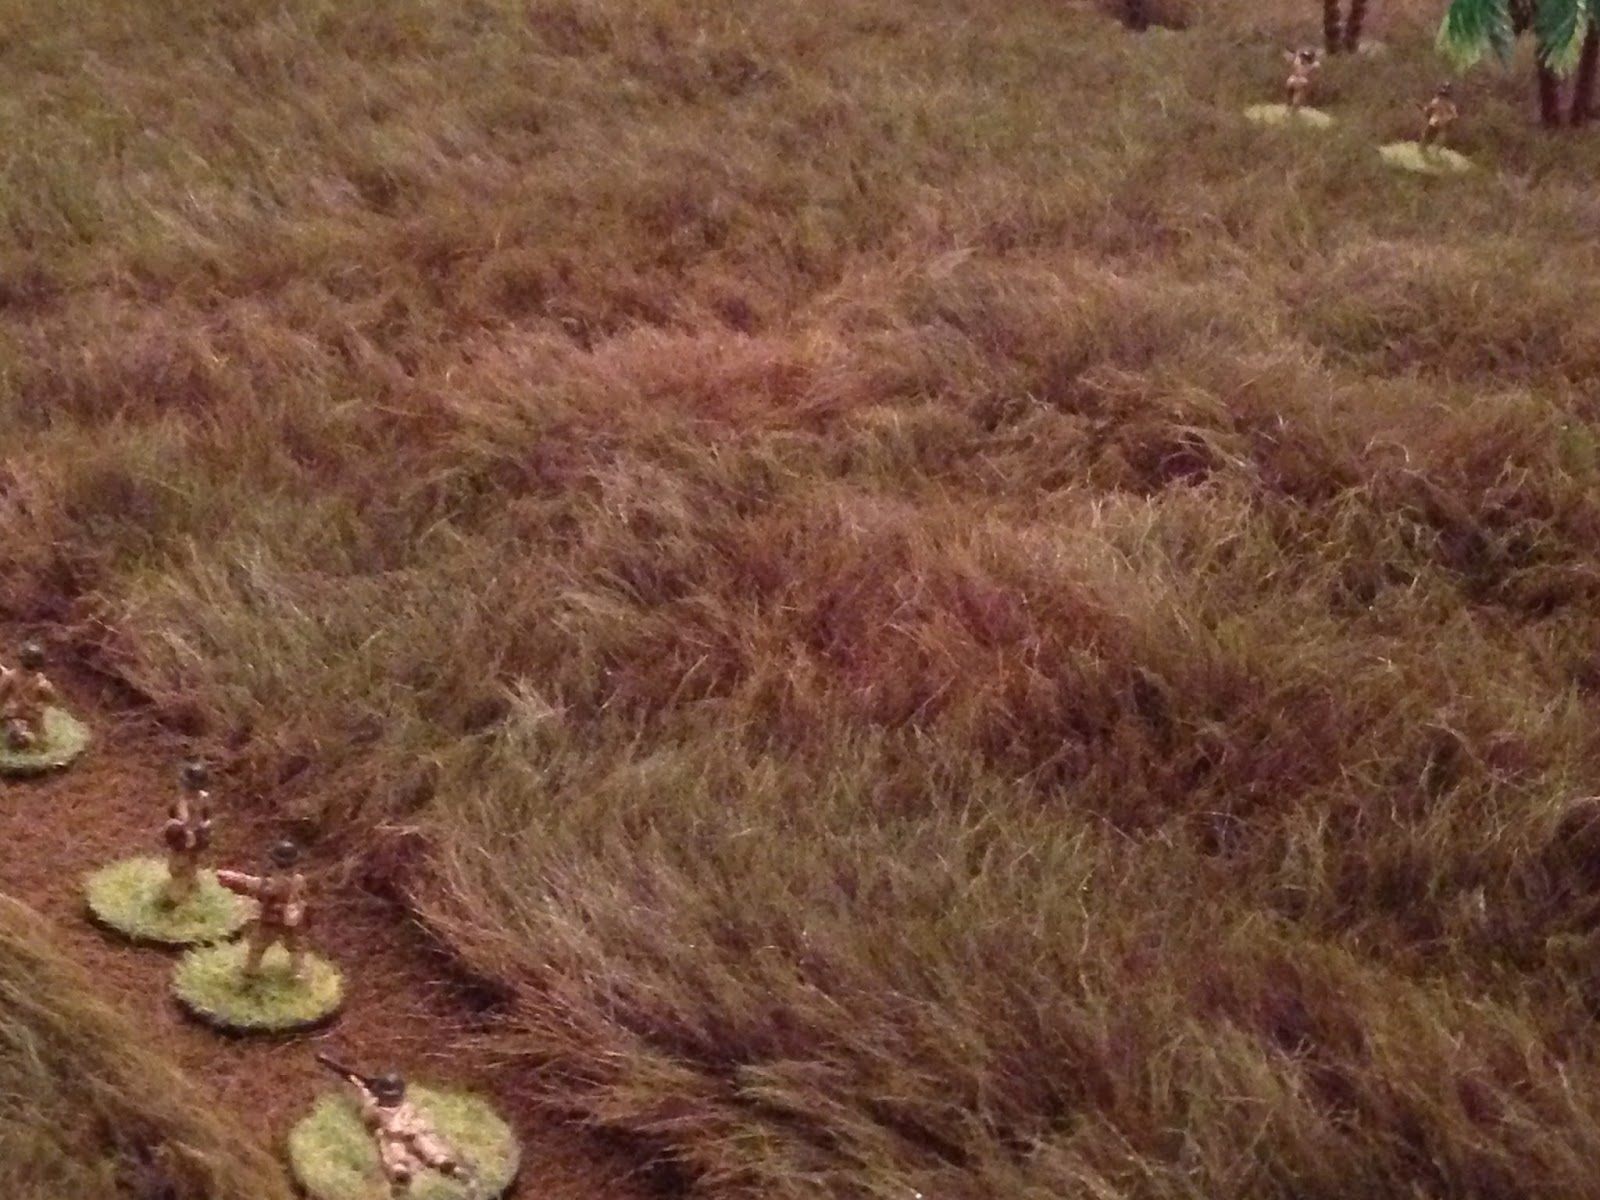
Situation: the entire platoon is on the board. Captain Moon has the platoon on the move, almost to the village of Dadangan (top right, platoon moving left to right). In the lead is a three-man scout team from 1st Squad, then the main body of 1st Squad. they're followed by 2nd Squad, the Platoon Commander (Captain Moon) and the Platoon Sergeant (Sergeant Carlson), then the machine gun team, the mortar team, and finally 3rd Squad. 2nd Squad, in the center of the platoon's route march formation, has kicked out two teams of flankers, one to each side (each is two men; you can see the northern flankers at top center left, atop Hill 100).
Another look at the column; you can see flankers at top left and top right.
Looking from the Platoon Commander (bottom left) at the right-hand flankers (top right).
A look at the right-hand flankers (Privates Wortham and Harris) at bottom right, the platoon at left.
Looking from the MG team (bottom left) at the left-hand flankers (top left).
The left-hand flankers (Privates Lathom and Rozier), atop Hill 100 (bottom center), looking at the platoon's advance scouts (top center right, nearing Dadangan).
Looking from 1st Squad at the advance scouts.
The advance scouts (bottom right; PFC Grimsley, leading Privates Highsmith and Meads) nearing Dadangan.
Final update prior to the commencement of combat: as the platoon approaches Dadangan, Captain Moon calls a security halt. Everyone takes a knee and scans for signs of the enemy as Capt Moon and Sgt Carlson bust out their map and pore over it. "Definitely the left fork to get to Hill 439." Sgt Carlson signals PFC Grimsley with the advance scouts; Grimsley starts to stand up and signal 'advance,' but he quickly crouches, then passes the 'halt' signal. Grimsley and Sgt Carlson exchanged hand signals; "Sir, Grimsley's gonna scout ahead, see what he can see in the village."
With that, Grimsley, Highsmith, and Meads began moving up the road.
Enter the Japanese: with the platoon on the road, each red and white (beautiful, isn't it?) poker chip is either a real Japanese unit of some type, or a dummy. Once they are spotted by the Marines they will be uncovered and we'll discover what they represent. I'm a big fan of getting the enemy off the blinds as quick as possible in the game, so the enemy force can coordinate its efforts.
Oh, that reminds me: as we've been doing of late, my 7-year old son and I are playing cooperatively against the enemy.
Dadangan at left, advance scouts at right, a look at the Japanese blinds in the center and north (down).
A look at the blinds from east to west; while there are three blinds in Dadangan, I'm intrigued by the two on the backside of Hill 100 (top right).
And the two on the backside of Hill 125 (bottom center and bottom left). This is looking southeast to northwest, advance scouts at top center, platoon at top left. The platoon's right-hand flankers are in the trees at top left.
Looking south to north at the east end of the table. It's time to get it on!
With the advance scouts, Grimsley (center) looked at Meads and Highsmith, wiped the sweat from his brow, and nodded: "alright boys, I seen some movement in the village. I suppose it's time we get to seeing exactly what's up there.
For those interested in how I ran NEIS like this: the boy and I just ran through each leader (sniper is self-motivated, and then we've got the Captain, Plt Sgt, three squad leaders, MG team leader, and mortar team leader) as we wanted to, and I'm playing that we push the leader to exhaustion, then move to the next one. For blinds we spot during the activations, we will flip it and figure out what it its, placing the Japanese force on the table immediately as necessary. I will push to get the entire Japanese force on the table ASAP; those not spotted during the Marine phases will move up on blind until they're spotted, then come off blinds and begin rolling activations.
In subsequent turns we drew cards; each side got a number of cards equal to its number of leaders, which we put in one deck, shuffled, then drew. Whichever side owned the card that popped up got to choose a leader and use him until he exhausted that turn's activations, then we drew the next card. One turn is going through the entire deck.
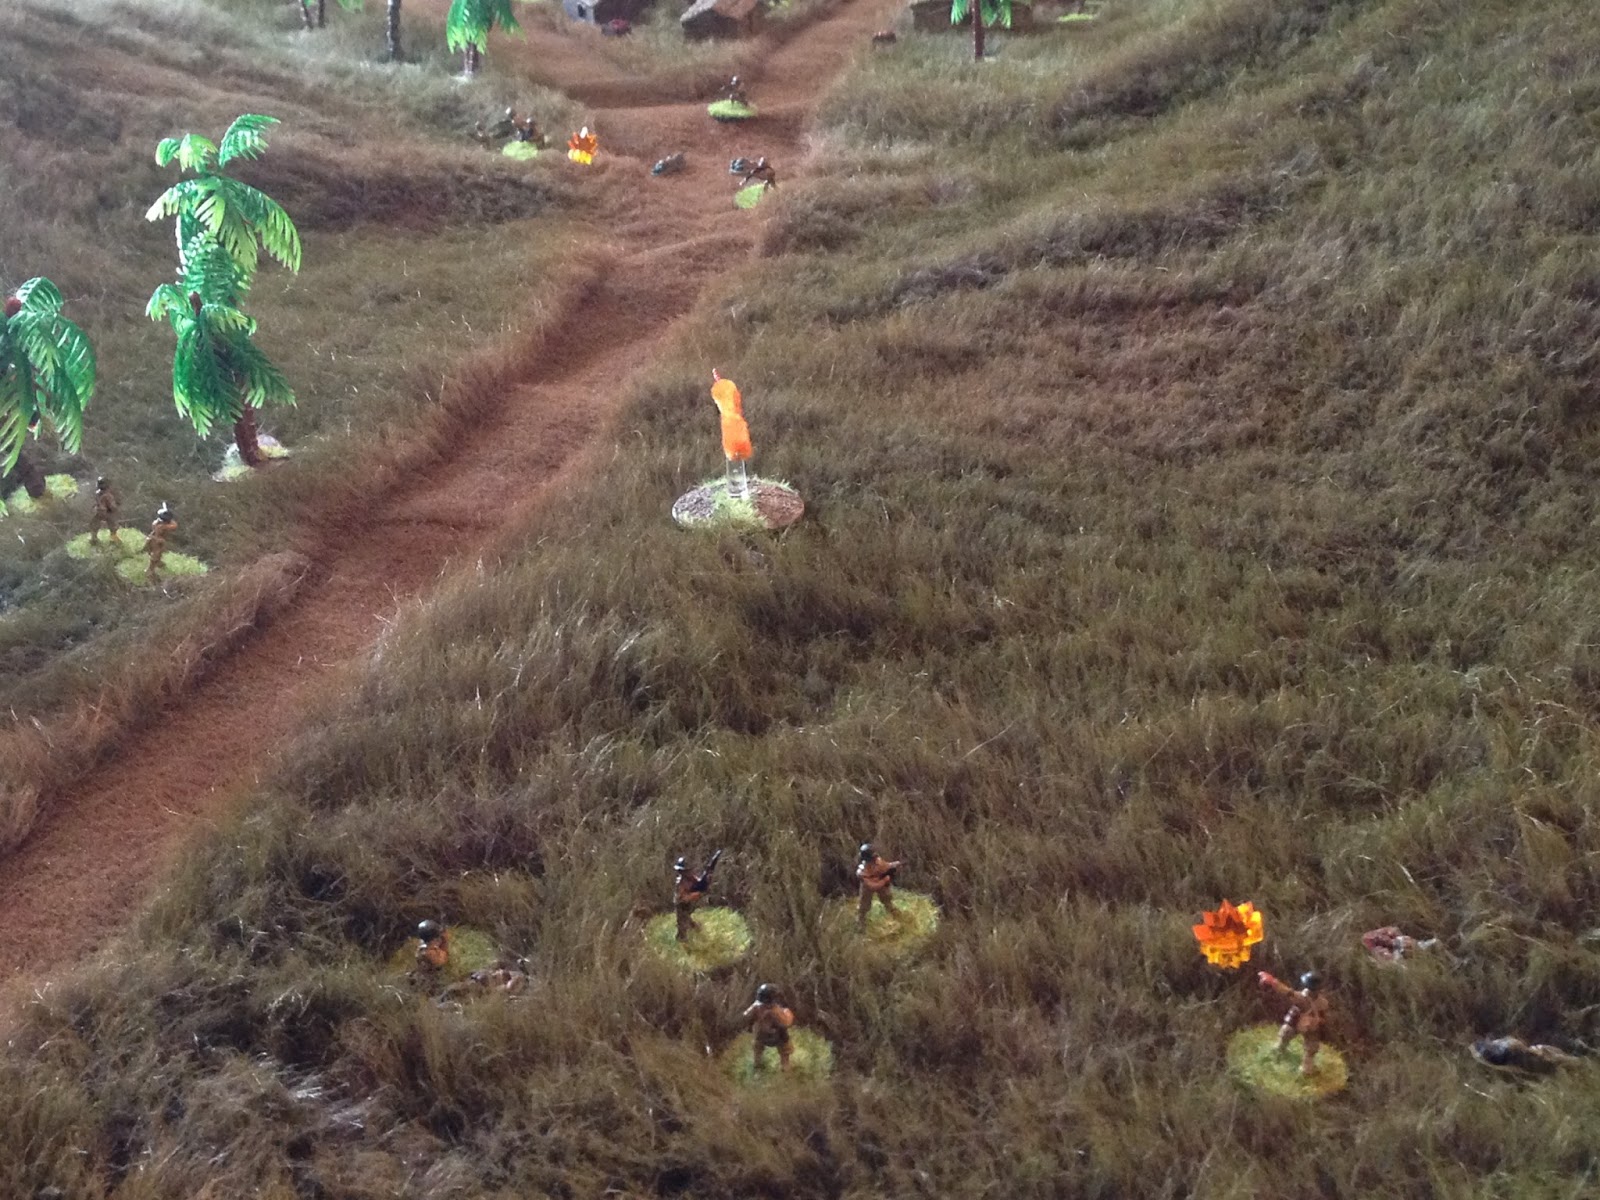
Grimsley pushes his scout team up the road (top right); they receive fire, but it's ineffectual. However, we've got contact!!! A Japanese rifle squad is discovered on the road in Dadangan (bottom left).
Back with the main body, Cpl McDowell sees the scouts take fire (top right). He orders 1st Squad off the trail, and they hustle left towards a copse of trees (top center).
They take fire, pinning Cpl McDowell and one of his Marines (yellow beads), but he's quickly able to get it straightened out. PFC Pinkett (center), 1st Squad's Automatic Rifleman, gets his BAR into action as a couple riflemen toss in as well; they pin a Japanese soldier in Dadangan.
Back with the scouts, Grimsley, Meads, and Highsmith fire into the village, killing an enemy troop. But then, off to their left, on the north edge of Dadangan, they spot...
An enemy machine gun team (bottom center left, with their rifle squad visible at top center).
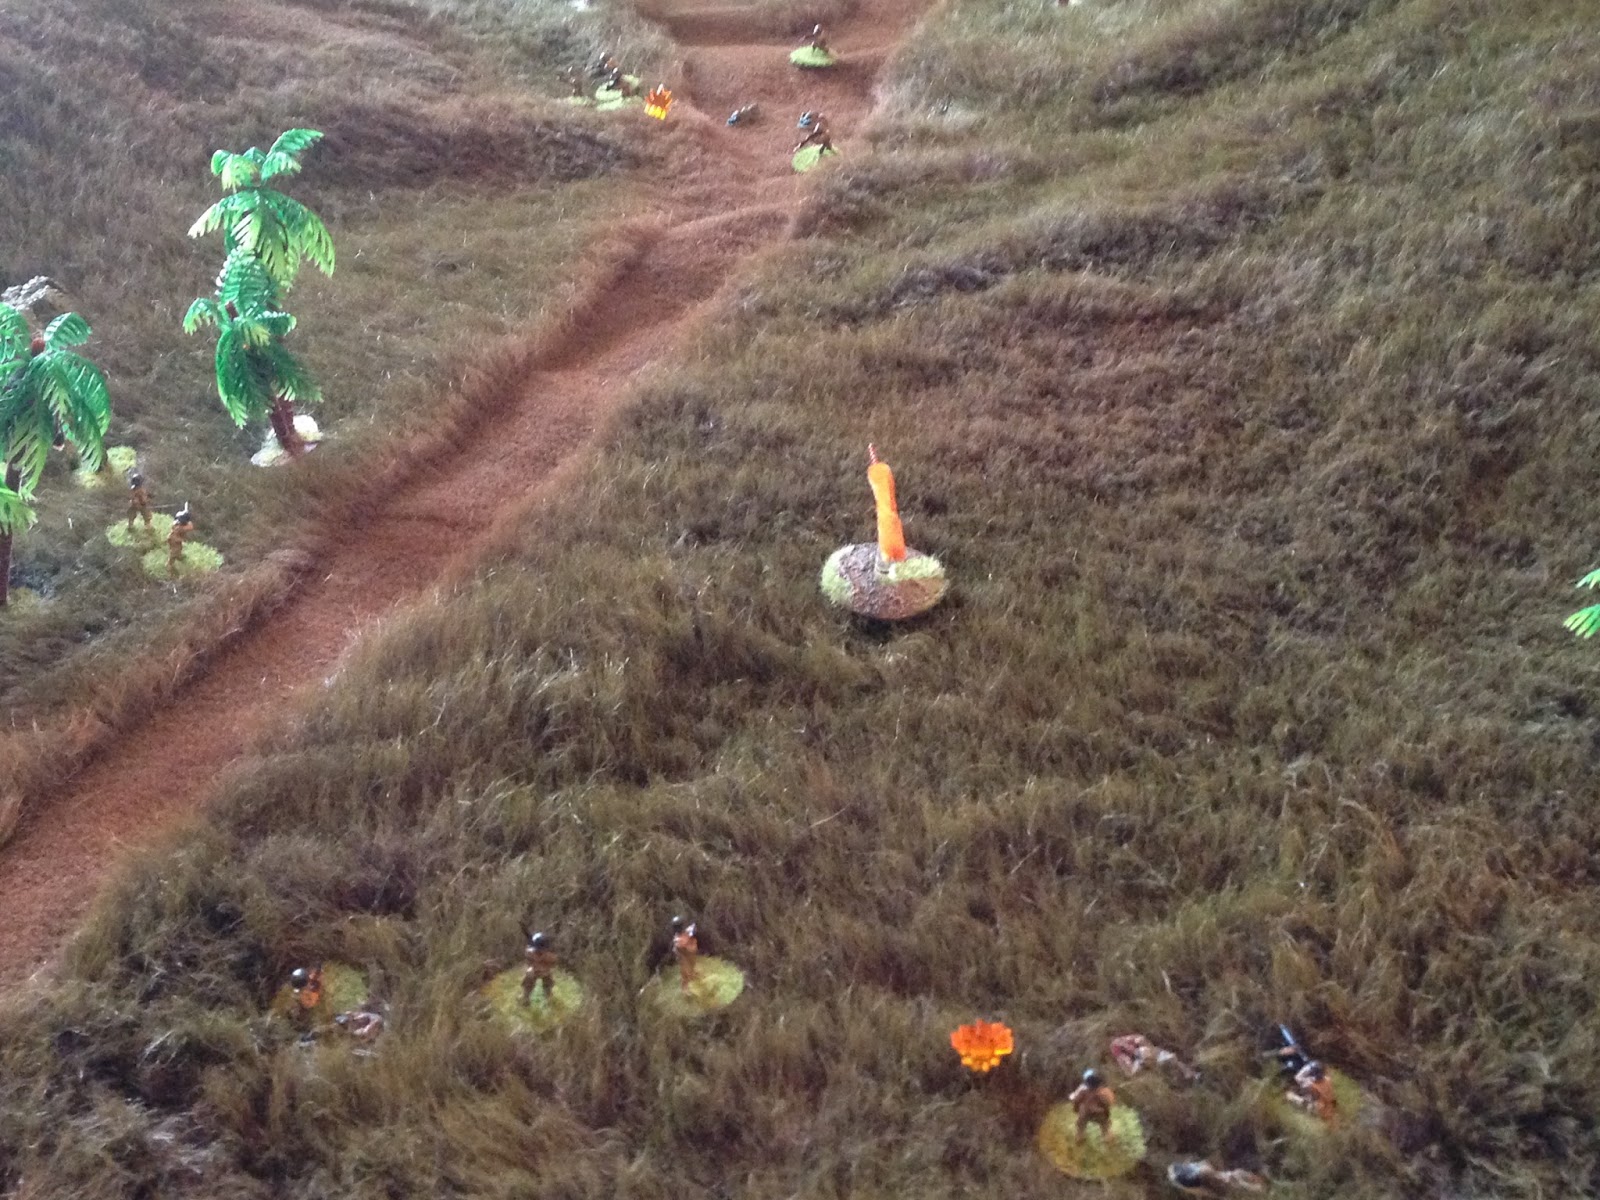
On the far left, atop Hill 100, Lathom and Rozier move up along the ridge, dodging enemy fire. At bottom right is the main body of 2nd Squad, followed by Capt Moon and Sgt Carlson.
Simultaneously, Wortham and Harris, the right-hand flankers, move up (top right).
With 1st Squad (minus the scouts) in the trees at top left, Cpl Dishman leads the Marines of 2nd Squad off the trail to the right, where enemy fire pins Cpl Dishman.
Okay, so we're building up the firing line, most of two squads coming on line to form a base of fire, going to the the machine gun up there as well, and get the mortar set up and in the fight. We really struggled with whether to recall the flankers, but with blinds still out there we figured we needed eyes out. Anyway, once the base of fire is established we'll get 3rd Squad moving on an envelopment, not sure left or right, yet.
Capt Moon dashes up (bottom right) to 2nd Squad, dodging fire (keep in mind that in NEIS, every time you move with enemy in LOS they get to shoot at you), where he rallies Cpl Dishman (top).
The Captain then leads 2nd Squad forward, where they fan out. But...
PFC Givins, the squad's Automatic Rifleman, is shot (casualty figure at center left).
Captain Moon (bottom left) hollers at the right-flankers, and they move up into the bush below Hill 125 (center right).
Cpl Jefferies, the machine gun team leader, pulls off quite a feat: "Let's go boys!" And with that, he led, carrying the gun, his two Marines forward at a sprint (from bottom left, where the sniper and Plt Sgt are still on the road, to top right), where they anchored the far right position of the Marine line. However, enemy fire pinned Cpl Jefferies, preventing the team from getting the gun set up.
The sniper, PFC Brown, takes off at a sprint, up Hill 100 (bottom left, with Plt Sgt at bottom right, 1st Squad at top right, and the left-hand flankers at top left).
Initially we played it that the Sniper had to be activated by the Captain or Plt Sgt (no command distance though), but then we changed it to he's self motivating, which is how we decided to treat Japanese snipers as well.
Sgt Carlson then dashes off the road to the right (bottom center), nearing 2nd Squad and the Captain (top left) and Cpl Jefferies' MG team (top right). Sgt Carlson orders one of 2nd Squad's Marines to check on Givins (far left); he's hurt pretty bad, definitely out of the fight. He then orders the crew to set up the machine gun, though the gunner (and team leader, Cpl Jefferies) is still pinned.
I'm not typing it every time, but remember that every time someone moves they're receiving react fire.
Cpl Kinard, 3rd Squad's leader, begins moving his Marines up Hill 100 (left, with sniper at top left), though they're getting pretty strung out (two men still on the trail). Meanwhile, Cpl Duncan moves the mortar team off the trail (right), but incoming fire means they don't get the tube in the baseplate...
Looking north to south at Hill 100 (bottom), we've got the Marine left-hand flankers at bottom left, the scouts at top left, 1st Squad in the trees at center right, and 2nd Squad above them, two Japanese blinds move up Hill 100. One is a dummy, but the other reveals a Japanese sniper (center left).
A close up of the newly arrived Japanese sniper. The Marine scouts are at top left, just outside Dadangan (off camera to left).
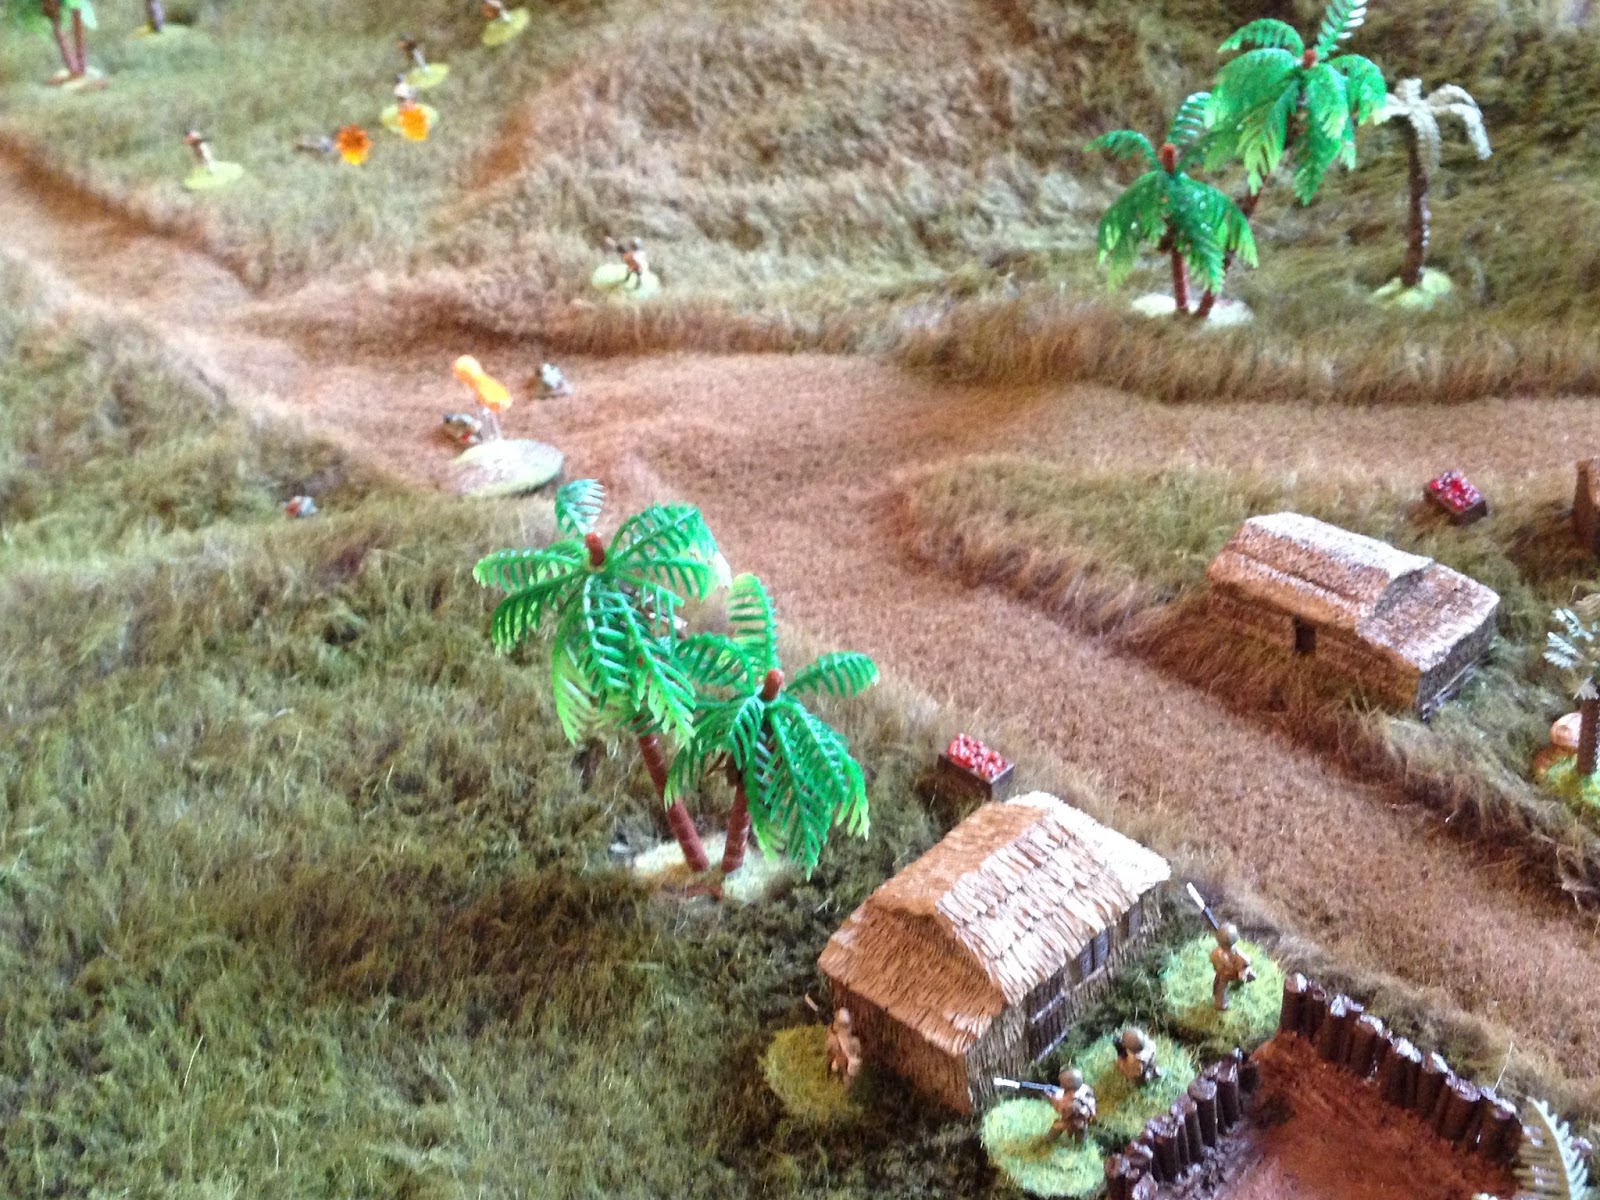
In the village, the Japanese have a rifle squad at bottom left and an MG team at bottom right. They move a blind up on the left (south) side of the village, very near the Marine scouts (top right). the blind reveals another Japanese rifle squad (center top, just above the animal pen).
Hill 125 looms at top left, where, on the backside, two more Japanese blinds are moved up. Again one is a dummy, but the other...
Is a third Japanese rifle squad (far left, practically on top of the Marine right-hand flankers. This is looking southeast to northwest, with a Japanese rifle squad at top right, the Marine scouts just to their left, and the main Marine line running from top left to top center. This is gonna be trouble...
A close up of the 3rd Japanese rifle squad, on the back side of Hill 125, with the US right-hand flankers at top right.
The Japanese flurry of punches starts in the north, where their MG (bottom center, nicknamed "the woodpecker" by Marines due to its low rate of fire; low enough to be loaded by stripper clips), opened fire on the Marine scouts (top center).
The Japanese Type 92 hammered away for quite some time, dropping PFC Grimsley and pinning both Highsmith and Rozier. But the real problem was on the Marine right...
The Japanese 3rd Squad immediately let out a blood-curdling series of screams: "Banzai!!!" They charged the hapless right-hand flankers, Privates Wortham and Harris. The two Marines fire on the seeming horde of Japanese infantry, joined by Marines from 2nd Squad and the machine gun crew, using their pistols (top right).
Incredibly, the Marine defensive fire fails to harm a single Japanese soldier. The Japanese are on top of Wortham and Harris, who both fall in brutal hand-to-hand combat, failing to drop a single Japanese soldier.
Nice dice rolling...
The Captain (bottom left, next to a 2nd Squad Marine) looks on as the Japanese (top right) charge the Marine machine gun team (center bottom), who can't even use the gun as Cpl Jefferies is pinned. But once again, .45s, Springfields, and Tommy Guns rattle as the Japanese close the distance...
The defensive fire drops only one enemy, so eight Japanese clash with three Marines, one wounded. It's brutal and intense, going several rounds. Private Mathews goes down, but they've taken four Japanese with them!
Finally Cpl Jefferies and PFC McNeil (top right) are subdued, but after that melee only two Japanese soldiers remain. They (center) continue their charge, moving towards the Captain and 2nd Squad (left).
Once again the Marine defensive fire fails to cause a single casualty, but the Captain (center left, with Sgt Carlson at bottom center), pistol in hand, leads the defense! Bayonets, rifle butts, entrenching tools, blackjacks, trench knives, all are in play; the Marines stand firm, eliminating both Japanese, while taking no losses themselves.
But back in the village, the scouts are in a bad way (bottom right). Grimsley is down, and Highsmith and Meads are both pinned. The 2nd Japanese squad breaks cover, charging them (1st Japanese squad at top left, MG just off camera at far left)!
From off camera to right and bottom right, 1st and 2nd Squads are able to fire over the heads of their pinned comrades, killing one Japanese soldier and pinning three more. But it doesn't stop them, and they crash into the two pinned Marines.
Another Japanese soldier falls, but Meads and Highsmith are subdued. The Japanese 2nd Squad is spread out and disorganized, and rapidly realizes they are exposed to quite a few Marines.
I used the "human wave" rule for both Banzai charges. I imagine I'll be doing that a lot.
The Japanese begin moving to the cover of a fold at the base of Hill 100 (top left), but ferocious fire from 1st Squad (bottom right) pins one and knocks out two more Japanese. The remaining Japanese hold up and return fire.
Forcing Pvt Ryan to fall back (bottom right, from center).
With three men already in the fold (bottom center), the Japanese 2nd Squad tries to get the rest of its men there, though two end up exposed in the road.
But as they are exposed in the road (top left), the Japanese sniper (bottom left, atop Hill 100) fires on 1st Squad, pinning Pvt Childress (far right).
Quite fortuitous he only got one shot off!
Back in Dadangan, the Japanese 1st Squad moves off the road to the left, picking its way through the village.
Quick side note: all that, and it's just the end of Turn 1!!! We now went to card activation.
Turn 2 begins with the Marine right flank in shambles. While there is no longer an immediate threat to that flank, thanks to the Japanese 'banzai-ing' themselves into oblivion, the right-hand scouts are lying out there in the brush somewhere, God knows what's become of them, while the MG team is lying there bleeding (bottom right) and 2nd Squad has a seriously wounded man (bottom left). Also, the two left-hand flankers are from 2nd Squad, sitting atop Hill 100 (off camera to left), so they're short those men too. But the Captain and Sgt Carlson are there.
Captain Moon orders 2nd Squad (bottom left) to fire on the Japanese 2nd Squad (the ones that overran the scouts, top center, with 1st Squad at left), while he moves over to check on the MG team. Cpl Jefferies and McNeil are bot badly wounded (bottom right).
Sgt Carlson, in a very stupid move that placed the platoon's leadership right next to each other, dashed over to the Captain, dodging enemy fire...
"I got it Skipper!" Sgt Carlson takes over the gun, charging the weapon and finally getting it into action.
The Captain (bottom center right) looks on as 2nd Squad (bottom left) fires and Sgt Carlson (bottom right) opens up with the machine gun, dropping three Japanese soldiers at the crossroads and pinning another (top center)!
For goodness sake, Cpl Duncan finally gets the damn mortar set up and in action. They hand a 60mm round and drop it, targeting the south side of the village.
I placed a blue bead on the desired target point in Dadangan; at the end of the turn I will roll D12 for direction and D6 for distance off target, then see where it landed and see what it hit. Subsequent rounds on the same target will drop distance by 1 (each), after seeing it splash. I.e., this turn they fire one round, with the round detonating however many inches off the target as I roll on a D6. But they see where it hit, so next turn all rounds (if they fire 1 or 5) will be at -1 for distance on the D6 roll, -2 the next turn, etc...
But on the north side of town, the Japanese machine gun (bottom center left) opens up again, this time on Sgt Carlson firing the US gun (top center). The Japanese Type 92 spits death, dropping Sgt Carlson and pinning Captain Moon!!!
The Japanese, having knocked out the US machine gun (or so they think!), pack up and displace, dashing across the road to the foot of Hill 100 (right, from left). They displaced because 1) they're spot wasn't very good, want to engage at range, not point blank, with an MG; 2) they heard the US mortar fire and figure they need to get off the spot; and 3) they know they're 2nd and 3rd Squads have been chewed up, so the only way the Japanese might carry the day is to get the gun into a dominating position to keep the Marines at bay by making them cross a mile of open ground.
Meanwhile, not far above them atop Hill 100, the Japanese sniper turns his sights on the Marine left-hand flankers. He draws a bead and fires...
The Japanese sniper (top left) drops Pvt Lathom, chambers another round, then drops Pvt Rozier (bottom left). But following the second shot the Marines of 1st Squad (right) finally get a bead on the Japanese sniper and return fire; at first they pin him, then a lucky shot puts him out of the fight!
1st Squad (bottom center) then turns its guns on the Japanese 2nd Squad (top left).
Perhaps thinking their fire was more effective than it really was, Cpl McDowell leads 1st Squad forward. Predictably, they get stranded in the open...
The sole surviving Japanese soldier of their 2nd Squad (bottom left) unpins, then opens fire on 1st Squad with his Type 99 Light Machine Gun. In his second burst of fire he mows down Cpl McDowell!
Back on the right, Cpl Dishman, 2nd Squad's leader, has his two remaining men (bottom left) fire on the Japanese 1st Squad (lurking about in Dadangan, top center), while he dashes over to check on Sgt Carlson...
Quite luckily, it turns out Sgt Carlson is only 'walking wounded'! He's back in action, manning the gun (with Capt Moon pinned at bottom center and Cpl Dishman at left). 2nd Squad continues its fire, and Sgt Carlson adds the weight of the machine gun to it; they end up knocking off two Japanese soldiers.
On the far left, the US sniper, PFC Brown, sprints up the ridge to check on Lathon and Rozier. Both are seriously wounded.
In Dadangan, the Japanese 1st Squad gets busy. They're LMG gunner (bottom center) lays down fire on 2nd Squad, dropping Pvt George right next to PFC Givins (top left), while three buddies move up (bottom right).
The blue bead is the target point for the US 60mm mortar round.
The LMG gunner moves up again (left), trading fire with 1st Squad (off camera to top), which sees hims come out okay but drops 2nd Squad's Automatic Rifleman, PFC Gray.
3rd Squad has really been a non-factor to date; as slow as they've been moving, I kinda wish I'd have stuck the Captain or Sgt Carlson with them, but then who knows how things on the right flank would have gone (Capt Moon fights off a Banzai charge, Sgt Carlson mans the machine gun, even after being wounded)? In any case, Cpl Kinard pushes 3rd Squad up the spine of Hill 100 (left, with the US sniper at top left).
This is the end of Turn 2, which means...
It's time to see where the US 60mm mortar round hit. Off target, by a bit, no Japanese casualties. But this round's shots will be -1 on distance. I believe this was off 4" at 1 o'clock; this also explains, for all you out there wondering, why the Japanese 1st Squad didn't just run will-nilly away from the blue bead. First, with NEIS activation and movement, you never know how far you're going to get, or how many guys will be able to go. Second, you don't know where the mortar round is going to land, you might just run right under it!

I pretty much considered the fight over at this point, and expected the Japanese to fall back off the table. Cards at this point were US - 7, Japanese - 3, so a pretty good chance the US would get a couple cracks at the enemy first. I figured 2nd Squad and the MG would unload on the lone madman from the Japanese 2nd Squad, and the mortar would fire 3-4 rounds at the Japanese 1st Squad, all before they got to act. And with the Japanese MG still out of position, I figured the only move would be for them to fall back off table to avoid getting pounded by the US mortar and the MG getting rolled up between 1st and 3rd Squads. But what happens? Three straight cards for the Japanese; so, fight's on.
The Japanese start by trying to get their machine gun back in the fight. The MG team climbs up the steep slope of Hill 100, but they run out of gas before they're able to get into position (top center right, from bottom left, with 1st Squad to their left and 3rd Squad just visible at top right). Right now the gun is not set up, and they can't see anything, they're actually in a draw.
The Japanese MG team (bottom left) can't see it, but they hear a hell of a fight going on below them. The lone madman of their 2nd Squad (top center) slaps a fresh magazine in his LMG and resumes firing on 1st Squad (right). The fire is ferocious, but he doesn't hit anything!
In what certainly must be an NEIS record, that one guy got off five rounds of firing, two D6 each time, and didn't hit a damn thing (I ignored pressure for both sides, and though he wasn't the squad lead I let him activate himself, and didn't give him 1 permanent stress). But five times he passes orders, gave himself one activation point to shoot, didn't hit anything! That really screwed the Japanese; he really could have messed some stuff up.
The third and final Japanese card comes out prior to any US cards coming out, so the Japanese 1st Squad (bottom center) gets down to business again. The LMG gunner (bottom center) fires on 1st Squad (top left), pinning 1st Squad's Automatic Rifleman, PFC Pinkett.
The Japanese squad's knee mortar gets set up (right) while the LMG gunner keeps firing (center) and two rifleman dash left.
The knee mortar (bottom left) fires a 50mm grenade at 1st Squad (top right).
On Hill 100, PFC Brown (the sniper) moves up. The enemy spots him and fires...
They miss Brown (bottom left); he sights in on the two Japanese soldiers dashing forward. He fires two rounds over the heads of 1st Squad, killing one Japanese and pinning the other.
Sgt Carlson calmly manipulates the T&E on the machine gun (bottom right) to sight in on the wild man of the Japanese 2nd Squad (top left). The Plt Sgt depresses the butterfly trigger, sending out a long stream of tracers, dropping the enemy soldier.
Leaving the Captain, still pinned (bottom left), in their wake, Sgt Carlson and Cpl Dishman pack the gun up and hauls ass forward (top center left).
As Sgt Carlson and Cpl Dishman (center right) move the gun up, Cpl Duncan and his mortar team (bottom left) fire two more 60mm rounds at the Japanese 1st Squad (you can see the smoke from the last round at top center).
Keep in mind that, at this point, no US troops know where the Japanese MG team is right now. They're on the back side of Hill 100, top center left.
Cpl Kinard pushes 3rd Squad further down the spine of Hill 100, seriously strung out (bottom center to left, with Japanese MG team out of sight at top left).
1st Squad (bottom center), can't get as much done with their leader down, but they manage to fire across the crossroads into the Japanese still in Dadangan, killing one and pinning the LMG gunner (top left).
And that ends Turn 3, time for mortars to fall.
I start with the Japanese knee mortar: it hits well beyond 1st Squad.
But the US rounds hit much closer, pretty much on target! The LMG gunner (left) is killed, the knee mortar (right) is pinned. And with that...
The three Japanese soldiers remaining from their 1st Squad, and the three-man machine gun team decide to split town. Victory, at least in terms of who owned the ground at the end of the fight, goes to the Marines of 1st Platoon. However, it made clear that the Japanese were here in force and it would not be possible for 1st Platoon to reach Hill 439. This was an impossible position; Capt Moon has no idea what is going on with the rest of the company (keep in mind, there are no radios, and they're not set in yet to run wire), he only knows he cannot fulfill his mission of establishing a defensive position on Hill 439. If 2nd and 3rd Platoons were in position, 1st Platoon not mounting Hill 439 means the Japanese can simply flank 2nd and 3rd Platoons.
What to do? Capt Moon and Sgt Carlson quickly set their men about treating the wounded and policing up the battlefield, then consulted their map. They decided to fall back, then move north and occupy a horseshoe-shaped ridge there, hopefully in position to block the Japanese advance on Manila. Capt Moon immediately dispatched runners to inform the Company Commander of his change of plans, and to inquire about resupply. Additionally, while there were quite a few casualties, one of the men, the machine gun team leader, Cpl Jefferies, was wounded bad enough he would die without medical attention. Capt Moon paid several natives to place the Corporal in a cart and transport him to Cavite.
What a fight! I think the rules, coupled with the blinds from Platoon Forward, worked like a champ, making things VERY tense. Hell, the boy was sure we were going to lose when the Japanese 3rd Squad was on the verge of breaking through on our right flank. Casualties were rougher than I expected; some of that is my fault as I didn't play with the idea of 'breaking/pressure,' but I do recall Ivan saying you wouldn't see as many casualties in these rules ;) For all intents and purposes, the Japanese lost a full platoon of infantry, and the Marines didn't fare much better. For the record:
USMC:
3 KIA
1 WIA severe enough to require immediate evacuation
8 WIA that can remain with the platoon but will miss between 2 and 11 days of duty
2 WIA that are immediately able to fight
So, 14 casualties
Japanese:
24 KIA
Practically 18 from two Banzai charges
Commendations:
Captain Moon was awarded the Bronze Star for Valor for his part in fighting off a Japanese squad in hand-to-hand combat.
Sgt Carlson was awarded the Bronze Star for Valor for dashing through enemy fire to re-man the platoon's machine gun, and continuing to man it after being wounded.
13 December 1941 ended with the exhausted Marines retreating northwest towards what they were already calling Horseshoe Ridge, carrying everything they owned on their backs, to include their wounded. They didn't reach the ridge that night; that night they slept in the open, just off the sides of the trail, cold and stomachs empty. The next morning they awoke to find their runners returning from the company command post: Major Ford ordered an immediate halt, dig in and fight in place!
This is madness, Capt Moon thought to himself, but he did as ordered. The Marines of 1st Platoon reorganized themselves and dug in, grimly awaiting the Japanese. Gunfire, mostly artillery, but sometimes mortars and machine guns, could be heard to the south, but they spotted neither hide nor hair of the enemy. They spent two more days there, dug-in in the open, before another runner arrived at the platoon's position, directing Capt Moon to take his Marines to Horseshoe Ridge. The morning of 17 December they mounted up and began their trek, but there was quite a storm. The Platoon didn't arrive until nightfall, immediately establishing hasty defensive positions. But the morning of 18 December, the sun rose high and bright, revealing to Capt Moon and Sgt Carlson they were in the wrong location! They had gone too far north, woke up practically on the beach! They began marching back south, but halfway there they realized the platoon was out of water.
Captain Moon immediately halted the platoon, formed a 360 degree perimeter, and sent out foraging patrols to find a source of potable water. This took the remainder of the day, but by that evening they had enough water to last another several days. They laagered overnight there, then began moving towards Horseshoe Ridge. The going was VERY slow, owing to the Marines' weakened state (hungry, dehydrated, carrying wounded), and was made slower when they found themselves having to avoid Japanese patrols. This forced them to spend another night in the open, but the morning of 20 December 1941 saw 1st Platoon making its approach on Horseshoe Ridge.
Which, of course, is the next fight. Sorry for all the narrative BS setting this up; just wanted to try and paint a little bit of the picture of how miserable the situation in the Philippines was...
V/R,
Jack


Awesome, thanks for a brilliant ABR
ReplyDeleteThanks a bunch!
DeleteV/R,
Jack
Great report Jack! and the terrain is fantastic.
ReplyDeleteThanks Shaun, glad you liked it.
DeleteV/R,
Jack