It's 2130 on 20 December 1941, and following its ass-whoopin' at Horseshoe Ridge, 1st Platoon is moving Back up the slopes under the cover of darkness to recover its casualties.
Sgt Carlson: "Alright, here's what we're gonna do. We're gonna wait 'til it's nice and dark, then we're gonna go get our men. We'll set the gun and Cpl Duncan's mortar into the same exact positions, and I'll take 2nd Squad up the ridge. 1st Squad stands by down below, just in case. We go up, grab our guys, then get the hell outta dodge. If any shootin' starts, I want the mortar and MG to open up. I want a wall of fire between the eastern side of the ridge and the west, keep the Japs from getting at us."
With that, the Marines of 1st Platoon moved into their start positions, ready to jump off.


The MG and mortar teams are for decoration, scenario fodder. The Marine fighting force is just seven men with Tommy Guns, a BAR, and Springfield 03s.

For this smaller game, the boy and I are still playing co-op, but this time we're using an old favorite, Ivan's "Five Men in Normandy." For the larger fights we'll stick with No End in Sight, for smaller ones 5MIN. What I'm starting to worry about, though, is that soon we may not have enough Marines left to play NEIS, we'll be stuck with 5MIN!!!


Sgt Carlson: "Sir, is that you?" A bit further up, he spots two shadows, then hears something in a foreign tongue...


*Yeah, I got sick of not having casualty markers for the enemy, so, until I get my Peter Pig Japanese casualty markers I'm using Peter Pig Viet Cong...


The Japanese are now down to two men, one on the right, one on the left.


But then we get just a little too froggy...
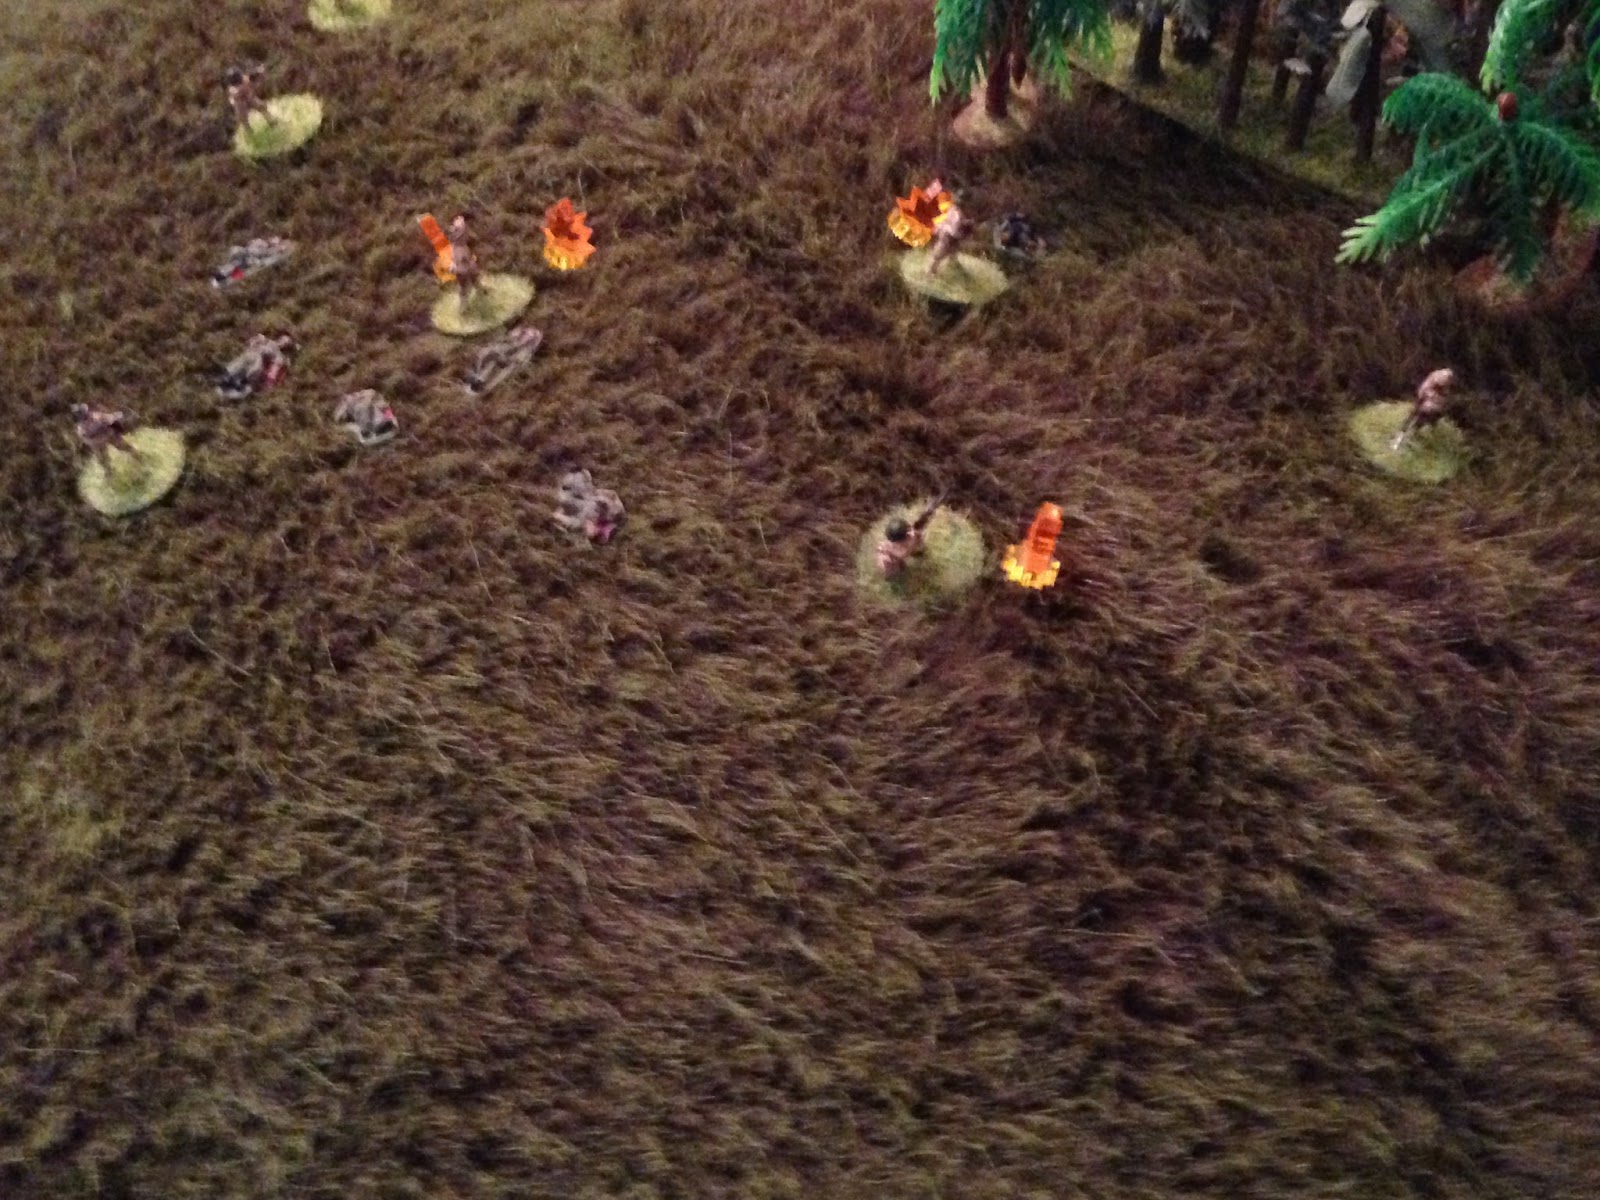


And now the tables are turned. With all the Bushido/Samurai resolve he can muster, angered by watching his friend shot...


So, the fanatic is down, and can only get back in the fight via a friend coming up and checking on him. The last remaining Japanese soldier in the fight (far left) looks on, thinking 'this is going to be quite a challenge.'


Good grief, that got out of hand fast! Here I'm thinking Rozier will dash up there and put this to bed, but he gets whooped, then the enemy fella goes and drops two more Marines after that! A cool, quick fight, accomplished the mission, though more casualties then I'd hoped for. Refreshing to play a quick one after the two monsters previously (each took about 3 1/2 hours). I rolled up to see how the casualties from this fight fared:
Sgt Carlson, WIA, out of action for four days, return 24 Dec 41
Pvt Rozier, WIA, out of action for six days, return 26 Dec 41
Pvt Eaton, WIA bad enough he needs to be evacuated and is done for the campaign
Regarding the five casualties atop Horseshoe Ridge, I had previously rolled to see how they did. There were three bad enough to require evacuation, and two walking wounded (including the Captain). I thought about re-rolling since they'd laid out there all day, but decided against it as I wasn't going to let casualty do any better than the first roll, and I couldn't afford to have anyone do worse! My platoon is rapidly shrinking; we're already down to a Plt Cmdr, Plt Sgt, a 2-man MG team, a 3-man mortar team, and two 7-man squads (down from three 8-man squads, and no sniper), and that's waiting four days to have the next fight in order to get five guys back from recuperating from their wounds, just to get there! So now I gotta come up with a scenario fluff to justify why we're not fighting for another four days ;)
So, here goes. First: Capt Moon: "Cody, I want to say thank you for coming to get us, not leaving us up there for too long. And I know you didn't mean to leave us up there, you had no choice, but thanks for coming."
Sgt Carlson props himself up on an elbow, off his litter: "You bet, Sir, I appreciate ya letting me off the hook. We were always coming for ya, but man it hurt leaving you guys up there. I'm sorry. Oww, man that hurts. How am I gonna explain this, Cap'n? Of all the damn things, get stuck in the ass! I wasn't runnin', I swear! I was reaching for my pistol, the damned Tommy Gun jammed!"
Anyway, the remains of the platoon fall back to the south, then slink off the west, dodging enemy patrols while trying to find the Company Command Post. Of course, they're not making it very far in their weakened state, plus carrying casualties. Capt Moon was finally able to find some Filipinos willing to transport the badly wounded (four more men) back to Cavite; it was getting tough, what with the local population realizing 1) the war wasn't going well, and 2) their were Japanese between them and Cavite/Manila.
On 22 Dec 41 the platoon finally located the CP, only about five miles southwest of Horseshoe Ridge. They got an update from Major Ford, who'd been wounded by an enemy sniper two days ago: "Boys, the situation is rough. 2nd Platoon has taken quite a pounding, and I ain't heard from 1st Platoon in two days. I'd say we're surrounded, but I don't think it's actually quite that bad. I've recently talked to the Army's Brigadier General Parker, in direct contact with him, he's in charge of the defenses on the southern end of the island, while McArthur has General Wainwright running the northern defenses. On a side note, he didn't have any idea there were Marines running around in his back yard! Turns out HQ didn't let him know we were out here training, and when the Japs bombed Pearl Harbor everybody forgot about us."
"In any case, the Japs that landed southwest of us, at Legaspi, are pretty much gone. Sure, there are rear area types running around here and there, but it seems like they landed and beat feet straight through us, on their way to Manila. But General Parker tells me that Navy air reconnaissance has spotted more Jap shipping in the area, looks like they're going to land more troops at Legaspi. And well, there's no use in us trying to fall back and catch the Japs headed for Manila, so General Parker wants to to block the northern route, he's going to have Philippine Army units cover the southern route . You know what that means; back to Horseshoe Ridge, gentlemen."
"Now, I'm off to find 2nd and 3rd Platoons. You can take a day to rest up, but I want you on top of Horseshoe Ridge not later than midnight on 24 December. It should be a cakewalk, no Japanese there now, but just in case, General Parker is lending us a tank, one of those M-3 Stuarts they have. Seems McArthur has two battalions of'em. They were formed into a Provisional Tank Group, but this one had broken down before the war started and was being repaired in Manila. Well, when the invasion hit, General Parker found the crew and ordered them south, and now we got'em!"
"Anyway, you and the tank take Horseshoe Ridge on the 24th, and I'll be following directly with 2nd and 3rd Platoons, as soon as I can. Any questions?"
Captain Moon saw to it that his men got plenty to eat and drink, and plenty of rest. Then they mounted up on the morning of 24 Dec 41 and began making their way back to Horseshoe Ridge.
V/R,
Jack
Only just found this blog Jack! More great, inspiring AARs! Thoroughly enjoying reading them!
ReplyDeleteThanks for taking the time & effort to write & share them
Sorry man, but yeah, I've actually got a total of five blogs:
Delete1. Blackhawkhet - a mix of just about everything, notable for KG Klink (WWII German), All Americans (WWII US Airborne), In Country (US in Vietnam), Operation Jupiter (Brits in WWII Normandy), and Blood & Guts (WWII US Infantry) campaigns.
2. This one, Island Hopping, following a platoon of Marines through WWII in the Pacific. Also thrown in so far, a US Marine fighter squadron, a US Army fighter squadron, and some naval cruiser actions. Soon there will be more: a US Navy fighter squadron, some Aussies, and maybe even some US Army, in Papua/New Guinea.
3. Cuba Libre - a replay of the failed Bay of Pigs invasion set in 1990, and this time it succeeded. The resulting nation dispatches troops all over the world to fight for freedom!
4. Sword of Gideon - Following a unit of Israelis through the various Arab-Israeli Wars. Still stuck in the War of Independence.
5. The Hakuna-Matata Wars, 3mm Modern African Imagi-nations. Actually, I think this is the one you were asking me about.
In any case, my pleasure, I have a great time playing, and a great time sharing/discussing wargaming!
V/R,
Jack
Hey Jack, Don't apologise - it's your hobby and you run it how you want!!
DeleteI'm just glad that you decide to share it with us at all!!
Please keep on doing so!
You bet man, thanks!
DeleteV/R,
Jack