1040
7 May 1942
Greetings, and welcome to my return to the Pacific! Both the US Navy and Imperial Japanese Navy are on the prowl in the southwestern Pacific; the Japanese have their eyes on Australia, or at least cutting off the lines of communication between the US and Australia, and the Americans are looking to not allow that to happen. On 3-4 May 1942, while fighting raged on New Guinea, the Japanese attempted secure their flank, sending an invasion fleet into the Solomon Islands to put troops ashore on Tulagi (across the channel from Guadalcanal), in order to conduct an amphibious assault on Port Moresby on 10 May.
But the Americans noted the Japanese invasion force in the Solomons, and the USS Yorktown launched strike aircraft that sunk or damaged several Japanese warships, though now the Japanese were aware the US carriers were in the vicinity, made doubly worse by the fact the Americans were shorthanded: they had only the Yorktown and the Lexington in the area because the Hornet and Enterprise had just returned to Pearl Harbor following the Doolittle Raid. These were faced by the Japanese fleet carriers Shokaku and Zuikaku, and the light carrier Shoho. The two opposing forces marshalled their troops, refueled, consolidated, and began searching in earnest for each other.
Both sides made various, confused sightings of the other sides' forces, mostly believing they'd found each other's carriers when they hadn't. At 0915 on 7 May, Japanese aircraft found the US fleet oiler Neosho and the destroyer Sims (earlier reported by scout aircraft as the US carriers), sinking the latter and badly damaging the former, leaving it dead in the water, later to be scuttled. At 1040 that same morning, the US strike aircraft from Lexington and Yorktown spotted a Japanese task force. Believing they'd found the Japanese carriers, they assumed attack formation and descended on the enemy ships, only then realizing they'd found a Japanese surface force with the light carrier, Shoho, attached.
The VF-63 "Killer Pelicans," led by Lieutenant Case, an Ace after the squadron's combat debut in the Dutch East Indies, were now embarked upon the USS Lexington. Lt Case had broken the squadron up, one six plane division devoted to strike escort, the other two divisions dedicated to Combat Air Patrol, protecting their floating home base. The six strike escorts, led by Lt Case, lifted off, aiming to protect the SBD Dauntlesses of VB-2 and VS-2 (the two dive bomber squadrons, "Bombing 2" and "Scouting 2"), and the TBD Devastators of VT-2 (the torpedo squadron, or "Torpedo 2"), but the strike package was jumbled, the Americans not yet having ironed out all the kinks of carrier operations. This resulted in the Devastators forming up first and immediately departing without escort, then the SBDs, and lastly Lt Case's six Wildcats, making for a very difficult escort mission!
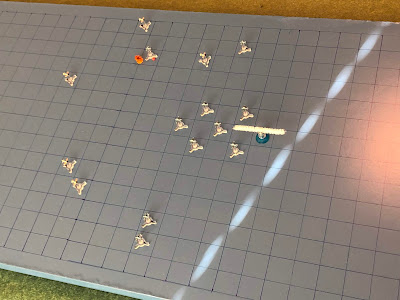
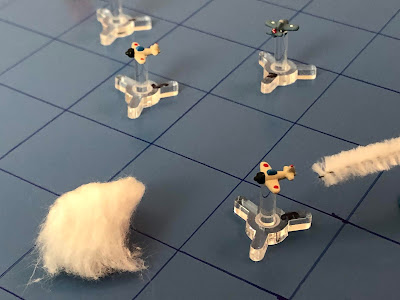
This is my arena for aerial combat; simple, yet durable and, to me, beautiful (in a simple, durable way). I'm using tiny aircraft designed by my buddy Thomaston; not sure what size they are, just that they are much smaller than 1/600. They're 3D printed models that I mounted on cut-down bases from Litko, and I'm using a very simple rules system called "Battle of Britain," which I found for free over on The Miniatures Page (I've already played a good 20 or so fights with them). North is left, where the Japanese carrier Shoho is present, as is her six-plane CAP, while at right, approaching from the south, is the Lexington's strike group, minus the Devastator torpedo planes, which have been unable to locate the target.
Ensign Riggins, a rookie pilot on his first hop
Lt(jg) Casey, a regular with two kills in two sorties, and Riggins' section leader.
The six SBD Dauntless dive bombers, which are referred to as Bomber 1 through 6
Ensign Warren, another rookie on his first hop
Ensign Didier, one more rookie on his first hop
Of course, missing from this fight are Lt Case, the Ace squadron leader, and Ensign Dahlgren, a regular with one kill. They missed this fight as they were searching for the Devastators, then tallied on a Japanese aircraft a few miles back that ducked into some clouds. By the time Lt Case and Ens Dahgren gave up the search, this fight was over.*
*Strike missions only get four fighter escorts, so this is the back story to explain why Lt Case and Ens Dahlgren are not in the fight. And if you're wondering why I played three rookies and left out these two, it's because I rolled dice to see which US pilots would be in the fight, and this is how it turned out. Not optimal, by any means, but it does mean Lt Case and Ens Dahlgren will definitely be in the escort fight(s) on Day 2.
The Japanese Combat Air Patrol, looking to protect their home base from those pesky Yank fliers. I made a big mistake by listening to Thomaston, which will soon become apparent, and rolled up pilot experience for the Japanese. To refresh your memory, pilot experience goes: Rookie, Regular, Veteran, Ace, and Natural Born Killer. Based on the fact that some of these Japanese pilots have been flying, and fighting, for years, I rolled it so that a pilot had about an 8% chance of being a Rookie, and it went up from there, all the way to Natural Born Killer. So, here we go, from the top:
Zero 3: Regular
Zero 1: Natural Born Killer
Zero 2: Regular
Zero 6: Ace
Zero 4: Ace
Zero 5: Regular
Perfect, right? The Japanese Zeros are already getting a +1 for being superior (in terms of maneuverability and climb) to the F4F Wildcats, and now the pilots are markedly better in terms of quality.
Anyway, time to fight!
The situation after Turns 1 and 2.
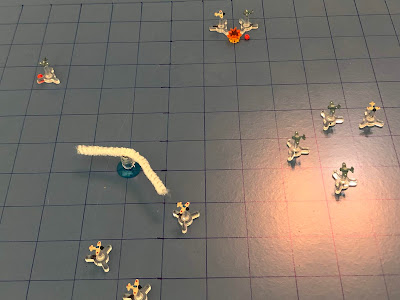
On the US right, Ens Warren is just chilling, cruising straight and level, not really reacting to the oncoming Japanese fighters (top left).
While Lt Casey isn't much better, a bit hesitant, staring at two Zeros directly in front of him.
While on the left, Ens Riggins cruises.
And Ens Didier pulls up on his wing.
Zero 3 pulls right, putting the pincer on Lt Casey.
As Zero 01 jinks in and goes head to head with Lt Casey. Both men stand on their triggers...
And Zero 01 flashes past, unharmed, with Lt Casey's Wildcat roughed up a bit by the Japanese 20mm cannon shells. The Japanese super Ace is now eyeing Ens Warren's stubby little Wildcat (far right).
*When a plane is damaged I am now doing rolls to see if the pilot stays in the fight or returns to base, which I carry out on the plane's next activation after being damaged.
Zero 01 loiters, staying between the American aircraft and his carrier.
On the Japanese right, Zero 06 cruises ahead, waiting to see what the American left-hand Wildcat section is going to do (bottom center right), while eyeing the American dive bombers (far right).
And Zero 04 hangs with him.
While Zero 05, like Zero 02 (top right), plays goalie, staying between the Americans and the carrier (top left).
The Dauntlesses charge ahead.
Ens Warren zooms past Zero 01, looking at Zero 03.
Lt Casey's aircraft is damaged, but he stays in the fight! He kicks the Wildcat into a hard left turn and takes a full deflection shot on Zero 02, but misses.*
*This does not sit well with me, for a couple reasons. One is game balance: right now the Japanese have all the advantages, I'm not sure any of my guys are going to survive this mess. Two, and more importantly, the US Naval aviators are known for having spent tremendous amounts of time training on gunnery, particularly deflection shooting, and when you read about the early war kills by USN pilots flying Wildcats, i.e., Jimmie Thach, Butch O'Hare, etc..., shooting down multiple aircraft in a single fight DESPITE the shortcomings of their aircraft, you read constantly about how the pilot took "a high side, full deflection shot and flamed him." So I haven't done it yet, but some things are going to change, soon.
On the left, Ens Riggins isn't sure what to do, so he really doesn't do anything just kinda hangs out, and Ens Didier does, too.
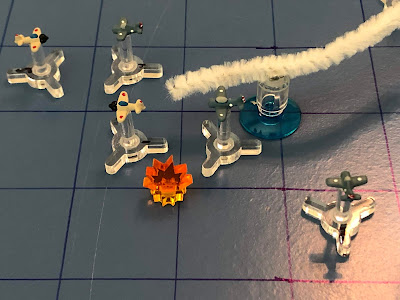
On the right, Zero 03jinks over and goes head to head with Ens Warren. Both pilots fire, but again the Japanese pilot gets away Scott free while the Wildcat is damaged.*
*I think I'm going to make the Wildcat more robust, destroyed only on a 1 or 2, and the Zero more fragile, destroyed on a 1 through 4. Not yet though.
With his section mates handling the American fighters, Zero 01 comes right and opens fire on Bomber 05...
He splashes one Dauntless, then cuts right again, firing on Bomber 04...
Sending the Yankee spiraling down into the sea!
Wow, two kills on one pass. That's a Natural Born Killer for you, getting +2 to his maneuver roll, +1 to his firing roll, and -1 to the enemy's roll when firing on him. Pretty damn powerful...
In the center, Zero 02 cuts right, daring Lt Casey (top left) to follow.
As Zero 06 cuts right and fires on Ens Riggins, but misses.
But the other Ace, Zero 03, zooms in and cuts left, opening fire on Bomber 03...
Splashing him before cutting left and firing on Bomber 01, damaging the Dauntless' flight leader!
The Japanese Aces and NBK are all getting +1 to their firing rolls, so they can afford to take bad deflection shots and still have a decent chance of scoring a hit, which is also depriving the SBDs of being able to take the Zeros under defensive fire.
Zero 05 becomes impatient, cutting left to stalk Lt Casey (top center).
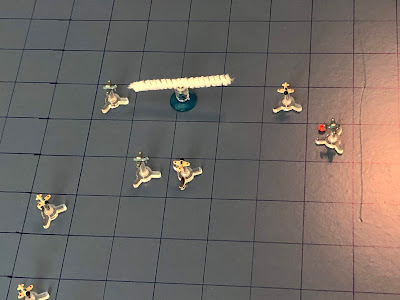
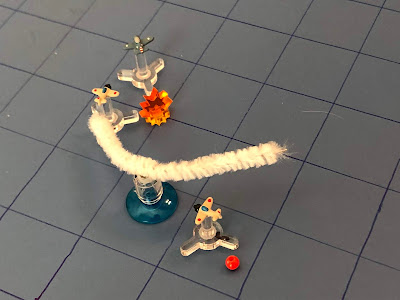
Bomber 02 (top left) and Bomber 06 (center left) press on, but Bomber 01 pulls a 180 to return to base (red bead at far right).
Failed his roll to stay in the fight...
And so does Ens Warren, immediately pulling around to the south to return to the Lady Lex.
He's a Rookie, there was no way he was going to pass that roll and stay in the fight (needed a '6').
Lt Casey, still fighting to get his wounded bird back in fighting shape, sort of sputters along.
But old Ensign Riggins finally gets a little fire in his belly: he pushes the throttle forward and kicks it right, lining up a shot on Zero 02. The .50-cals hammer away and the Zero is damaged.
Ens Didier immediately follows his lead, taking a shot on Zero 06...
But he misses and passes by.
Zero 02 flips around, aiming to land his damaged aircraft, or at least get out of the way.
As Zero 03 gives chase to Ens Warren, but can't catch up to the fleeing Wildcat, who's diving for the deck.
Zero 01, the consummate professional, ignores the damaged Bomber 01 (far right) and turns to follow the two Dauntlesses still in the fight, as Zero 04 (bottom center left) cuts left and lines up a shot on Bomber 02 (far left).*
*Sorry, apparently I missed a picture.
The Zero hammers the Dauntless into submission, knocking it from the sky, then cuts a shallow left turn.
Uh-oh: Zero 06, an enemy Ace, pulls an Immelman to jump on Ens Riggins' tail...
As Zero 05 comes right and takes a bad deflection shot on Lt Casey...
But he misses and zooms past. You can see that Lt Casey is actually eye-balling the damaged Zero 02, maybe hoping for some easy pickins'.
The sole remaining US dive bomber, Bomber 06, pushes north, still nowhere near the target area...
As Bomber 01 pushes for home...
And Ens Warren does, too.
Rather than take the easy way out and go after the damaged Zero 02 (far left), Lt Casey drives in to try and save Ens Riggins, who has Zero 06, an Ace, on his tail. The Wildcat roars in and its .50-cals thunder, and the Japanese pilot returns fire...
And the Japanese Zero comes apart under the intense barrage of .50-cal rounds! Lt Casey scores, downing one of the Japanese Aces, then slides by Ens Riggins' aircraft.
Trying to protect his boss's tail (Lt Casey, bottom right), Ens Didier kicks into a left turn and goes head-to head with Zero 05. Both fire, but both miss...
Ens Riggins pushes ahead, trying to guard Lt Casey's tail.
I missed another damn picture: Zero 01, the Natural Born Killer, rolls in on Bomber 06 (center), looking to down the last US dive bomber still in the fight (Zero 01 would be at right). Zero 01 opened fire, but defensive fire from Bomber 06 and Ens Riggins (bottom right) throws his aim off. He shoots past his target, where Bomber 06 again gets to shoot defensive fire, but again it misses.*
*Defensive fire only hits on '6,' and NBK's cause a -1 to the shooting roll, but I'm still going to let DF hit on a 6, it's hard enough to score.
Then Zero 04 cuts left and takes a pass at Bomber 06. The Zero fires, as does the Dauntless's twin .30-cal MGs in the rear cockpit, but both miss.
The Japanese pilot then cuts right, a perfect tail shot on Ens Didier, and fires, but he misses again!
He then cuts left, disgusted...
He rolled two '1's in a row!
Zero 02 pushes for home.
Zero 05, suddenly finding himself in some very congested traffic, freaks out a little bit and just kind of sputters past Ens Didier's Wildcat.
And Zero 03 finally cuts right to get back in the fight, giving up his chase of Ens Warren (teturning to base, off camera to far right).
Bomber 06 cuts left, still pushing north towards the Shoho.
Ens Warren and Bomber 01 reach safety.
Lt Casey kicks his damaged Wildcat hard left, onto Zero 01's tail, and fires, but the crafty Japanese pilot makes his aircraft shimmy and shake, ensuring none of the Wildcat's tracers find their mark.
It's kinda hard, shooting at a Natural Born Killer. All Lt Casey needed was a 3+ to hit, and that's exactly what he rolled, but then it was -1 because he was shooting at a NBK, so he missed. The exact same thing would happen again later.
Ens Didier jukes ahead, defensive.
As Ens Riggins cuts left, defensive too.
Zero 02 nears home base.
Despite the rounds missing, Zero 01 is spooked a bit with how easy it was for Lt Casey to get on his tail and line up a shot, so he cuts hard right, defensive.
While Zero 04 does the same, biding his time, confident the Americans will make a mistake that allows him to swoop in.
While Zero 05 flips an Immelman, a great move to get back into position.
And Zero 03 continues working his way back to the fight.
Bomber 06 keeps pushing north (left), but it seems a losing battle, the old Dauntless just is not going to outrun a Zero, particularly against these hotshot enemy pilots. And the Wildcats are not in good position to support him...
Ens Didier, is frantic, with enemy all about him. He scans the sky forward and left, left and right, high and low, turning in his seat, craning his neck, but all that gyrating causes him to lose focus and he simply sputters ahead, barely above stall speed. Probably just signed his own death warrant.
I know these guys are rookies, but these @#$%ing maneuver rolls for the Americans have been pathetic, while the Japanese are regularly getting seven and eight-bangers (rolling a six, plus the +1 or +2 for being an Ace or NBK)...
But while Ens Didier (top left) is drifting aimlessly, Ens Riggins is laser focused: he cuts right, onto Zero 01's tail, and cuts loose with his .50-cal HMGs, and again an American dead on the tail of the Japanese NBK misses...
Zero 04 (bottom left) now has a very interesting choice to make: he can go for the easy kill, cutting right onto Ens Riggins' tail, or he can continue left, and chase down Bomber 06.
Lt Casey, once again, to the rescue. Or at least he attempted rescue: Lt Casey sees the peril Zero 04 is putting Ens Riggins (top center) and Bomber 06 (off camera to left) in, so he cuts left and takes a full deflection shot on Zero 04...
The .50-cal rounds chew up the fragile Zero, and it crashes into the sea, giving Lt Casey his second kill of the day! He almost relaxes as he cruises by the enemy splash; he shouldn't.
Zero 02 escapes to the safety of the lee side of his carrier.
As Zero 01 cuts in behind Ens Didier and opens fire...
The Zero rakes Ens Didier's aircraft, but the sturdy little Wildcat somehow remains aloft!
But then Zero 05 cuts left and takes a 2 o'clock shot on Ens Riggins...
But he misses and flashes by!
But Lt Casey is in a bad way: Zero 03 rolls in on is tail. He performs evasive maneuvers, but he can feel the Wildcat shudder as 20mm rounds slam into his fuselage...
Lt Casey is hit! Blood blocks his vision and he feels nauseous, brought back to reality by an intense heat and the smell of smoke. Fire! Lt Casey somehow manages to pull the canopy back and bail out.
Lt Casey drifts down into the ocean, where he quickly shrugs out of his harness, inflates his life raft, and climbs in. He does his best to bandage up his wounds, then sits back, suddenly realizing he has a front-row seat to the show. He looks skyward to see Bomber 06 cut right, heading north, and traces its line of flight forward, to where the enemy carrier is lying.
*Lt Casey would ultimately be picked up by a friendly, shore-based PBY two days later, and whisked away to safety at the US base on Espiritu Santo. Unfortunately, however, the good Lieutenant was wounded badly enough that he would be out of action for the next couple months, meaning he would miss the big fight at Midway in June...
Ens Didier turns his aircraft about and heads for home.
Again, no way a rookie was going to pass the roll after being damaged. But now Ens Riggins finds himself all alone against three Japanese Zeros.
So he does the only thing he can, he tries to even the odds! Ens Riggins pushes his Wildcat left, onto Zero 01 for another run, but again the cagey enemy pilot shakes him...
And to add insult to injury, Zero 01 then pulls away in convincing fashion, leaving Ens Riggins (top right) far behind, and boxing in Bomber 06 (bottom left).
And Zero 05 moves in to close the trap.
But Lady Fortune does, indeed, smile on the Yanks, as Zero 03 cuts right and takes a shot on Ens Riggins...
But misses and comes off right!
Bomber 06 cuts right, running for his life, two Zeros in hot pursuit!
Ens Didier pushes his damaged Wildcat for home.
As Ens Riggins pushes hard to keep helping Bomber 06 (far left) as much as he can: he cuts left, onto Zero 05's tail, where he opens fire, walking his tracers onto the enemy plane...
It shudders, but ultimately remains aloft, damaged. Its pilot pulls right, still chasing Bomber 06 (top left)...
But Zero 01 has swooped in for the kill, diving onto the Dauntless's tail and opening fire at point bank range.
Splashing the last US dive bomber less than a mile from the Shoho, not far from where Lt Casey was floating in his life raft.
Zero 03 comes left to reengage, the Japanese relaxing a bit as the threat to their carrier is averted...
But it's premature! Ens Riggins jinks in behind Zero 05 and gives him burst...
The enemy fighter drops into the sea, cartwheeling, as Ens Riggins flips his aircraft around, looking to escape.
But Zero 01 has noticed the dastardly Yank shooting down his damaged comrade, and he's pissed! He zooms in and lines up a shot on Ens Riggins' Wildcat, and opens fire...
Ens Riggins' aircraft is damaged, but he's able to out-dive the Zero and escape!
*I thought about just letting Riggins get away after downing Zero 05, but then I thought, 'let me roll to see if Zero 01 can do anything,' and I'll be damned if he didn't roll well enough to come all the way back and get a shot in. So then I said to myself, 'okay, it was kinda dirty letting Riggins fire on the damaged Zero 05 after all the dive bombers were shot down (as opposed to just flipping around and heading home), so I'll just let Zero 01 get one shot in.' Well, of course, being a NBK, he scored, but luckily he only damaged the Wildcat.
Just then Zero 03 calls his flight leader on the radio, informing him of trouble. The super Ace immediately cut left to rejoin his comrade...
But it's too late, dive bombers from the Yorktown have slipped past the Japanese CAP...
And they press home their attack, scoring several hits on the Shoho! And then the Lexington and Yorktown torpedo bombers showed up to seal her fate: hit by seven torpedoes and thirteen bombs, the Japanese light carrier would sink at 1135 in the morning.
Ensign Riggins pulls up alongside Ens Didier for the long ride home.
Yes, this fight was an absolute debacle for the US, a complete and resounding defeat for the United States, I just threw in the Yorktown dive bombers for narrative purposes as, in real life, the Shoho was sunk. But what a disaster! The US lost their only experienced pilot, not just for the remainder of the this battle (the real work during the Battle of the Coral Sea is on Day 2), but for Midway as well! And the other three Wildcats were damaged, which is bittersweet, as at least they make it back to the Lexington and lose their Rookie status, becoming Regulars. But only one SBD made it back, the other five being shot down and not one bomb being dropped on the target! Ugh...
But there is good news: two fliers were decorated for valor, as both Lt(jg) Casey and Ensign Riggins showed tremendous courage in exposing their aircraft to enemy fire in order to assist comrades. Both pilots were awarded the Bronze Star with 'V'. Lt Casey also surpassed three kills, which makes him a Veteran, and actually has four, leaving him one shy of becoming the squadron's second Ace.
Lt(jg) Casey, 2 kills, awarded BS/V, becomes a Veteran, promoted to Lieutenant, shot down, WIA, out for two months (return July 1942)
Ensign Riggins, 1 kill, awarded BS/V, becomes a Regular, promoted to Lieutenant Junior Grade, damaged
Ensign Didier, becomes a Regular, damaged
Ensign Warren, becomes a Regular, damaged
The Lexington and Yorktown still had scouting patrols out to locate new enemy targets. The scouts had identified a surface warfare task force and a transport task force (carrying the Japanese 'South Seas Detachment,' the Port Moresby invasion force), but with the enemy carriers still not located, Admiral Fletcher decided to hold off on launching another strike.
The US had sent a surface warfare task force north, which was promptly located by the Japanese. The Japanese carriers were still waiting on their strike force (which hit the Sims and Neosho) to return, so Admiral Inoue ordered two groups of bombers from Rabaul to attack. At 1435 they did, without effect, as did an errant flight of US Army B-17s... The US surface force then promptly withdrew.
Admiral Inoue very aggressively continued to scout for the US carriers, and at 1515, when the strike force that hit the Sims and Neosho returned, he even quickly rearmed them and sent them south, certain his scouts would locate the US carriers, and then he could vector the strike force to them. But it was not to be; the Japanese scouts were unable to locate the US carriers, but the strike force, flying bling in bad weather, stumbled close enough to them that the Lexington and Yorktown were able to vector their CAP over to intercept. At 1747 the US Wildcats tore the Japanese strike force a new one, sending the survivors back north, scrambling to safety without ever having seen the US carriers!
And that is the next fight!
V/R,
Jack














No comments:
Post a Comment