It's 1510 on 21 February 1942, and Captain Moon's platoon is in a heckuva fight! Harassed and harried by the Japanese as they try to find their way off Sumatra following the loss of their base at Palembang, they've been bottled up and are trying to fight their way out of it. This is game three of a four fight operation played out in 15mm using Eureka Minis (plus a Peter Pig Japanese MG team) and Ivan's "Five Men at Kursk" rules. The games were all solo fights, and the action all happens within a 20 minute timespan as the Marines fight for their lives against superior numbers of enemy forces.

Overview of the entire battlefield, north is up. This is a 4' x 4' table, but each of the four fights will be fought out separately on a little piece of the above table. Here's the lowdown: at left center is Sgt Carlson, the porters, and the wounded, sitting tight, while Cpl White and the base of fire team is at center top, looking to lay down fire on the Japanese MG position (just right of the river and above the trail, at top right), while Captain Moon and the assault element (center bottom) has moved up and is ready to cross the river. But the first fight happens as they cross; they didn't have time for a proper reconnaissance, so they moved up to the river unaware a Japanese squad was patrolling on the other side of the nearby knoll (far right), and Cpl White's base of fire element didn't know the Japanese MG position contains more than just the MG team, there's another five Japanese riflemen behind them, just waiting to make life more difficult. And once the fighting breaks out, the noise draws Japanese from the north out of the woodwork, and they begin moving up the trail (top left), closing in on Sgt Carlson, the porters, and the wounded.
In the first fight, Captain Moon signaled Cpl White's team, then assaulted across the river and took the knoll, losing one man (Pvt McNair) to a wound in the groin. They are now forming up on the hill at bottom right to assault the Japanese machine gun position. As soon as Captain Moon signaled, Cpl White and his men opened fire on the Japanese MG position to keep it pinned down, or at least distracted, so Captain Moon and his boys could cross the river and flank it.
In the second fight, Cpl White and his base of fire element opened up on the Japanese machine gun position, but were surprised when enemy rifleman tried to flank them on the left. They put up a spirited defense in the river and the jungle nearby that saw them stop the enemy push cold, but at the cost of losing Pvt Jennings and having Pvt Cofer badly shot up. The remaining three Marines took cover and plinked away at the Japanese MG team to keep their attention while waiting for Captain Moon's assault element to flank the enemy gun.
This is where we're at, the Japanese MG team (bottom center) firing at Cpl White and Privates Allen and Irving (top center), who are waiting for Captain Moon, who has already crossed the river at far left) to eliminate the enemy position.
While Cpl White's base of fire element (far left) is taking fire, Captain Moon finally has the assault element up and moving again (center, right, and bottom center).
The Marines, from left to right: Cpl Dishman, PFC McNeal, and Captain Moon (top left), Pvt Gibson (bottom center), and Pvt Jamison (right). Capt Moon looked around; "well, looks like we're about ready to go, eh boys? Alright, up and at'em, this should be short and sweet!" And with that, the Marines were up and moving on the Japanese MG team (top center).
Gibson (bottom center) kicked off the fight by sighting in with his Springfield '03 and firing...
And accomplishing nothing but causing the Japanese team leader to turn and take a look. He quickly let out the Japanese equivalent of "gadzooks! There are enemy soldiers behind us!"
Capt Moon, Cpl Dishman, and PFC McNeal (left) all open fire...
And manage to suppress the gunner and his assistant! The team leader says, "I told you there were enemy soldiers behind us..."
Then it's time to go over the top, so to speak. The Marines hustle forward, looking to close with the enemy while their still shocked at finding enemy soldiers behind them. Captain Moon quickly mutters a prayer that Cpl White is watching and doesn't accidentally light them up...
The Japanese team leader blazes away with his pistol
Cpl Dishman is knocked down and McNeal is pinned (white bead and yellow bead, respectively), as Captain Moon returns fire with his service pistol!
He doesn't hit anything, but it's close enough to convince the enemy team leader to fall back. He quickly rallies the gun team...
And they quickly reposition the gun. This is what we call a supplementary firing position, specifically used for those times you find yourself flanked.
Gibson, maintaining position to cover the group with his rifle (bottom left), keeps popping away...
Suppressing the enemy team leader.
PFC Jamison (bottom left) levels his Tommy Gun and cuts loose...
Pinning the gunner and assistant.
Jamison then dashes up, behind the gun position (far right, from bottom center), while McNeal grabs Cpl Dishman and drags him forward, into the lee of the hill, out of the line of fire (far left).
Captain Moon pulls the pin on a grenade, dashes forward (center, with Jamison at top right), and tosses the frag into the Japanese machine gun position (blue bead)!!!
The Japanese look at each other and decide it's time to un-ass the position. They grab their personal weapons (to include that big-ass Samurai sword!)…
And charge, running into Jamison (bottom left), Captain Moon (center left), and McNeal (top left).
The Skipper meets the enemy team leader...
Never bring a sword to a gunfight!
The assistant gunner lunges at Jamison with his bayonet...
But Tommy Guns are made for situations such as this!
While the enemy gunner also lunges with his bayonet, hoping to get McNeil (yellow bead) and then Cpl Dishman (white bead)…
As I mentioned, Tommy Guns are made just for this type of situation.
Captain Moon (center), quickly looks around, checking to make sure his Marines are okay. He lets out a sigh and pushes his helmet back...
And then pisses his pants as his frag goes off in the machine gun position! Luckily no one was hurt.
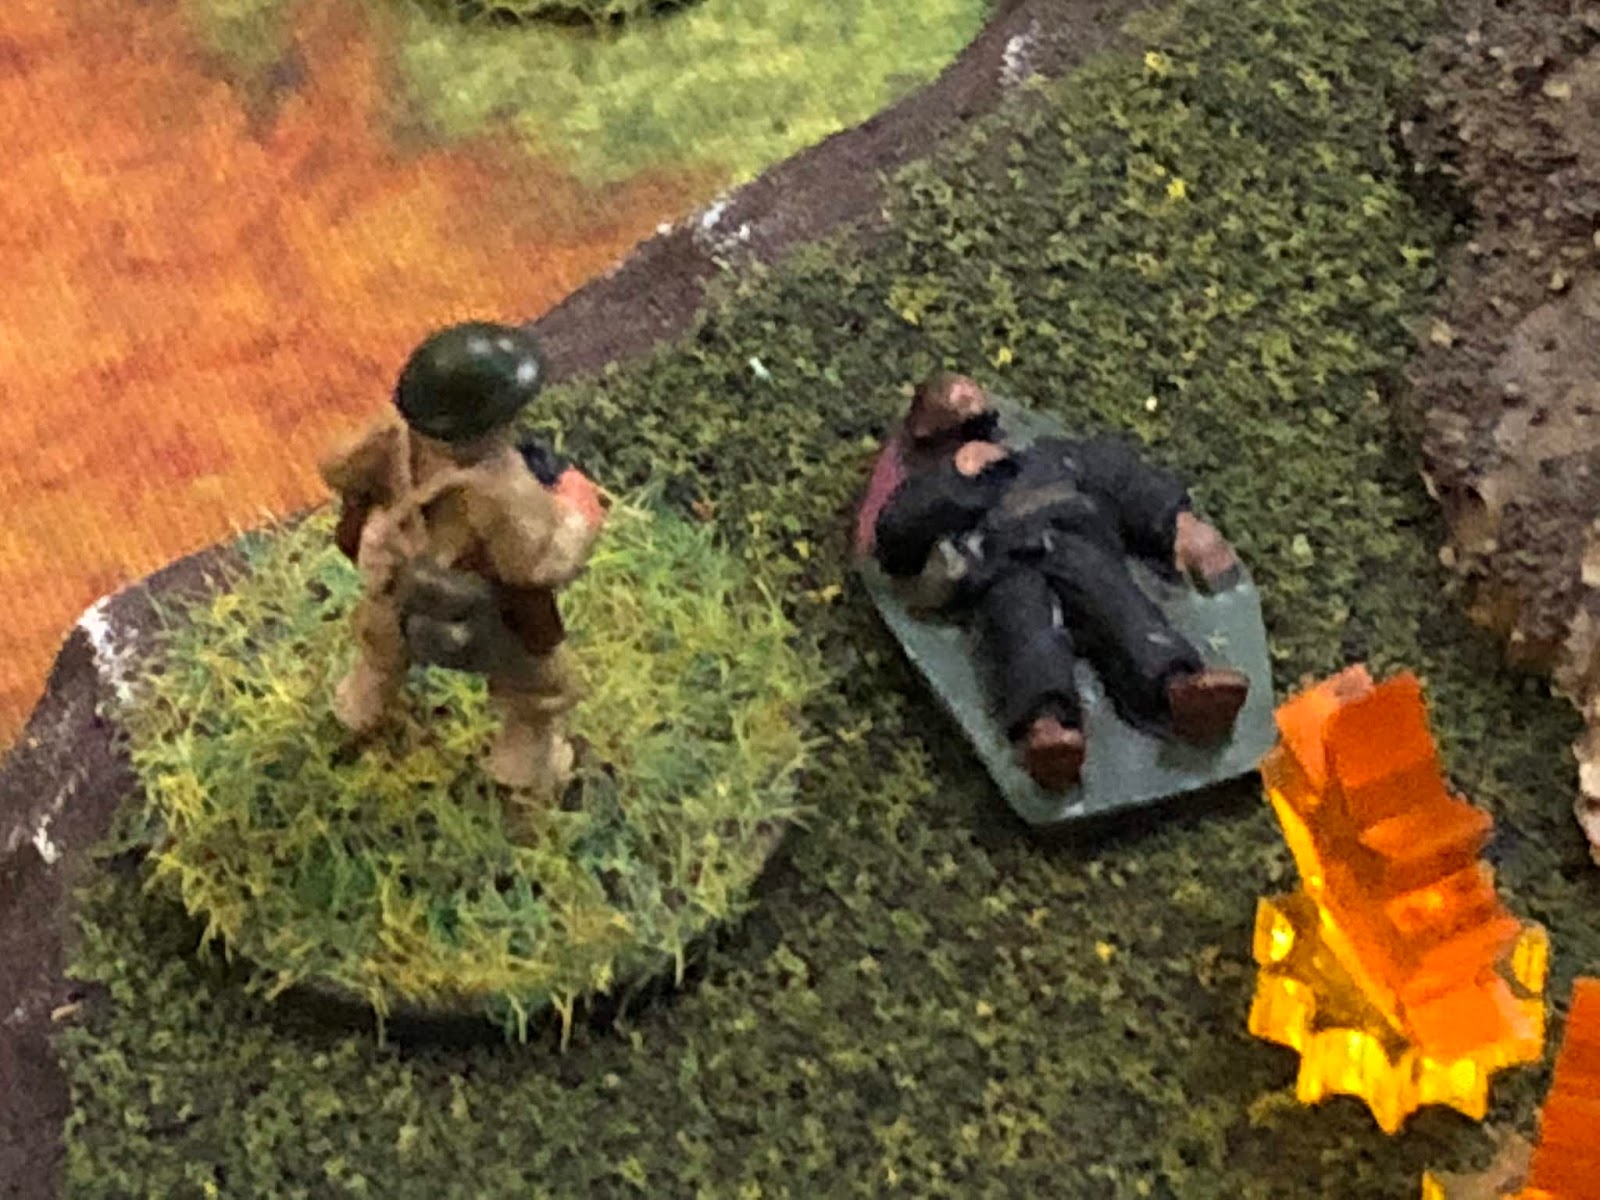
The Marines quickly consolidate on the position, with Captain Moon (left) signaling the rest of the platoon that it's safe to come on up, and Pvt Gibson bringing McNair (bottom right; McNair was badly wounded in the first fight of this series) up. "Sir, McNair's not looking so hot." "It's okay Dennis, do what you can to keep the dressing clean, and give him some water, we'll be moving as soon as Cpl White and Sgt Carlson get their men across the bridge."
But as soon as those words left his lips, shots rang out at the rear of the column; the pursuing Japanese patrols had caught up while they were tangling with this damn machine gun position! Last Marine infantry fight of the Dutch East Indies coming right up!
V/R,
Jack


No comments:
Post a Comment