It's 1000 on 19 February 1942, in Darwin, Australia, and a massive air raid by Japanese carrier aircraft is inbound. The Chickenhawks are down to 12 pilots and aircraft, but they scramble everyone, four pilots in three successive flights, rising to defend the myriad ships docked in the bay, nearly defenseless against the coming onslaught.
I'm using some amazing, but teeny-tiny aircraft from "Thomaston," whom I met over on The Wargames Website when he posted some pics of what he calls "Tiny Air Combat" (https://www.thewargameswebsite.com/forums/topic/tiny-air-combat/page/3/), and I'm using some simple rules posted by "Tango" over on The Miniatures Page (http://theminiaturespage.com/boards/msg.mv?id=489811).
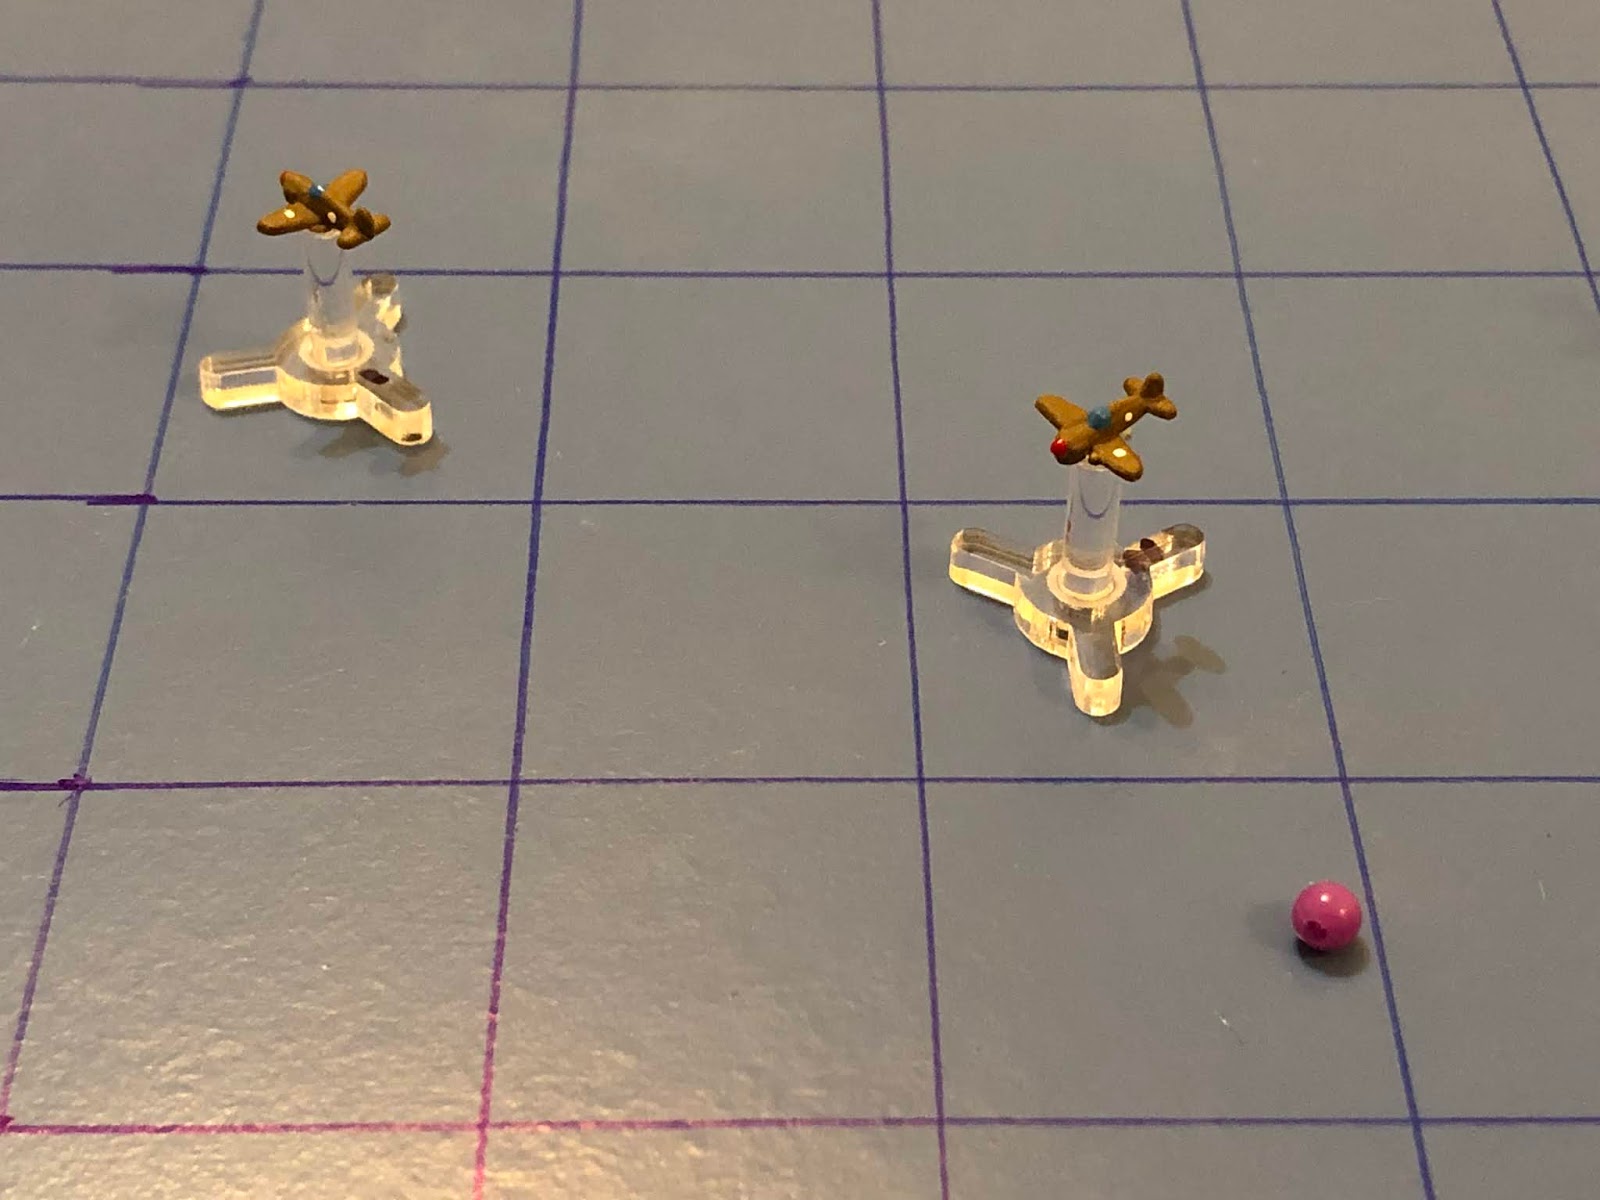
The new set up, sun blazing and reflecting off the warm waters of the Timor Sea. Six Japanese bombers are inbound from the west (left), escorted by two fighters, as four P-40s rise to meet them from the east (right).
The Chickenhawks, from top to bottom:
Chicken 02: 2nd Lt Beach
Chicken 01: 1st Lt Kimble
Chicken 03: 1st Lt Goode
Chicken 04: 2nd Lt Daniel
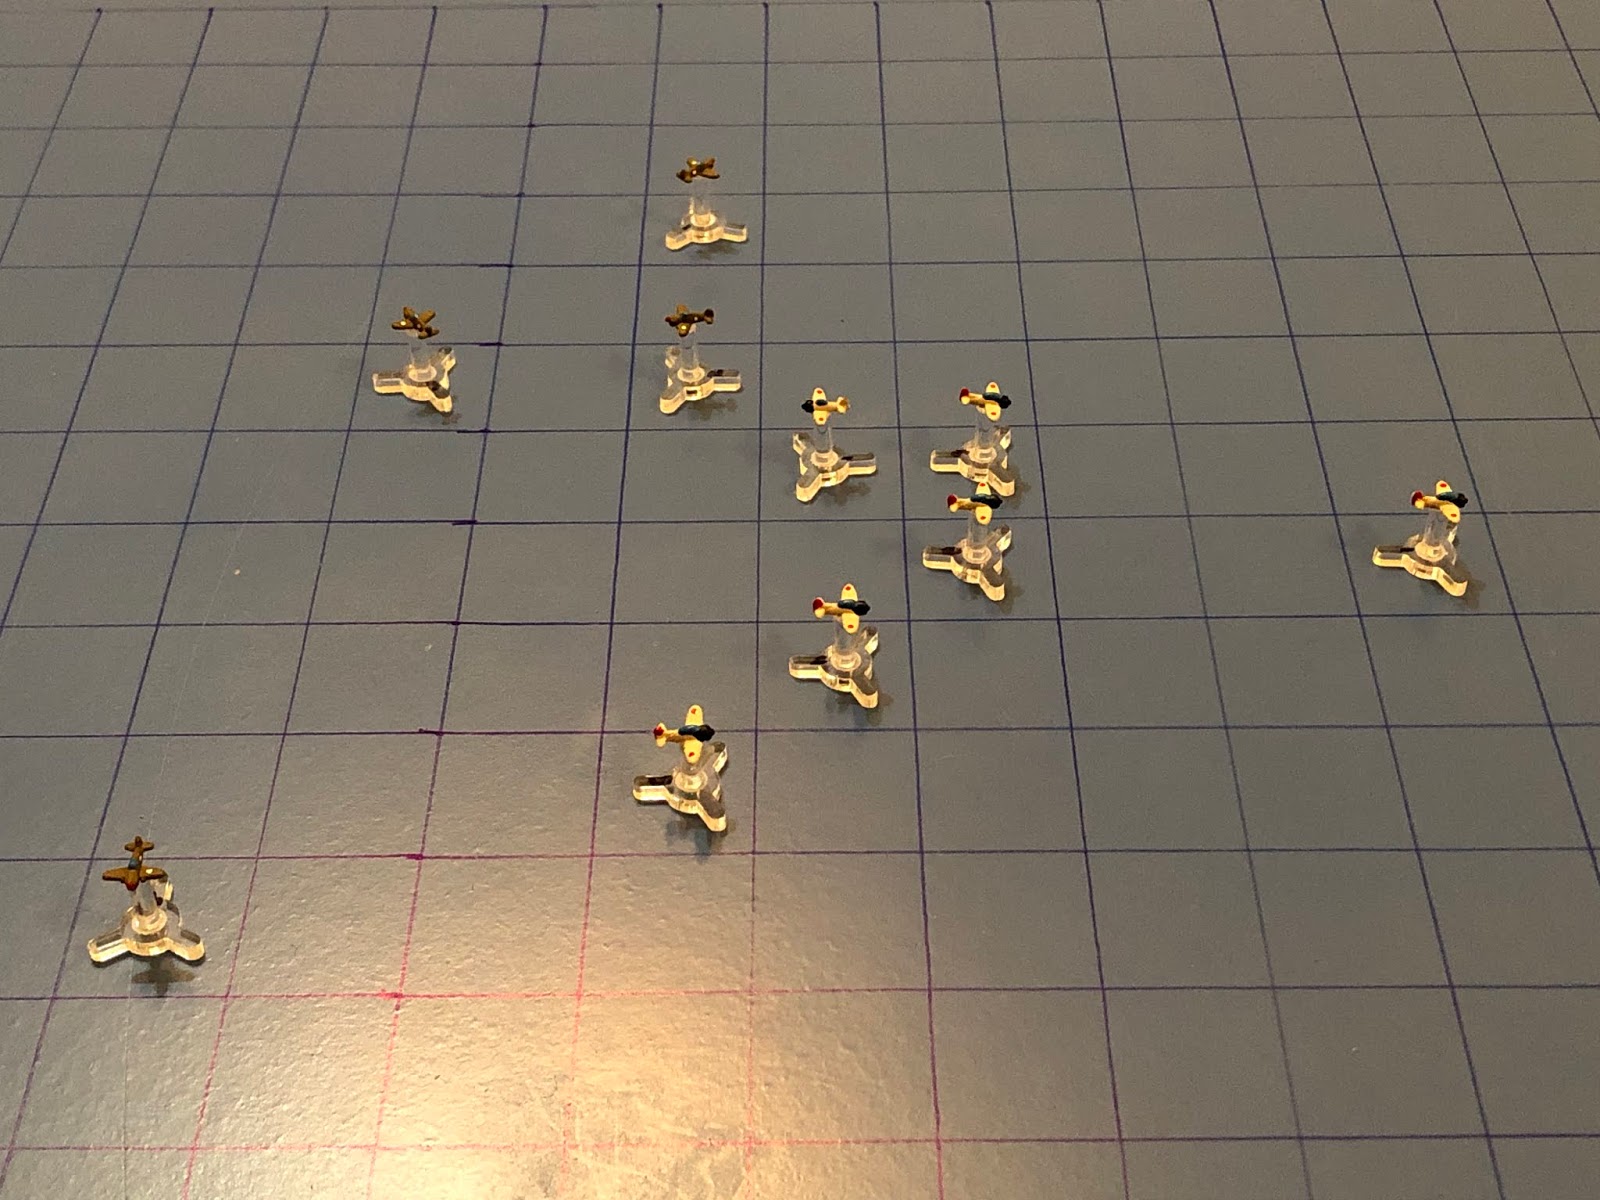
The Japanese 1st carrier strike, six D3A "Val" dive bombers escorted by two A6M "Zero" fighters. From top to bottom:
Zeke 01
Left top: Val 06, Val 04, Val 05
Right top: Val 03, Val 01, Val 02
Zeke 02
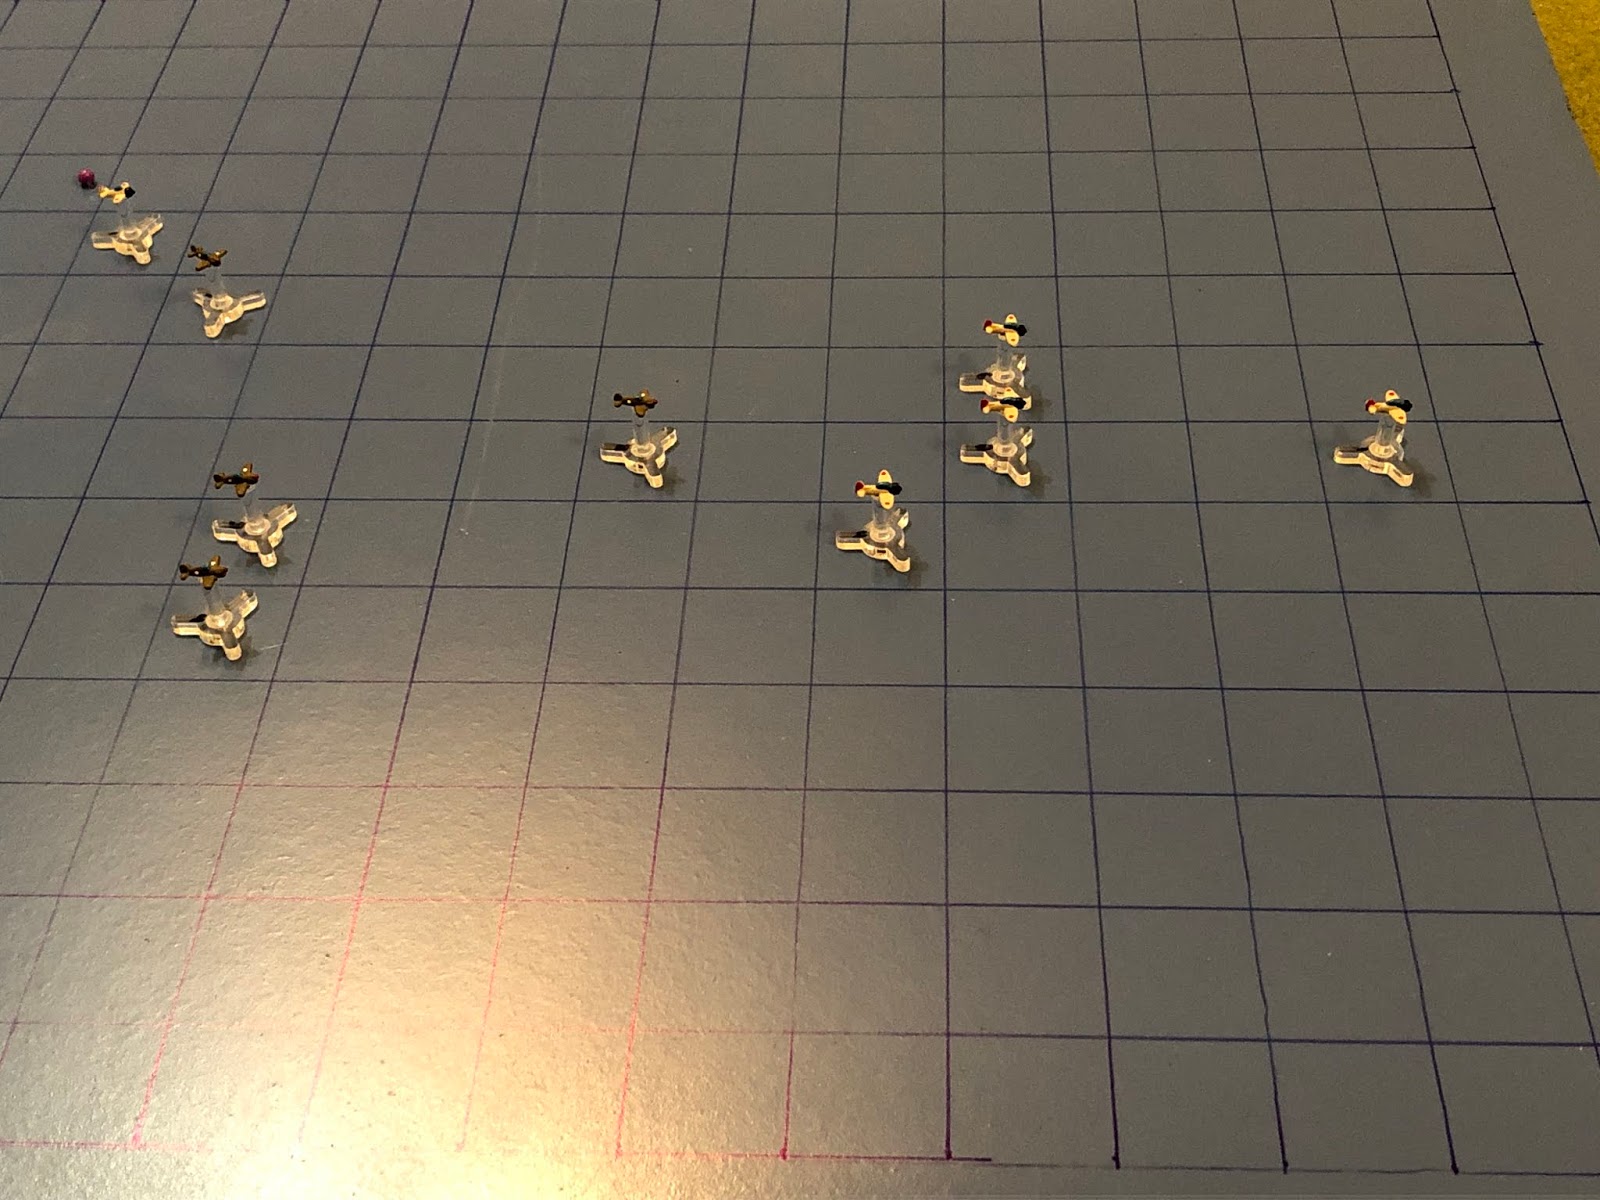
Turns 1 and 2 see Zeke 01 (center top) charge out ahead to meet the Americans (right), time to fight!
*The Vals are pretty quick, moving 4 squares, not the 3 squares the Bettys and Helens have been churning, though the Kate torpedo bombers we'll soon see will only move 2 squares.
In the south, Zeke 02 sputters ahead (bottom center), unable to keep up with his leader (top right) and so unsure of what he should do.
And then Zeke 01, his wingman hanging back (off camera to bottom left), suddenly doubts himself, and sputters left (top left).
Lt Beach pushes in, tucking up close to Zeke 01, intent on getting at the bombers.
As Lt Kimble zooms by (far left).
Lt Goode hangs back (furthest right) to deal with Zeke 01, as Lt Daniel zooms furthest (center left, with Zeke 02 at bottom left).
And here come the Vals.
Zeke 01 plays defense, cutting in behind Lt Beach.
While in the south, Zeke 02 cuts left and charges Lt Daniel, 20mm cannons thumping and 7.7mm MGs rattling...
He misses Lt Daniel (bottom left) and cuts left, firing on Lt Kimble...
Missing again and cutting left, defensive (left).
*Wow, he had two decent shots and missed both of them! Not impossible, maybe not even improbable, but certainly problematic for the Japanese fighters, down 4 to 2.
Lt Daniel is a little freaked out by Zeke 02's firing pass, and he sort of just sputters straight into Val 02, snapped out of his shock by tracers zipping past from the Val's forward firing machine gun. He stands on the trigger and the Japanese dive bomber explodes in front of him!
Further east, Lt Beach (top) turns into Zeke 02 and fires...
Splashing the Zero, as Lt Kimble cuts right (top left) to get position on the Japanese dive bombers.
And Lt Goode follows him (left, with Lt Kimble at top left and Lt Beach at top center).
The Japanese bombers push east, but they're formation is broken up, three aircraft being forced to cut right.
The remaining Zero, Zeke 01, pulls right (center) in behind Lt Goode and opens fire, but misses!
As Lt Goode pushes left, head to head with Val 06, braving defensive fire from her and Val 01...
But everyone misses and Lt Goode cuts right (top left).
Lt Kimble cuts right (top center, with Lt Goode at far left and Lt Beach at far right).
Lt Daniel cuts hard left (bottom center).
While Lt Beach finds himself in the middle of a helluva furball and vapor locks, sputtering straight ahead (center)…
As the Japanese bombers straighten up and continue east.
Zeke 01 cuts hard right (center top) onto Lt Kimble's tail and fires, but misses!
*The Americans are having some horrendous Maneuver rolls, while the Japanese firing rolls... Well, they're really beyond horrendous.
But Lt Kimble is thrown by suddenly having tracers flash past his head and only manages to sputter right (top right).
Lt Beach cuts left, braving defensive fire that, luckily, misses, and he can't get a shot off.
*Not one of my more inspired moves, but like I said, my maneuver rolls are sucking, and at least this points him in the right direction.
As Lt Daniel cuts left, exchanging fire with Val 05, to no effect!
And is matched by Lt Goode (center right) playing exactly the same game with Val 06 (Lt Daniel is at bottom right)!
And the Vals scurry further east, leaving all the American fighters behind them.
Zeke 01 pulls hard right, going defensive by splitting and keeping close to Lt Goode (bottom) and Lt Kimble (top). He's also kinda chuckling to himself about the ineptitude of the Americans at allowing the Vals to get past them...
Lt Goode again pursues, cutting left, avoiding defensive fire, and shooting at Val 04 (bottom right), but missing again!!!!
*This is ridiculous!!! At this position, dead on 6 o'clock, you only need a 3+ to hit!!!
But things are looking up: here comes Lt Daniel, kicking it in the ass to catch up, pulling in right behind Val 05. The enemy tail gunner sprays tracers his way as Lt Daniel (right, with Lt Goode above him and Lt Kimble at top center) stands on the trigger...
Val 05 goes down in flames as Lt Daniel pulls even with Lt Goode.
Now it's Lt Beach's turn: he flashes straight in (right, with Lt Goode then Lt Daniel below and behind him, Lt Kimble just visible at top left), pulling in behind Val 03, hammering away with his .50-cal MGs as defensive fire comes in from Val 03 and Val 06...
Everyone misses, then Lt Beach overshoots and takes more defensive fire, but it misses, too!
Lt Kimble continues playing cat-and-mouse with Zeke 01, cutting right to stay close, continuing their rolling dogfight (not a great place for a P-40 to be against a Zero).
As the Vals get closer to the target area.
The game between Zeke 01 and Lt Kimble continues, neither able to gain advantage.
*You can't shoot at someone right next to you, you have to move at least one square before you're eligible to fire, so it might seem a bit counterintuitive, but the defensive play is to stick right next to your foe.
Lt Beach continues his dogged pursuit, again closing straight in on Val 03, the two airplanes spewing hot lead at each other...
The Japanese dive bomber splashes into the ocean, but Lt Beach's P-40 was riddled by the tail gunner and is damaged!
And now it's Lt Goode's turn: he zooms straight in (right, with Lt Beach above him), ignoring the enemy tail gunner...
The six .50-cals rip the Val to shreds and Lt Goode pulls up (center bottom left), beaming from ear to ear, having just become the Chickenhawks' first ace!
Lt Daniel kicks it into high gear, pulling ahead and left to cover Lt Beach's tail (right), to protect him from Zeke 01, hoping Lt Kimble will quit screwing around and finally down the bastard (top left)!
But now, they're twisting, turning dogfight continues as Lt Kimble jinks back and forth, staying close to the enemy fighter, still defensive.
Only two Vals remain, but Val 01 makes it to the target zone (the area where the US fighters have to break off for fear of being shot down by their own anti-aircraft gunners) and Val 06 is right at the edge.
Zeke 01 stays defensive, nice and tight on Lt Kimble.
As Lt closes on Val 06, braving defensive fire, and both miss!
Lt Beach charges in, but he can't get a clear shot (top right, with Lt Goode below him)! Lt Daniel (far left) sees there's no way he's getting the last Japanese dive bomber before he gets into the target zone...
So he cuts back left, looking to help Lt Kimble with the last Japanese fighter.
But still Lt Kimble can do nothing decisive, pulling ahead and to the right (bottom right, Lt Daniel above him).
As the last Val enters the target area...
And the enemy Zero disengages.
The P-40s look to form up as two Vals enter the target area...
A very interesting fight, especially so since the Americans didn't lose any aircraft! A goodly amount of kills, but they still let two bombers into the harbor, ready to pounce on the friendly shipping. Kills were as follows:
Lt Beach: 2
Lt Daniel: 2
Lt Goode: 1, becoming the Chickenhawks' first ace.
Lt Daniel is kinda pissed with Lt Kimble for not whacking the last Japanese fighter, but both Beach and Goode tipped their hat to him for his skill in wrapping up the nimble enemy aircraft, tying him up so they could focus on the bombers, of which they devoured four.
Next fight is the second flight of Warhawks, led by Captain Jordan, coming up to meet another group of Japanese bombers.
V/R,
Jack


Hey Jack,
ReplyDeleteWonderful report! Glad to see the chicken hawks are still flying, though I can believe some of the rolls, 3+ to hit and still a miss!?! Haha , great job, are you still having the little one control the opposition forces?
Johnson,
DeleteMan, you're quick! ;) Yeah, nothing beats getting a great roll to pull off some crazy maneuver to get dead on someone's tail, and then you blow the easiest shot you'll ever see. These Darwin fights were all solo, I was off and get some games in while he was at school ;)
Alright man, it's after Christmas, time for you to start posting some fights! ;)
V/R,
Jack
Oh don’t you worry jack,
DeleteI got something I am working on, just need to finish painting two planes (waiting for super glue to dry) and I wil get them on the board for something super familiar?... ;)
Fantastic, I can't wait man!
DeleteV/R,
Jack
Hi Jack,
ReplyDeleteSounds a great fight, pretty intense - but no pictures showing up for me.
John,
DeleteHmmm... Damn man, I've looked around but can't figure out why that would be. I didn't do anything different than all my previous batreps, and no one else has mentioned it, so I have no idea why you're not able to see the photos.
V/R,
Jack
Not sure what's going on at all. I've messed with it but can't figure it out. No one else has mentioned problems with this batrep, but I've had one guy tell me he had problems with the next one...
DeleteV/R,
Jack