It's noon on 13 February 1942, at an Allied airbase at Koepang, Dutch Timor, on the eastern edge of the Dutch East Indies (DEI). The VF-63 Killer Pelicans, led by Lieutenant Shawn Collins and sporting brand new F4F Wildcats, were on the way to Philippines when the decision was made two days ago to cancel that trip and instead divert them to the DEI, so the USS Langley made a quick detour to Timor, dropped them off, and headed to Australia. The Naval aviators had just enough time to get settled in and check their aircraft out before incoming bogeys of the Japanese 1st Air Fleet, operating out of Kendari, Celebes (captured 24 Jan 1942), were spotted. The Killer Pelicans immediately scrambled six Wildcats to meet the enemy.
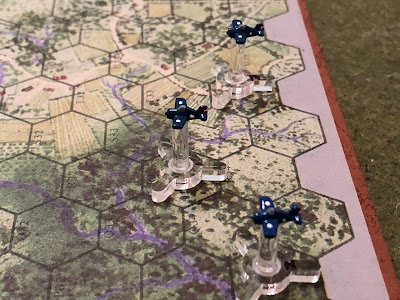
My initial setup. I'm using some amazing, but teeny-tiny aircraft from "Thomaston," whom I met over on The Wargames Website when he posted some pics of what he calls "Tiny Air Combat" (https://www.thewargameswebsite.com/forums/topic/tiny-air-combat/page/3/), and I'm using some simple rules posted by "Tango" over on The Miniatures Page (http://theminiaturespage.com/boards/msg.mv?id=489811). I've actually played seven dogfights using these rules already (yeah, taking me a long time to get them written up for some reason) and I really like them, but I've got a problem with my playing surface. One, with the tiny aircraft, my old "Flight Leader" boards are a bit too busy. Second, the Flight Leader boards are hexed, and my rules are designed for squares, and I really couldn't make them work with hexes, so this is the only fight you'll see with the Flight Leader boards. Having said that, the playing surface for fights 2-7 is horrendous, I really need to do something to get better. I also need some better lighting. In any case, the Japanese are on the left and the Americans are on the right.
The incoming Japanese of the 1st Air Fleet: six Ki-49 "Helens" escorted by four Ki-43 "Oscars". Because I'm dumb, lazy, and cheap I am using G4M Bettys as the Helens and A6M Zeros as the Oscars. I have since purchased some actual Ki-43 Oscars, working on getting them painted up. From left to right will be Oscar 02, Oscar 01, the two flights of Helens, which are Helens 01, 02, and 03 in the lead (as lead, left, then right), followed by 04, 05, and 06 (set up the same way).
And the US Navy interceptors, from left to right:
Pelly 14, Ensign Davis
Pelly 13, Lt (jg) Dapper
Pelly 15, Ensign Fitzsimmons
Pelly 17, Ensign GalanPelly 16, Lt (jg) French
Pelly 18, Ensign Head
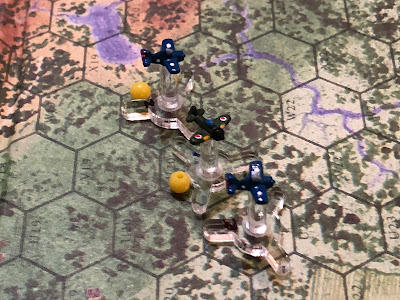
A side view of some of the Japanese aircraft, just to show how cool they are ;)
And of Lt French's flight. Yes, I know the US forces were organized into 4-plane flights and not 3-plane vics, but it's how the rules are setup and I like how it fits for the campaign.
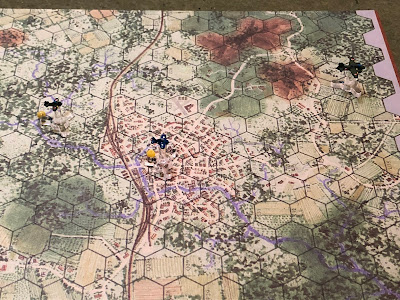
Turns 1 through 4 conspire to bring us here: this is the situation at the end of Turn 4, no combat, just movement to contact, AKA, the 'merge.' The bombers have fixed movement each turn, but the fighters' movement is diced for and dependent upon type (Oscars are D6+1, Wildcats are simply D6, while the Helens are 3). The activation sequence is Japanese fighters, US fighters, Japanese bombers, and there is no altitude in the game (which I know some folks will hate, but I'm looking for dead simple, and here they are, and a good bit of fun, too!). Time to get down to business, though I'm not going to do as I usually do. Please forgive my laziness, but I'm not going to go step by step through these dogfights, rather, I'm going to try and focus on the highlights.
Oscar 02 (top left) and Oscar 01 zoom straight in, with Oscar 01 going head to head with Ensign Head's Pelly 18. The Oscars machine guns pound 12.7mm and 7.7mm tracers into the hapless Wildcat, flaming it out and sending Ens Head bailing out, gently descending to earth under a silk canopy...
While in the south, Oscar 04 (yellow) zooms in, fires and misses on Pelly 14 (gray), then kicks left, still firing, and damages Lt Dapper's Pelly 13 (black), while Oscar 03 (dark red) darts in, also firing and missing on Ens Davis' Pelly 14 (gray), who cuts right to get at the bombers. Pelly 13, shaken up from the new bullet holes, sputters ahead, while Pelly 15 (blue) cuts left and goes head on with Oscar 03, firing but missing.
Whaddaya think? Are those colors too jarring? It's a little much for me, but I'm not sure how else to do it. I think when I get to my simpler playing surface it might help make things clearer.
Lt French (dark blue) rolls right and goes to guns against Oscar 02, missing, while Ens Galan slips Pelly 17 (light blue) left, into the path of the charging Japanese Helens (dark red).
Break-break-break!!! Okay everyone, this isn't working. Five weeks ago I sat down and played seven (7!!!) of these dogfights over two days (they're pretty quick, actually), but I haven't played any more because I hadn't written up the battle reports. And it's been dragging and dragging and dragging on, so this is it, I'm finishing this! No more photo-editing, do your best to keep up.
US and Japanese fighters jockey for position in the south...
While in the north, a Japanese fighter busts a u-turn and gets on Lt French's tail, guns blazing...
But Lt French dodges the incoming rounds and wings over onto the other Oscar's tail, his six .50-cal machine guns chewing up the enemy fighter and sending it crashing into the jungle below!
While Ensign Galan pulls hard right to cover Lt French's tail, ignoring the Helens. Probably not the smartest move...
Lt Dapper (yellow bead) flashes across the face of one of the Oscars, intent on getting at those enemy bombers, as Ensign Fitzsimmons cuts hard left into an Oscar, standing on the trigger but missing...
Ensign Davis skids left into the middle of the Japanese bomber formation. His six .50-cals are blazing, first on one Japanese bomber and then onto another, as are the Japanese gunners from THREE nearby Helens, but everyone misses!
And the Japanese bombers charge ahead, leaving Ens Davis cursing in their wake (far left)!
In the north, the lead Japanese Oscar cuts hard left into Lt French, opening fire...
Lt French's aircraft is damaged (yellow bead), as the Japanese fighter cuts back right, firing on Ens Galan's Wildcat.
The Japanese fighter misses and shoots past, into the center of the bomber formation.
Another Japanese fighter shoots through the bomber formation, landing on Ens Davis' tail. 20mm and 7.7mm rounds tear into the Wildcat, damaging it.
While another Oscar pulls onto Lt Dapper's tail (center) and opens fire, but misses.
Damaged and confused, Ens Davis' fighter sputters ahead (top left) as Lt Dapper zooms in on his assailant (center top), guns blazing but tracers zipping by harmlessly. Shoulda gone after the bombers, that is the mission, after all...
But then a stroke of luck in the south as Ens Fitzsimmons gets to point blank range on a the tail of an Oscar and guns it down!
Ens Galan drifts right (top right, with Lt French below him), waiting for the Japanese bombers to come around...
While Lt French turns onto the lead Oscars' tail and cuts loose, damaging the Japanese fighter plane while dodging defensive fire from the Japanese bombers.
Who continue their march east.
An Oscar closes in on Ens Davis' wounded aircraft and opens fire (with Lt Dapper looking on)…
But the fire is ineffective and the Japanese pilot overshoots!
As the lead Oscar shoots through the bomber formation and opens fire on Lt Dapper (right)…
But he misses, too, and zooms by Lt Dapper (center).
Ens Davis cuts hard right (top center) to chase the enemy bombers as Lt Dapper brings his damaged Wildcat onto the tail of Oscar 04 (far left), firing and missing...
Ens Fitzsimmons comes right (bottom right) to chase the bombers as Lt French comes right (center) to case the Oscars...
And Ens Galan (top center) makes a lazy turn to starboard to chase the bombers...
Oscar 04 comes hard right (top left) to chase Ens Davis as Oscar 01cuts hard right and fires on Lt Dapper, missing...
And flashing past, coming right (center) behind Ens Davis.
But Ens Davis continues his right turn (top center) to chase the bombers, as does Ens Fitzsimmons (bottom right), while Lt Dapper (far left) cuts hard right and fires on Oscar 04, damaging it.
Before pulling alongside the stricken Japanese fighter (far left), as Lt French cuts into Oscar 01 (center) and opens fire, but misses...
While crazy-ass Ens Galban charges into the Japanese bombers. Tracers criss-cross from the Wildcats' .50-cals and the Japanese defensive machine guns, with the lead Helen becoming damaged...
But the Japanese bombers continue to press towards their target.
The lead Oscar cuts right onto Ens Davis' tail (top right) and fires, missing.
But Oscar 04 is damaged and confused, caught between Lt Dapper (top left) and Lt French (center bottom), so he pulls a lazy right-hand turn and closes his eyes in preparation to meet his ancestors...
Ensigns Davis and Fitzsimmons (far right) give chase to the bombers, leaving Lieutenants Dapper and French to tangle with the Oscars.
While Ens Galan (center right) continues to press his attack, damaging Helen 04, but the Japanese gunners get their revenge, shooting down Ensign Galan's Wildcat!!!
Lt Dapper (top left) is damaged and confused, and sputters ahead indecisively, as Lt French comes right and fires on Oscar 04 and misses...
The Japanese bombers open up the range, getting dangerously close to the target area. When they reach the east (right) edge of the board the Wildcats must break off so as not to get shot down by friendly anti-aircraft fire. It looks highly unlikely that Ensigns Davis and Fitzsimmons (center) will catch the Helens...
The lead Oscar is hot to trot: he dashes forward (top right) and fires on Ens Davis' Wildcat...
Missing Davis, the Japanese fighter pilot slips right and fires on Ens Fitzsimmons, missing again!
Lt Dapper (far left) will be chastised for his utter lack of aggressiveness: he again sputters ahead listlessly, as Lt French cuts right onto Oscar 04's tail. The .50-cals thunder but again the cross-eyed Lieutenant fails to score (though he does have one kill today)…
Ens Davis (far left) is indecisive as he's not in a great spot to deal with Oscar 01, but Ens Fitzsimmons refuses to give up! He pushes his throttle to the firewall and chases the enemy bomber formation (center right).
But they're getting closer and closer to escaping...
But then the lead Oscar jumps on Ens Fitzsimmons' tail and fires damaging the Wildcat...
Before overshooting.
And further back, Oscar 04 moves onto Ens Davis' tail and fires, missing!
Damaged but undeterred, Ens Fitsimmons maneuvers his Wildcat into firing position. He cuts loose, damaging Helen 06 while successfully dodging the incoming defensive fire...
And then he bravely pushes further, firing on Helen 03 and damaging it, too, while continuing to dodge the intense defensive fire. Unbelievable, damaged four Japanese bombers but can't knock any of them down!
Meanwhile, Ens Davis turns into Oscar 01, but can't reach him...
Lt Dapper finally gets his nose pointed in the right direction (top left), but it's far too late to be useful, and Lt French gives chase to Oscar 04.
And the first flight of Helens makes it to the target area...
The Japanese fighters perform poorly, with Oscar 01 sputtering ahead (center), not sure whether to push east to protect the bombers or face about to face the two U.S. Navy Lieutenants, while Oscar 04 (far left) gives chase to Ens Davis but doesn't catch him...
But Ensign Fitzsimmons' blood is up, and he continues his one-man onslaught! He charges in, friendly AA fire getting dangerously close, but he lines up the shot on the already damaged Helen 06 and opens fire, sending the Japanese bomber down in flames!
Then he swerves left and back right, onto the tail of Helen 04! The Navy Ensign looks dead into the eyes of the Japanese tail gunner, both squeezing the trigger!
And they shoot each other down, the Wildcat following the Helen down into the jungle below! All told, Ensign Fitzsimmons shot down an enemy fighter and two enemy bombers!
Meanwhile, further west, Ensign Davis maneuvers his damaged Wildcat onto the tail of Oscar 01, guns blazing, and he scores, shooting down the enemy flight leader!
Lieutenants Dapper and French give chase to Oscar 04, but they can't catch him...
And the final Japanese bomber reaches the target area.
Four enemy bombers reached the target, the USAAF radar station at Koepang, moderately damaging it (13 points out of a total of 32). The Japanese lost three Oscars and two Helens, while the Americans lost three Wildcats. The great news is that all three pilots were able to bail out, and fighting over your own territory has its advantages: all three were returned to friendly lines!
For conspicuous gallantry in the air, Ensign Fitzsimmons was awarded the Navy Cross and meritoriously promoted to Lieutenant (Junior Grade).
The "Flight Leader" hex board looks good, but it DOES NOT work for these rules, I need squares. So bear with me, my board is about to get really, really (no, I mean it, really) ugly. It's an interim, makeshift, home-made solution to test the rules out, so please don't let it turn you off, and don't make fun of me! I now know that the rules work great so I'm looking for a better solution for my gaming surface.
Next fight coming right up. The way I'm playing this is one dogfight per day, for a week's worth of fighting, thus seven total fights for the Fighting Pelicans.
V/R,
Jack


Hi Jack,
ReplyDeleteHow do you find playing air-to-air combat, especially fighter combat, solo? Do you find it easy to decide what the optimal moves are?
John,
DeleteI have no problems playing solo, most moves are pretty self-evident, and the ones with even a hint of conflict I quickly come up with 2-3 courses of action and roll to see which one he picks, takes less than 30 seconds.
V/R,
Jack
Love the report brother! I am happy to hear that you are still doing avaiation! (Bummed I didn’t see the post about the ww2 minis sooner, oh well). I have been mia for awhile so I am glad to see that while I have been out of touch, there are some fresh battle reports to catch up on!
ReplyDeleteThanks man, glad you liked it, and don’t worry, aviation is ramping up, not going away. Yeah, the WWII minis went in hours, moderns are gone now too, just the Vietnam package left.
DeleteWell, now that you’re back, you should head over to the Cuba Libre blog, that’s where most of my action has been lately. There might be 25 or so batreps over there that you haven’t seen (I tend to play them in bunches).
V/R,
Jack
Hey Jack,
DeleteAre you still doing 1/600 scale at all? Or have you full transitioned to 1/1200? Also once I get done with the training I am in, I am planning on getting some more minis painted and some stuff posted. Your campaigns have inspired me! Lol
Johnson,
DeleteI'll probably do some 3mm land stuff, but I'm out of the game in terms of aerial 1/600, it's all 1/1200 now.
Hopefully training's going well for you, and looking forward to seeing you get some gaming in. And posting for everyone to see, of course ;)
V/R,
Jack