It's 1000 on 19 February 1942, in Darwin, Australia, and a massive air raid by Japanese carrier aircraft is inbound. The Chickenhawks are down to 12 pilots and aircraft, but they scramble everyone, four pilots in three successive flights, rising to defend the myriad ships docked in the bay, nearly defenseless against the coming onslaught.
Lt Kimble already led one flight into combat, downing one Zero and four Vals without loss, though two Vals entered the harbor. Captain Jordan is leading the second flight into action now.
Major Jordan led another flight into combat, downing two Zeroes, two Vals, and two Kates, at the loss of two P-40s.
I'm using some amazing, but teeny-tiny aircraft from "Thomaston," whom I met over on The Wargames Website when he posted some pics of what he calls "Tiny Air Combat" (https://www.thewargameswebsite.com/forums/topic/tiny-air-combat/page/3/), and I'm using some simple rules posted by "Tango" over on The Miniatures Page (http://theminiaturespage.com/boards/msg.mv?id=489811).

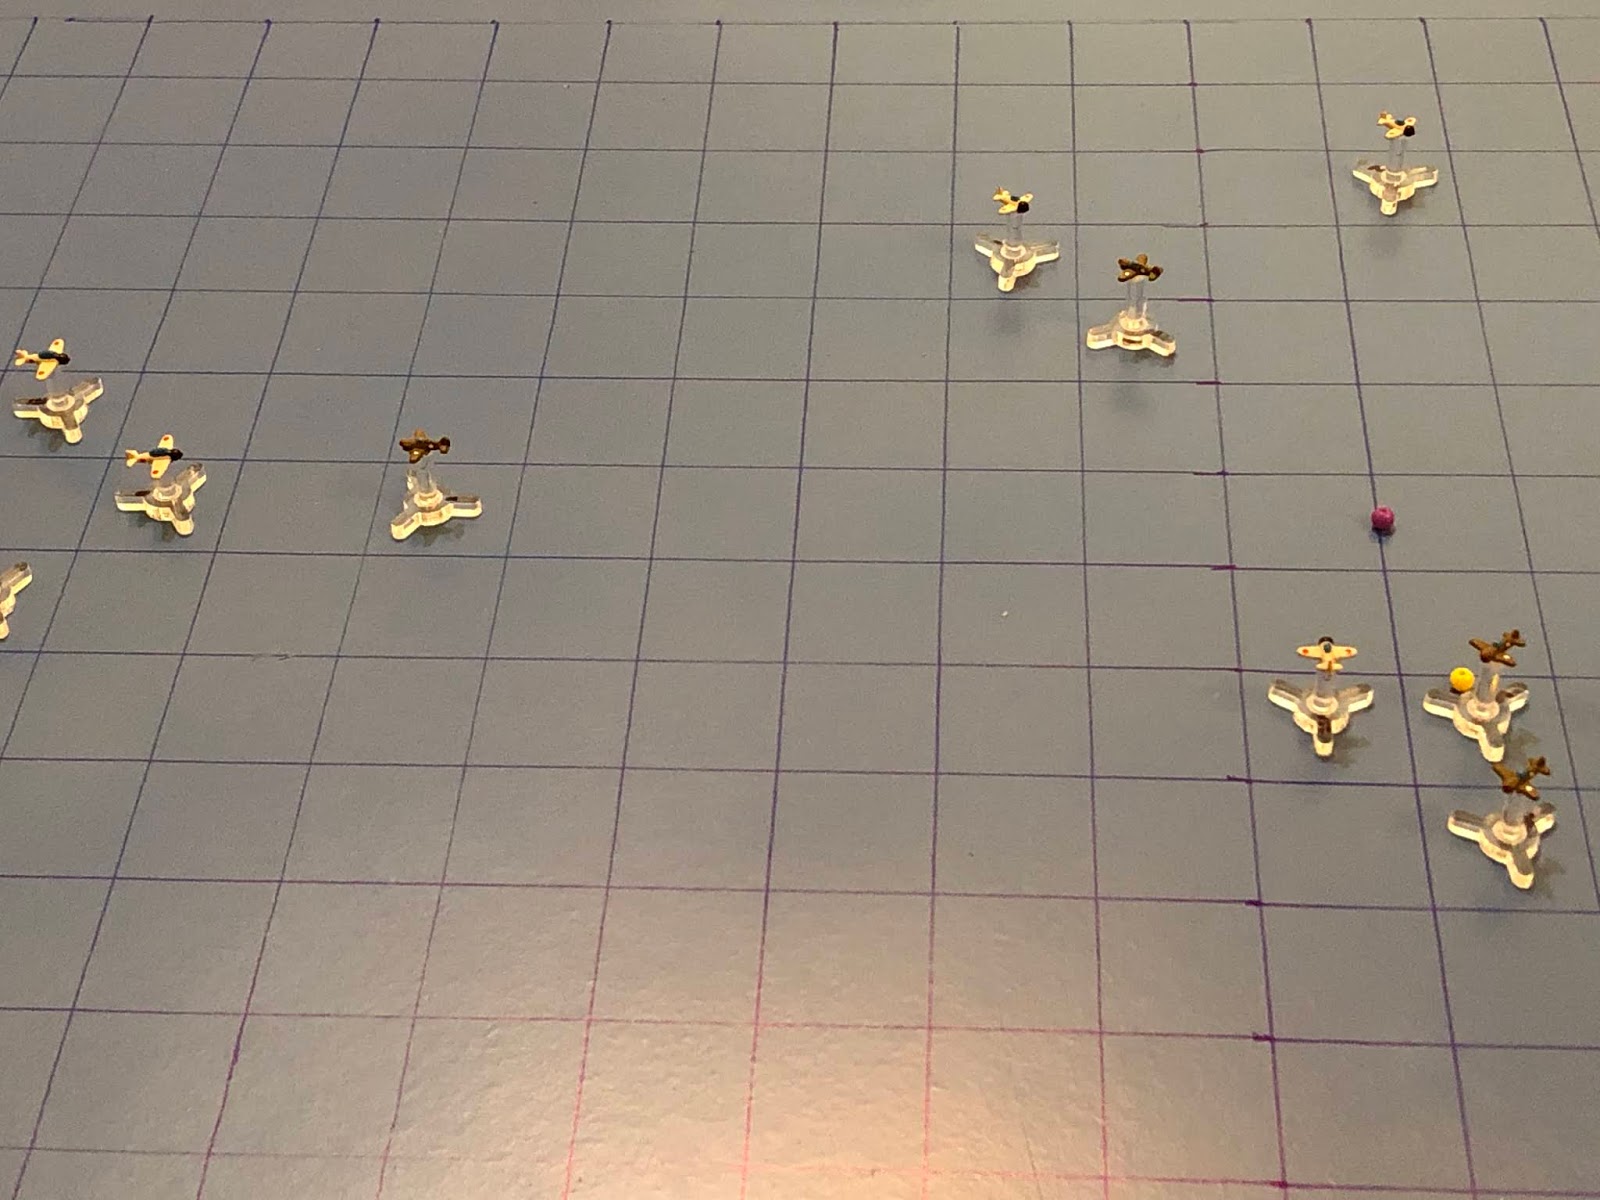
The new set up, sun blazing and reflecting off the warm waters of the Timor Sea. Six Japanese bombers are inbound from the west (left), escorted by four fighters, as four P-40s rise to meet them from the east (right).
The Chickenhawks, from top to bottom:
Chicken 02: 2nd Lt Kenn
Chicken 01: Captain Biasucci
Chicken 03: 1st Lt Pace
Chicken 04: 2nd Lt Macon
The Japanese 3ed carrier strike, six B5N "Kate" torpedo bombers escorted by four A6M "Zero" fighters. From top to bottom:
Zeke 02
Zeke 01
Left top: Kate 06, Kate 04, Kate 05
Right top: Kate 03, Kate 01, Kate 02
Zeke 03
Zeke 04
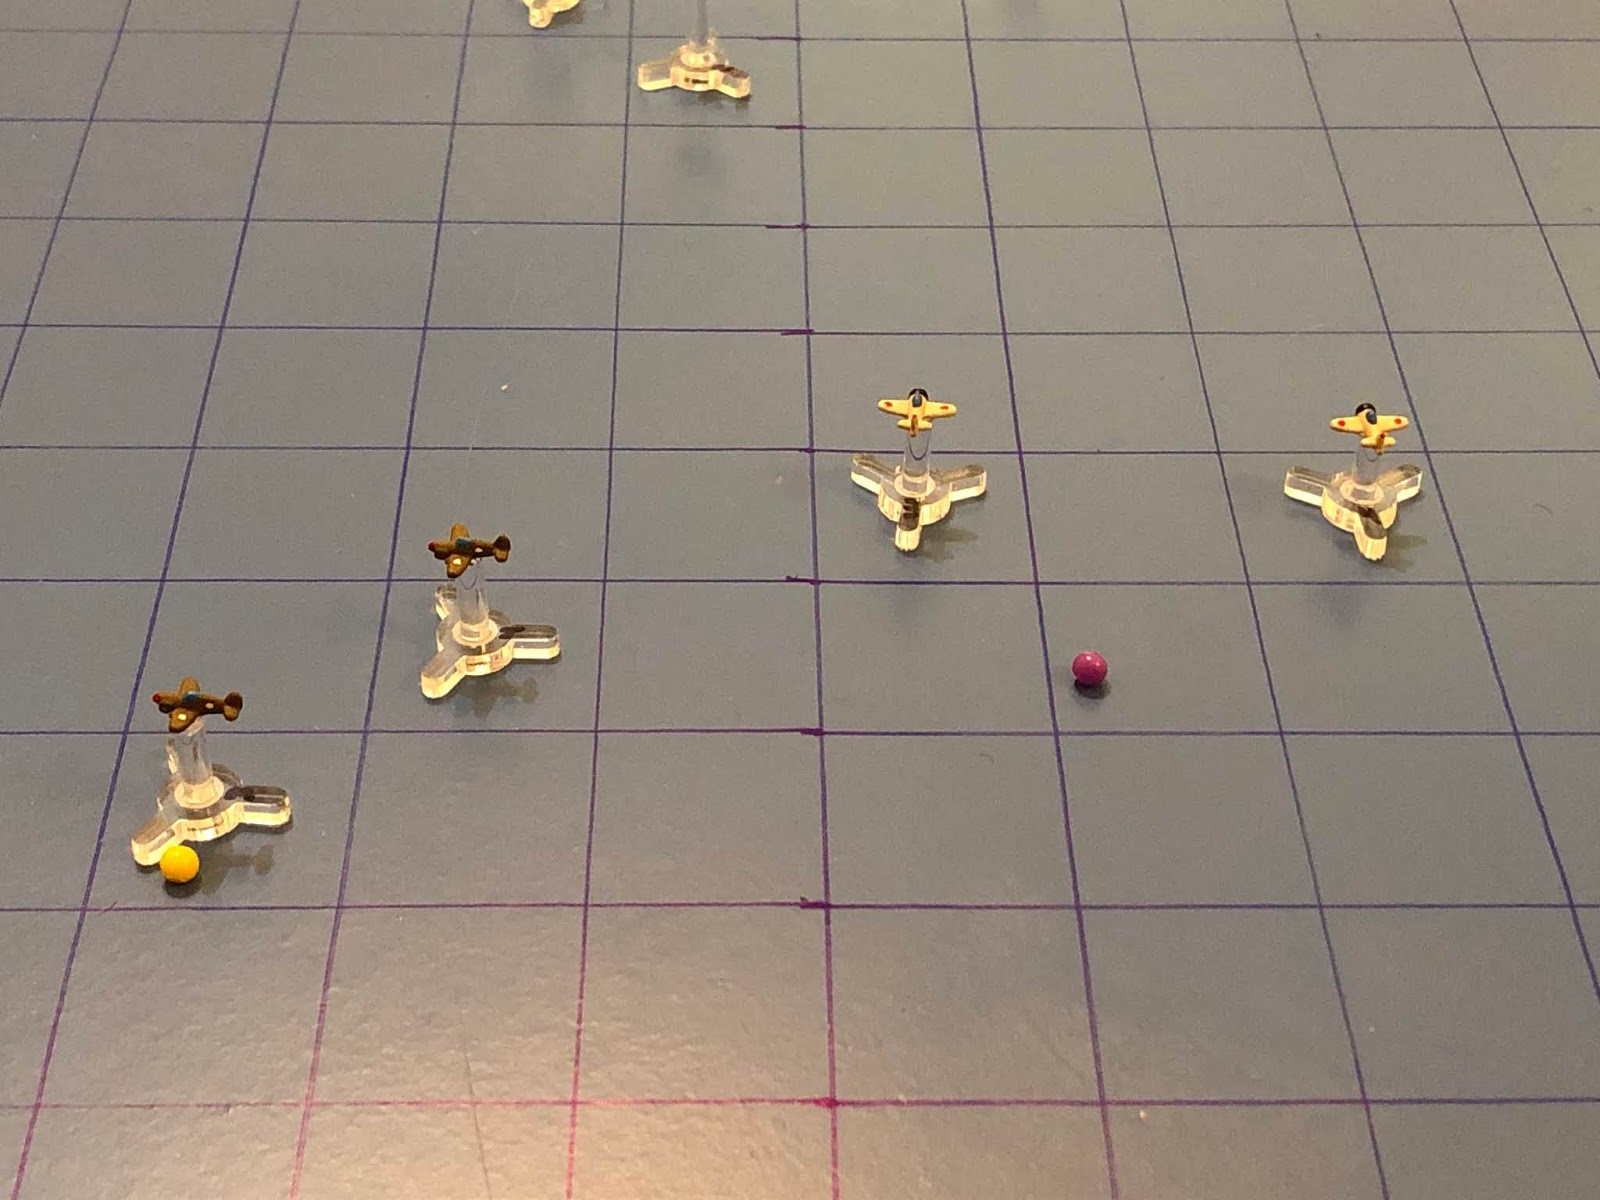
Turns 1 and 2 see the Zeroes perform rather conservatively, sticking together for the most part and close to the Kates, not charging out ahead to meet the Americans (right). Nevertheless, it's time to fight!
*The Vals are pretty quick, moving 4 squares, not the 3 squares the Bettys and Helens have been churning, but the Kate torpedo bombers only move 2 squares.
The Japanese fighters push east, but none can reach the US interceptors.
Lt Pace (top center) turns into the southern Zeroes...
And his wingman, Lt Macon, joins him.
While Captain Biasucci zooms straight in (left) at the enemy torpedo bombers...
And his wingman, Lt Kenn, sticks with him (left).
The Kates (far left) push east.
Zeke 03 cuts left and goes head to head with Lt Pace, both squeezing the triggers...
The P-40 shudders from the incoming tracers and is damaged, as the Japanese pilot smiles to himself and cuts left (center).
While his wingman, Zeke 04, cuts in behind the Americans (right, Americans at center, Zeke 03 at left).
In the north, Zeke 01 cuts left and hangs back (left, with Zeke 02 at top center), waiting for the situation to develop.
And his wingman does the same, albeit a bit further east (top center).
Lt Kenn cuts right and goes head to head with Zeke 01 (left), tracers criss-crossing but none finding their mark!
While Captain Biasucci says 'ta hell with the fighters' and zooms straight in on the Kates (left).
In the south, Lt Pace pushes his damaged Warhawk past the enemy fighters and cuts right (bottom left) to get at the bombers, as Lt Macon (right bottom)…
Stays on his wing (left, with Lt Pace at bottom left).
The Kates push east, but Capt Biasucci has broken the formation up. Kate 01 and 03 are forced to turn left.
Zeke 04 is licking his chops to get at Lt Kenn (center left top) and cuts left in behind him (center right), but doesn't reach him. Zeke 03 (bottom center) sees his comrades have gotten Lt Kenn in the bag...
So he pulls hard left, rolling over onto Lt Macon's wing (center left, with Lt Macon below him and Lt Pace at bottom left). The Americans seem to have been a bit premature in going straight after the bombers and are finding themselves in terrible tactical position...
In the north, Zeke 02 cuts right to get in on the chase (center left, with Lt Kenn above him, Zeke 01 above him, and Zeke 04 at bottom right). But Zeke 01 is way ahead of him. He pushes his goggles down, says a prayer to his ancestors, and begins pulling hard right, G-forces nearly causing him to pass out...
But it worked, and he finds himself straightening out directly on the tail of Captain Biasucci (left)! He depresses the trigger and walks his tracers into the P-40, damaging it.
Surprised to find himself with an enemy on his tail and his aircraft getting chewed up, Captain Biasucci sort of stumbles into the center of the torpedo bomber formation, guns blazing, as defensive fire comes back at him from two different directions!
They miss and he misses, and he pulls left, but that subjects him to fire from Kate 02's (bottom right) tail gunner, who promptly shoots the good Captain down! Though injured by shell splinters, Captain Biasucci manages to bail out and is quickly picked up by an Australian patrol boat.
Seeking retribution, Lt Kenn rolls left (left) onto the tail of Zeke 01 and opens fire...
The six .50-cal machine guns pound the little balsa-wood plane into splinters and Lt Kenn pulls left, defensive, putting himself in relatively good shape regarding Zeke 02 (top right) and 03 (bottom center, with Lt Macon visible just below him).
Lt Macon wants to go after the bombers, but he's got Zeke 03 all over him, so he cuts right, defensive (top left, with Lt Pace's damaged P-40 at bottom left).
And Lt Pace says 'damn the torpedoes, full speed ahead,' tearing into the torpedo bomber formation. He cuts right (left) and zooms in on Kate 02, .50-cals spewing hot lead...
He misses and, inexplicably from a defensive standpoint but an extraordinarily bold offensive move, cuts right, firing on Kate 01 (top center), though this exposes his aircraft to defensive fire from her and Kate 04 (left). Just as inexplicably, all miss!
And the Kates continue to push east.
Please recall that Lt Kenn (far left) was in good shape dealing with Zeke 02 (top center right) and Zeke 03 (bottom center, with Lt Macon in front of him), but he was really just hoping Zeke 04 would get lost in the sauce. He didn't; Zeke 04 kicks it in the ass, circles around his comrade in Zeke 02, and pulls left (top left), in behind Lt Kenn, and his 20mm cannons pulverize the Warhawk. It's beaten to a pulp, huge pieces of the American fighter drifting down to the warm ocean below, carrying with them Lt Kenn's body...
Zeke 03 decides to quit dallying with Lt Macon (far right bottom), so he pushes the throttle to the firewall and zips past the bomber formation (far left), stalking Lt Pace (left, in the middle of the Kates).
*I misses a pic; Zeke 02 (just off screen at top right, Zeke 04 visible at top right) zoomed in and cut hard left, laying into Lt Macon's P-40 (far right)…
Lt Macon's bird is damaged, and Zeke 02 cuts right (left) and passes him, defensive.
While Lt Pace pulls off a helluva maneuver: finding himself in the center of the enemy bomber formation (far left) but with power to burn, he kicks it hard right (center top right) and makes a run on Zeke 04 (far right, Zeke 02 and Lt Macon visible at bottom right), .50-cals hammering away...
But he misses and cuts hard right again, defensive, and in bad shape to get at the Kates...
Still recovering from his aircraft getting its tail shot up, Lt Macon cuts hard right (center right, with Lt Pace at center left), defensive.
And the Kates march east, though the formation is further broken up when Kate 04 and Kate 05 have to cut right.
From behind the bombers, Zeke 03 cuts hard right and zooms in on Lt Pace (far right), taking a terrible deflection shot...
He misses and shoots by (right, with Zeke 04 at top right, Lt Macon at bottom right, Lt Pace at left, and Kates at top left and bottom left)! It's getting crowded in here!
And it gets worse when Zeke 02 hangs a right (top left) to stay with the pack.
But Zeke 04 has had enough of the melee and pulls right (bottom right) to get some distance, then re-engage.
Surprisingly, Lt Pace is able to fight through the traffic and give pursuit, getting into a pretty good firing position (bottom right) on Zeke 04. He opens fire but the Japanese fighter jumps to and fro and he can't score a hit...
And Lt Macon cuts hard right, defensive but still looking to break up the bomber formation (the Kates move two spaces per turn and now he's sitting smack dab in the way).
The Kates push east, with one having to cut right to avoid Lt Macon (center). At bottom right, Zeke 04 had just disengaged to buy himself some room and time, but finds himself uncomfortably close to Lt Pace...
So he pulls a Split-S and reverses course (bottom left) to gain some space.
And this clears the way for Zeke 03 to zoom in and get onto Lt Pace's tail. 20mm cannon rounds begin demolishing the P-40...
Lt Pace bails out of his disappearing fighter and Zeke 03 cuts left (right, with Lt Macon at top left). Lt Pace spends a few hours in the drink, but other than that he's right as rain.
But he's (bottom right) in trouble too, as Zeke 02 zooms through the broken bomber formation and cuts right, opening fire. Just like Lt Pace, Lt Macon is surprised when his P-40 suddenly starts coming apart, but unlike Lt Pace, Lt Macon is severely wounded when a 20mm shell explodes in his cockpit, and he is forced to ride his fighter into the waves! Somehow he nails the water landing and is able to pull himself from his shattered cockpit before collapsing into an inflatable life raft. The Royal Australian Navy was able to get to him very quickly, saving his life, but he's going to miss quite a bit of time.
Zeke 02 peers over his right shoulder and watches the American perform a perfect water landing, then turns back and searches the sky for more Yankee sky pirates. He's astonished to find there are none, and signals his comrades...
To form up for the attack!
Wow, what a disaster!!! The Chickenhawks lost all four P-40s, the Japanese but a single fighter, and now six Kates are loose in Darwin Harbor, joining the other Kate and three Vals already there.
To re-cap, Lt Pace is okay, Captain Biasucci is lightly wounded, Lt Macon is badly wounded, and Lt Kenn is dead, with Lt Kenn being the only American pilot to score a victory in this engagement.
This catches me up on all the dogfights prior to Christmas, not sure what's next. There was also a raid on Darwin later on this same day by Japanese land-based bombers, so I may play that, then probably another 1 - 4 fights in Darwin, before the Chickenhawks move to New Guinea. At some point in there the Killer Pelicans will get on a carrier and get back in the fight, some Coral Sea and Midway. Lots of land stuff planned as well, see ya soon.
V/R,
Jack


Hey jack,
ReplyDeleteDamn not another whipe! The chicken hawks really are getting a beating these last few sorties. I have been trying to get my game going like had hopped, but unfortunately I am having trouble finding time and motivation to paint the last couple of planes.
Yeah, that didn't exactly go according to plan. Such are the fortunes of war, I suppose ;)
DeleteAnd no sweat on your game, I understand exactly how you feel. For me, wargaming is all about motivation and momentum; motivation to get ya into a project, and momentum to keep it up, even when you don't feel like it! I find the motivation comes back once I'm finally able to get to the gaming, so if you can (and surely you can with only a couple planes left, quit being a sailor!), push through and you'll be gaming in no time.
If you don't you may end up with piles upon piles of unpainted lead; did you see all the airplanes I just sold? Do ya wanna buy a boatload of 10mm Napoleonics, or 15mm WWII Brits and Germans? 'Cause I'm not sure I have the gumption to ever get back to them...
V/R,
Jack
I feel ya. I really only had 7 days to get it done, and after being done with ocs and seeing my little son (9 months old missed a lot of his growing up in 3 months) I was having a little too much fun hanging out with him and just spending time with the family.
DeleteAnd I have a huge pile of lead that I need to paint. I am slowly working on it (though I want to get some moderns for afghan / Iraq / Iran thing for grunts forward and FoF). I am planning on taking my stuff and working on it when I am not studying.
That was not such a great ending (except for the Japanese) compared to the other dogfights. Ah well. It had to happen sometime. usually near the end of the series, not at the end. When the third Chickenhawk went down I thought "surely not? How will Jack pull a win out of this one?". I guess the answer was the Lt Macon down shortly after!
ReplyDeleteShaun,
DeleteHey, it seemed to fit with real life, where Darwin got the snot pounded out of it. Plus it was the Army squadron, so what'd ya expect? ;)
Hope all is well, and I downloaded your rules last night, started going through them.
V/R,
Jack