It's noon on 20 January 1942 (yes, we've gone back in time about a month from the seven Killer Pelicans dogfights I just posted), and only days before a squadron of US Army Air Force P-40 Warhawks under Captain Brian Jordan was sent to Makassar on the southwest tip of the island of Celebes, to aid in the American-British-Dutch-Australian (ABDA) defense of the Dutch East Indies (DEI) from the marauding forces of the Imperial Japanese Army and Navy. Captain Jordan and his men with their eighteen sleek, Curtiss Warhawks quickly settled into life on the dusty tropical airfield, happy be in the fight and ready to avenge Pearl Harbor!
As a matter of fact, two days ago Captain Jordan and three of his pilots took to the air and managed to shoot down three enemy fighters and two enemy bombers, at the cost of only one P-40 damaged! But the Japanese are keen on making Celebes theirs (in the Killer Pelicans games, the enemy aircraft were flying out of Kendari, Celebes), and the Army pilots expect their stay at Makassar to be short-lived as Japanese landing forces are sure to arrive any minute now.
Yesterday was a black day, indeed, for the Chickenhawks, with two Japanese fighters and two Japanese bombers shot down, but ALL SIX American fighters were shot down...
I'm using some amazing, but teeny-tiny aircraft from "Thomaston," whom I met over on The Wargames Website when he posted some pics of what he calls "Tiny Air Combat" (https://www.thewargameswebsite.com/forums/topic/tiny-air-combat/page/3/), and I'm using some simple rules posted by "Tango" over on The Miniatures Page (http://theminiaturespage.com/boards/msg.mv?id=489811). I've also finally got my 9-year old boy in on the act, he's playing the Japanese.
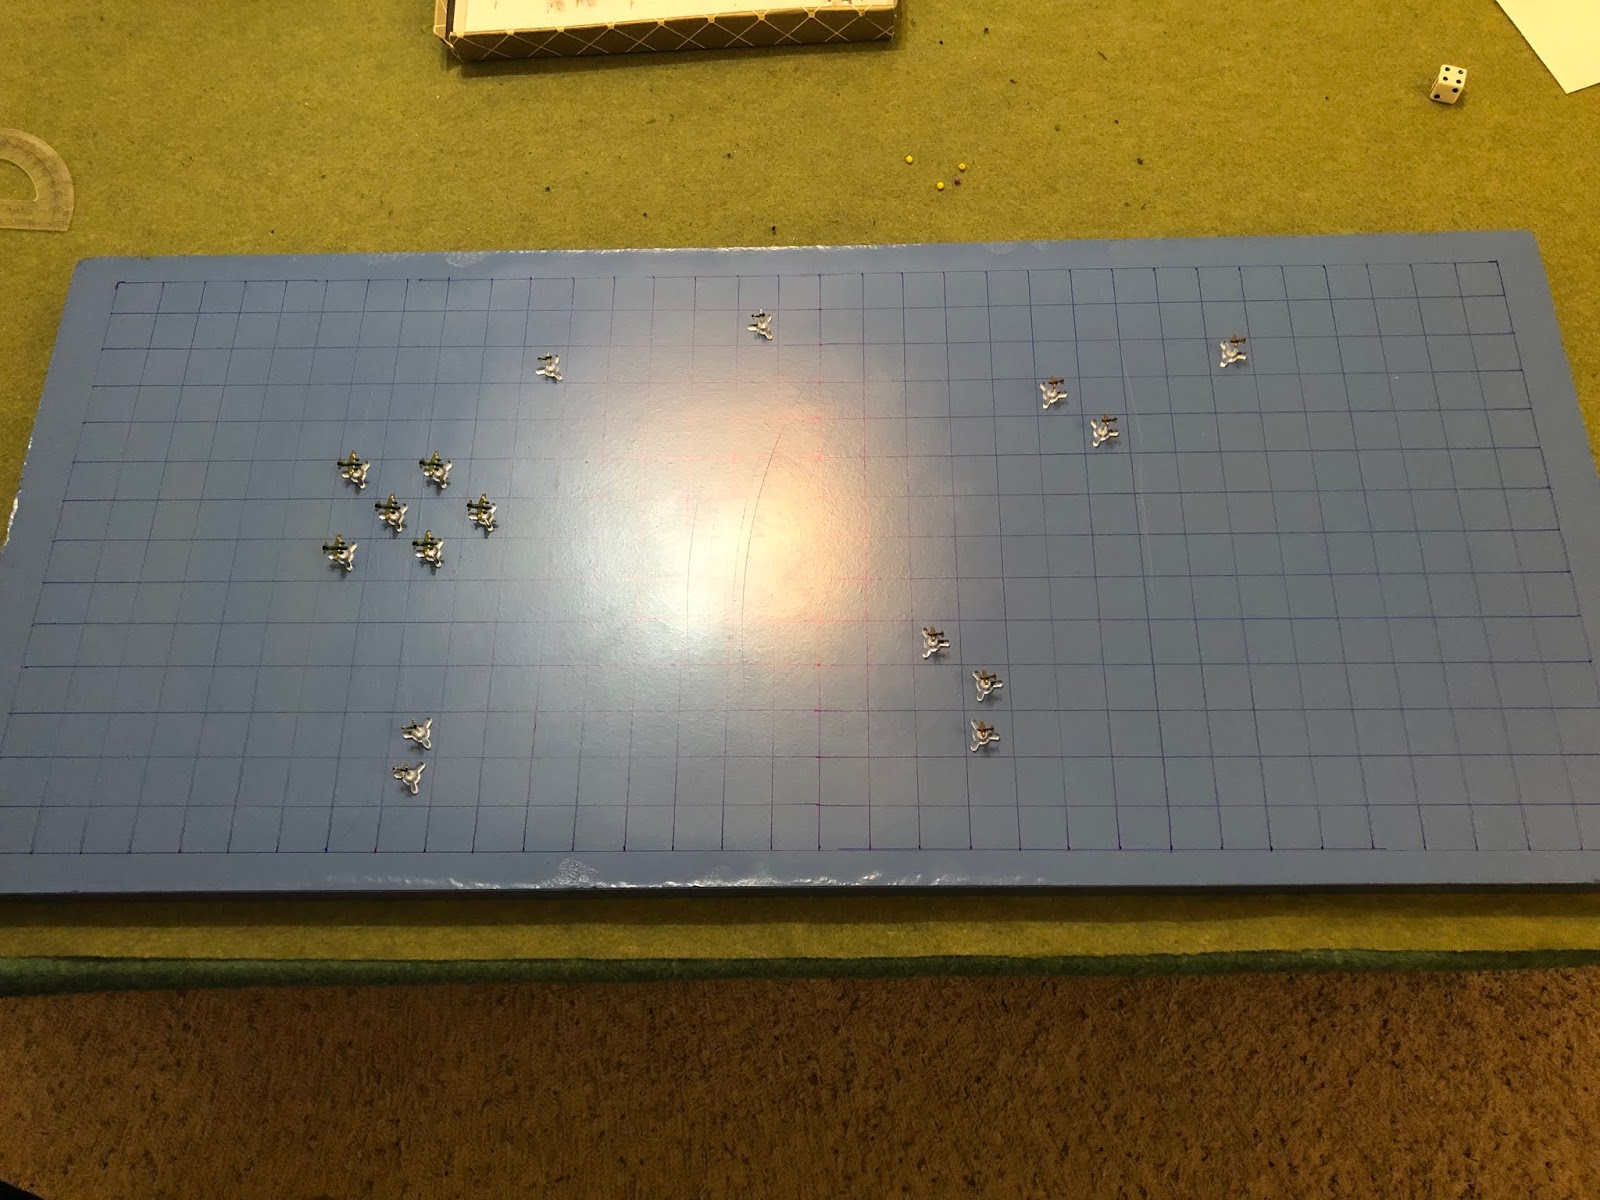
The new setup. North is left, where the Imperial Japanese Army aircraft are, south is right, where the U.S. Army Air Force is. East is up, West is down. The Japanese are charging in, intent on finishing off Dutch coastal artillery batteries (28/32 damage points) covering the Japanese Navy's intended landing beaches on Celebes, and then moving on to target the beach fortifications themselves.
The Americans, six P-40 Warhawks, from top to bottom:
Chicken 12: 2nd Lt Kenn, his first combat sortie
Chicken 11: Captain Jordan, 2 kills in his first sortie
Chicken 13: 2nd Lt Sanders, his first combat sortie
Chicken 62: 2nd Lt Dawkins, his first combat sortie
Chicken 61: 1st Lt Biasucci, his first combat sortie
Chicken 63: 2nd Lt Banks, his first combat sortie
The Japanese, from top to bottom:
Oscar 02
Oscar 01
Left: Helen 06, Helen 04, Helen 05
Right: Helen 03, Helen 01, Helen 02
Oscar 03
Oscar 04
Still using Bettys as Helens, but actually got the Oscars on the table this time.
Turns 1 through 3 bring us to the merge. The sun is giving a nasty glare off the warm, South Pacific waters...
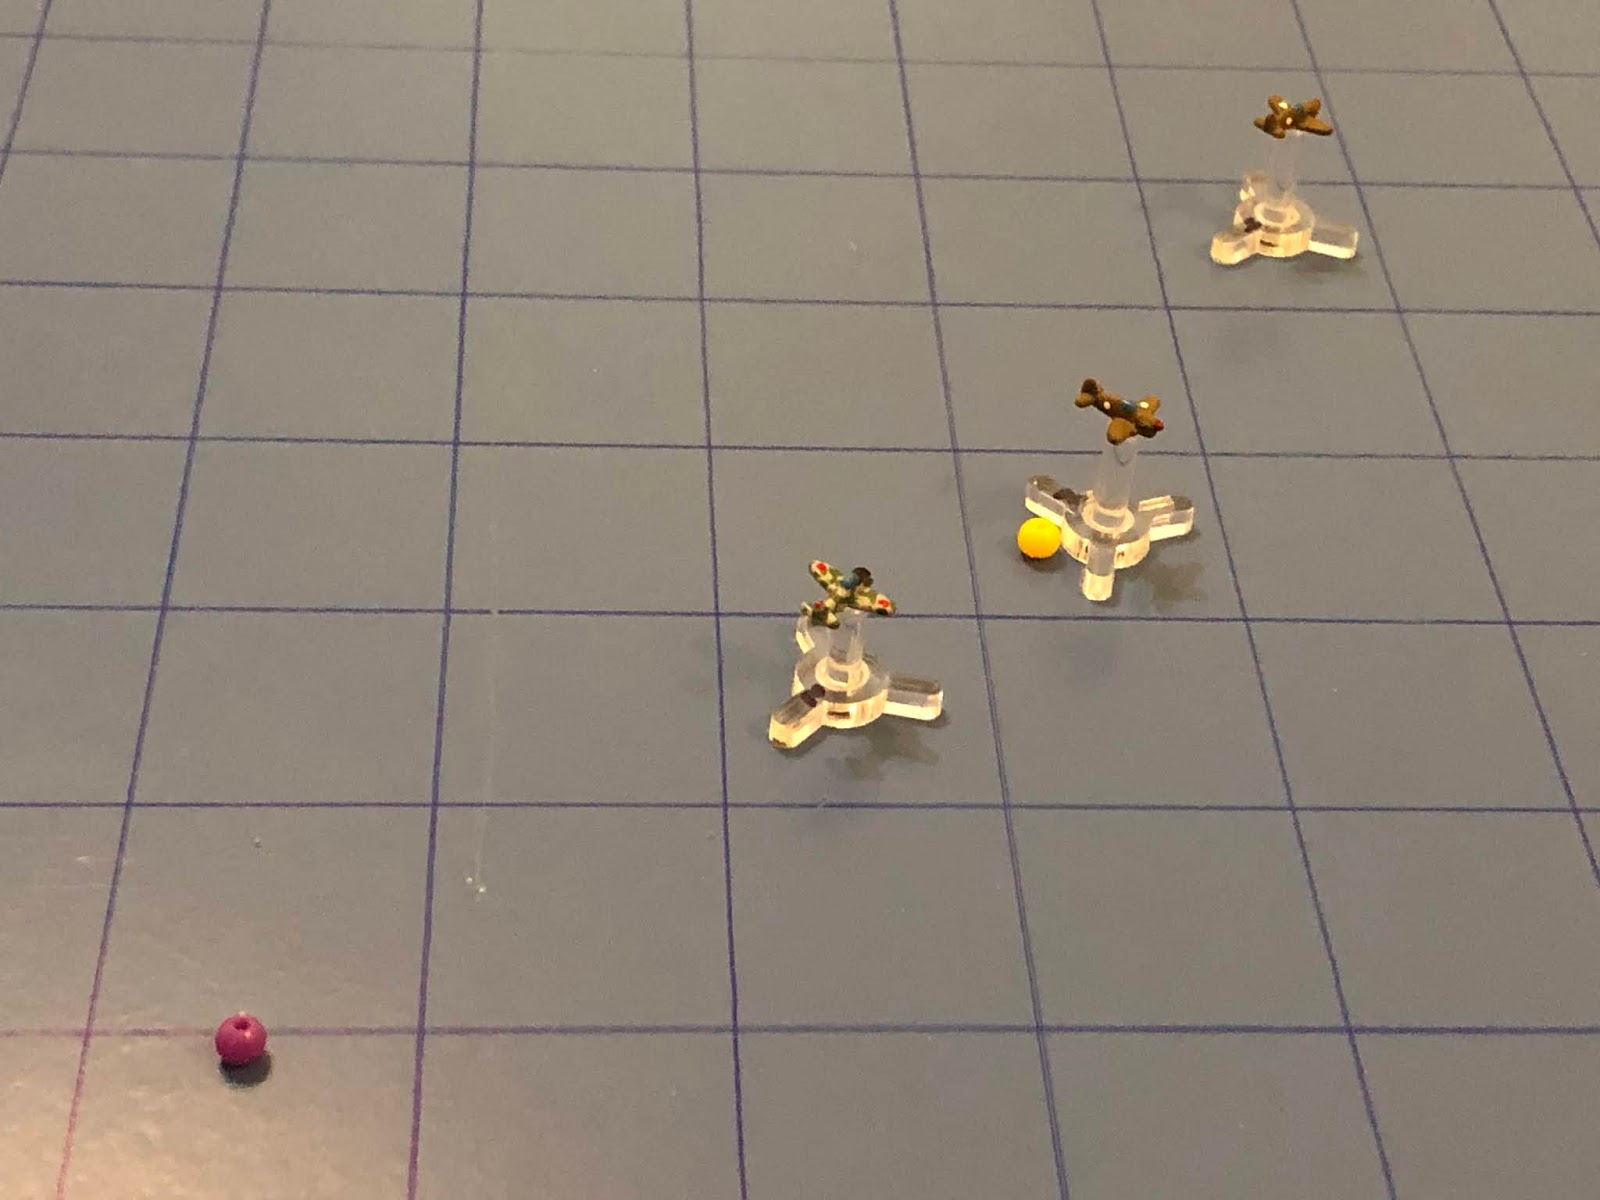
The fight starts in the east, where Oscar 02 charges in on the Squadron Leader, Captain Jordan (top center, from purple bead at left, which I use to show where the aircraft started from), guns blazing...
The Japanese pilot misses and zooms by (bottom right, from top left).
And the rest of the Japanese fighters (Oscar 01 at top center, Oscars 03 and 04 at bottom left) struggle to catch up with their overzealous comrade (Oscar 02, just visible at far right).
Captain Jordan pushes up even with Oscar 01 (top left), eager to get at the bombers, as Lt Sanders (center, with Lt Dawkins at bottom left) sputters ahead...
With Lt Sanders sputtering at far left, Lt Kenn pulls hard left onto the tail of Oscar 02 (right), guns blazing...
But the greenhorn misses and overshoots!
In the west, Lt Dawkins says 'hell with my mission of getting the bombers, I'm going after these Zekes (incorrectly identifying the Oscars as Zeroes)!' He charges in, cutting left and going guns against Oscar 04 (left)…
Lt Dawkins also misses and flashes past (bottom center) his intended target.
Lt Banks hangs back a bit to get a read on the situation (right), while Lt Biasucci charges in (center left), looking to get at the bombers (top left).
And here they come, marching south.
Lt Dawkins immediately pays for his petulance: Oscar 03 cuts hard right onto his tail and fires, damaging the P-40 Warhawk. Oscar 04 (center right) looks at Lt Biasucci (top right)…
But then decides to charge in on Lt Banks (far right), guns blazing but missing.
While in the east, Oscar 01 dashes ahead and takes a shot at Lt Sanders (right), missing.
While Oscar 02 doubles back (center) and takes a shot at Lt Sanders from the other end!
But he misses and overshoots (top center), nearly colliding with Oscar 01!!!
Which allows Lt Kenn, who thought he was in big trouble, to pull hard right (center bottom) and head towards the bombers, though Lt Sanders (above him)…
Is busy cleaning out his drawers after successive passes by Oscars at his nose and tail, and so he only sputters ahead...
But Captain Jordan is in the fight: he dives in, firing on Helen 03, but misses.
In the west, Lt Dawkins remembers he's here for the bombers and pulls his damaged P-40 hard right (left).
While Lt Banks dodges Oscar 04 (bottom right), zooming ahead past Lt Biasucci (center) and cutting in on the bombers.
*I missed a pic! Lt Biasucci (center) now decides to forget about the bombers, Oscar 03's (bottom left) tail is just too inviting ;) So he cuts left onto the tail, lines up a perfect shot, squeezes the trigger...
And damages the Japanese fighter (bottom center) before pulling right (bottom left).
And the bombers push south.
In the east, Oscar 01 goes defensive and comes right (bottom center)…
While Oscar 02 does the same, coming left (left).
*I was proud of the boy; he had two not so great maneuver rolls, and rather than try and force an ugly shot (or two) and leave himself vulnerable, he maneuvered to make it either impossible (Oscar 01 at bottom right) for me to engage, or to give me a very bad shot (Oscar 02 at left).
While in the west, things were going more the Japanese' way: Oscar 04 cuts left (center), dead onto Lt Banks' tail and stands on the triggers...
Lt Banks' P-40 bursts into flames! He parachutes safely into the water and is fished out by the Dutch Navy, but he's badly burned. Meanwhile, Oscar 04 then cuts hard left (top center) and takes a bad deflection shot on Lt Dawkins' already damaged airplane, missing. Oscar 03 (bottom center) is damaged and doesn't have much to do with Lt Biasucci practically on top of him...
So he bends it around to the left (right), looking to get back to the bombers.
Taken aback by Japanese tracers zipping perpendicularly past his cockpit, Lt Dawkins' damaged P-40 sputters half right, towards the enemy bombers.
And while Lt Dawkins (center right) is doing that, Lt Biasucci is realizing what a terrible position he's put himself in, with Oscar 04 on his tail (just below Lt Dawkins). He goes defensive, cutting right (bottom left) to open up the distance, though he knows this is taking him out of the fight.
Having missed his shot on the bombers and now falling behind, Captain Jordan pulls left in pursuit (far left).
While further south, Lt Sanders, who's really been sucking hind tit the entire fight to this point, moves up and takes a horrible deflection shot on Oscar 02...
He misses, then cuts left and fires on Helen 01...
He damages the lead bomber (yellow bead), the cuts right and walks his tracers onto Helen 04 (far left), as they and Oscar 01 (right) walk their tracers onto him, with both being damaged!
Then Lt Kenn zooms in (left, with Oscar 01 at right) and takes his own shot on Oscar 02, missing.
And the bombers push south.
Shamed by allowing the Yankee running dog-capitalist pig run through the center of the bomber formation like a marauding banshee, Oscar 03 cuts hard left (center top) and takes a bad deflection shot at Lt Sanders' P-40...
Missing and cutting right to protect the bombers.
Oscar 04 decides to ignore Lt Biasucci (bottom left), who had effectively taken himself out of the fight; he cuts right (top left), zooming even with Captain Jordan.
*Proud of the boy again, for not taking the bait by going after Biasucci, though both of us are scared to go head to head against another fighter.
While further south, Oscar 01 makes an amazing maneuver, pulling off a Split-S (center) to pull in behind Lt Kenn, but he misses this perfect shot!
While Oscar 02 slashes through the bomber formation (bottom left, from the purple bead you can just see at top right) and fires on Lt Dawkins, missing!
*Man, neither of us can shoot for @#$% today!
Somewhere out in the hinterland, Lt Biasucci decides it's time to get back in the fight, so he cuts hard right (left).
Lt Dawkins, despite being on top of the bombers, still chooses to ignore the bombers and go after the fighters! Chicken 62 zooms straight in (center) on Oscar 03's tail, pouring tracers into him as Japanese defensive fire spews out of Helen 05...
Lt Dawkins downs Oscar 03, twists through the defensive tracers, and squirts out on the other side of the bomber formation (top center)!
After making his own trip through the Japanese bomber formation, damaging two of them and himself being damaged, Lt Sanders goes back to sputtering ahead indecisively (center). But Captain Jordan (left) is on the move again...
He cuts hard left and pushes the throttle to the wall, zooming past Lt Sanders (right), onto the tail of Helen 05. Captain Jordan fires, gritting his teeth against the incoming defensive fire...
Both miss, and he shoots past Helen 05, onto the tail of Helen 02, firing at her, but now subject to defensive fire from both! Captain Jordan damages Helen 02 and his P-40 remains unblemished!
*Dammit! I missed another picture: Lt Kenn cut left and fired on Helen 06; he missed, and so did Helen 06's defensive fire, but Helen 03's defensive fire damaged him!
And the bombers march south.
North of the bombers, Oscar 04 pulls hard right (right) and takes a shot at Lt Sanders...
But apparently all the sputtering about throws off the enemy's aim; Oscar 04 misses and flashes by, now on the tail of Captain Jordan (far right). Meanwhile, Oscar 02 (bottom left) has something up his sleeve...
He cuts hard right and fires on Lt Sanders, but that cat has turned into Sergeant Barnes ("...the only man that can kill Barnes, is Barnes!")! The Japanese misses...
And cuts hard right (center right), zipping by Oscar 04, right onto Captain Jordan's tail! The Japanese pilot fires, damaging the Squadron Leader's P-40...
And zooming by (right bottom).
*A brilliant move, protecting the bomber's tail and making it impossible for Captain Jordan to fire on him (in these rules you must move at least one square before you're eligible to fire)! The boy is literally running circles around me, while I keep ignoring my mission to chase fighters, even running one of my flight leaders out of the fight.
The melee is on inside the bomber formation: Oscar 01 cuts hard right onto Lt Dawkins' tail (center top) and cuts loose...
But he misses and pulls right, paralleling him.
*The boy's maneuvers are incredible, but this game he can't hit a damn thing.
Lt Biasuccci continues his quest (center) to catch up.
While Lt Sanders, seemingly dodging attacks from all points of the compass, sputters left (center bottom).
And then Lt Kenn cuts left and fires into Oscar 04 (center)…
The rounds smash the Japanese fighter's cockpit, killing the pilot instantly, and Lt Kenn cuts left (right).
Captain Jordan is the latest American pilot to come down with fighter fever. Rather than sit tight and riddle bombers, he cuts left (center top), taking up position off Lt Dawkins' right wing, and lays into Oscar 01, while defensive fire comes in from Helen 03 and 04.
Captain Jordan shoots down the enemy flight leader, but the Japanese bombers shoot him down!!! Like so many of his subordinates, Captain Jordan survives to be fished out of the sea by the Dutch Navy, but he's lightly wounded by bullet fragments.
*Man, I apologize, I guess playing with the boy, keeping him focused, and explaining things had me distracted, I missed another picture! Lt Dawkins cut hard right and fired on Helen 03, braving defensive fire from her and Helen 04...
Everyone missed and he flashed by (bottom right, from top left).
And the bombers keep moving...
With a bunch of Americans chasing them!
Oscar 02 is the only Japanese fighter left, and for now he's content to shelter amongst the bombers (center left). Lt Dawkins swings around to the right (bottom center), looking to get back into position on the bombers and/or lure Oscar 02 out.
And the bombers march south, nearing the target area...
It worked, I guess, Oscar 02 pulls hard right onto Lt Dawkins' tail. Though he took a machine gun round in the shoulder and was badly injured, Lt Dawkins survived to bail out and be picked up by the Dutch.
Lt Biasucci makes his long awaited return to the war (with an incredible maneuver roll)! He zooms straight in (far right, passing Lieutenants Sanders and Kenn, left) on Oscar 02, taking a terrible deflection shot...
He misses and flashes by, content to go after the bombers, but getting a bit too close to Helen 05, though her defensive fire missed.
Lt Sanders did he usual sputter (center left), but behind him Lt Kenn leapt into action...
*Well, would you be surprised if I missed another picture? Lt Kenn pulled left, firing on Helen 06 (top right), and she fired back.
They both missed, and he pushed his damaged P-40 through the formation (top right, from bottom left).
The bombers move up.
Oscar 02 whips his fighter around to the left and takes a horrible deflection shot on Lt Biasucci and misses.
While Lt Sanders sputters (left).
*Musta had engine problems today. I can only remember one time where he had a decent maneuver roll.
But things heat up when Lt Biasucci pushes his P-40 left (center), onto the tail of Helen 06. Both aircraft open fire...
Lt Biasucci downs Helen 06 and noses over onto Helen 04...
But both miss and he zooms by (top right), as Lt Kenn (left)…
Pushes right and fires on Helen 05, but again both miss!
And the bombers push south, with Helen 01 reaching the target area safely and beginning its bombing run to finish off the Dutch coastal batteries.
Oscar 02 pulls a hard right back to the south and lines up a terrible deflection shot on Lt Kenn. He misses, but that's not his real target anyway; in reality he's looking at Lt Biasucci (top right).
He pulls onto Lt Biasucci's tail (top right) and fires, but somehow misses!!! Predictably, Lt Sanders sputters (center bottom). And then Lt Biasucci goes on a tear...
The young Lieutenant rolls right (right) and fires on Helen 05, gritting his teeth as defensive fire flashes past...
Helen 05 goes down in flames as Lt Biasucci pulls in behind Helen 02, and again tracers flash past each other in the bright, blue sky, and Helen 02 dips a wing, then careens into the sea below!
Wanting to get at the bombers, but fearful of Oscar 02, Lt Kenn sputters south.
And another bomber reaches the target area and begins its run!
Oscar 02 decides that discretion is the better part of valor and breaks off (top right) before he gets shot down.
And Lt Biasucci has nowhere to go, no way to engage the last bomber.
Lt Sanders gives it one last sputter (bottom), leaving Lt Kenn (top) as the only hope to down the last bomber...
Lt Kenn bravely charges in, straight onto the tail of Helen 04. He squeezes the trigger and watches his tracers tear into the Japanese bomber, so close he can see the tail gunner screaming in defiance as his own tracers find Lt Kenn's P-40!
In a remarkable turn of events, Lt Kenn manages to shoot down Helen 04 as Helen 04 manages to shoot down Lt Kenn, who bails out and is picked up by the Dutch, not a scratch on him, smiling at having racked up two kills on the day!
The Chickenhawks lost four more P-40s:
Captain Jordan: shot down, recovered, lightly wounded
2nd Lt Banks: shot down, recovered, badly burned
2nd Lt Dawkins: shot down, recovered, badly wounded
2nd Lt Kenn: shot down, recovered, okay
They shot down three Oscars and four Helens, with kills as follows:
Lt Biasucci: 3
Lt Kenn: 2
Captain Jordan: 1 (his third of the campaign)
Lt Dawkins: 1
Only two Japanese bombers made it to the target area, but they quickly and easily finished the destruction of the Dutch coastal artillery batteries covering the intended invasion beaches, then shifted their runs to the actual beach fortifications, causing moderate damage (12/32).
In two fights the Chickenhawks have lost ten of their eighteen fighters, to five enemy fighters and six enemy bombers. Not sure how much longer they can keep this up! On the positive side, 1st Lieutenant Biasucci was awarded the Bronze Star w/V and meritoriously promoted to Captain for his three-kill day. More to come.
V/R,
Jack


That's great Jack. I might convert a couple of these to Il-2 scenarios when I get the time! How is your lad getting on with the rules?
ReplyDeleteThanks John, and please do. He's having a great time, and the rules are very straightforward, though seeing all the angles for maneuvering takes some patience and experience.
DeleteV/R,
Jack