1130 local time
26 May 1942
New Guinea
Greetings all, having just wrapped up the Coral Sea battles, I figured it's time to head back to my U.S. Army Air Corps fighter squadron, the 565th Tactical Fighter Squadron, better known as the "Chickenhawks." The last we saw of the Chickenhawks was back in February of 1942; they'd started out fighting the Japanese over the Dutch East Indies before falling back to Australia and becoming embroiled in the fighting over Darwin. After things quieted down there, they ended up moving over to Brisbane, where they had a quiet period of daily patrolling to bring in replacements and get them trained up. But they got word at the end of April that they'd be moving soon, and immediately after the Battle of Coral Sea they packed up and shipped out, heading up to Port Moresby on New Guinea, making Kila Kila Airfield, AKA "3 Mile Drome," their new home on 11 May 1942. They only had a couple days before they were called to action.
On 13 May, Captain Cotton led six P-40s against four Zeros and six Bettys. One Zero and one Betty were downed at the cost of three P-40s and 25/30 damage points on the New Guinea Harbor Facilities.
On 14 May, Captain Goode led a depleted flight of only four P-40s up against four Zeros and six Bettys, and it was an unmitigated disaster. All four US fighters were shot down, with Captain Goode and Lt O'Brien killed in action, while the enemy didn't lose a single aircraft! The Japanese bombers quickly finished off the Harbor Facilities, and pounded the Marshalling Area (22/30 damage points).
On 16 May, Major Jordan led the squadron aloft to intercept six Bettys escorted by four Zeros, but Lt Daniel was the star of the show. The Americans lost a single P-40, but they knocked down two Zeros and four Bettys, with Lt Daniel knocking down four of those aircraft and winning the Distinguished Flying Cross. The remaining two Japanese bombers jettisoned their bombs and returned to base, so no bombs fell on the Allied Marshalling Area (still 22/30).
On 18 May, 1st Lt Pace led a flight of four P-40s on escort duty for six B-25 Mitchells detailed to pound Wewak's POL storage tanks. They met five Zeros over the target, with all five being shot down, though two of those were actually by the bomber crews, who took heavy losses. While the Chickenhawks only lost one P-40, four of the six bombers were shot down, and they barely scratched the POL target (6/30 damage points).
On 19 May, two patrols ran into each other over No Man's Land, ending with each side losing a single fighter.
On 21 May, two young Lieutenants found themselves escorting a flight of five B-25 Mitchells over to Wewak again, where a pair of Zeros rise up to meet them. Both Zeros were downed, for the loss of a single P-40s, and all five bombers made it, though they didn't score very well (only 12 more damage points, so 18/30 on the POL target).
On 22 May, five Bettys escorted by a single Zero were met by 1st Lt Daniel and three other P-40s. The Chickenhawks knocked down the lone Zero and three of the Bettys, turning back the last two, but they lost two of their own to defensive fire from the enemy bombers.
On 25 May, Lt Daniel led an escort of four P-40s with six B-25s against a Japanese Combat Air Patrol of four Zeros. All four Zeros were shot down (two by the bomber crews!), and no P-40s were lost, but two B-25s were shot down and two more were damaged and forced to return to base, so their combat power was seriously reduced and only caused seven points of damage on the Wewak POL storage tanks (25/30 total).
Now it's 26 May, and Major Jordan is leading a five-ship Combat Air Patrol up to intercept six inbound Bettys escorted by two Zeros.
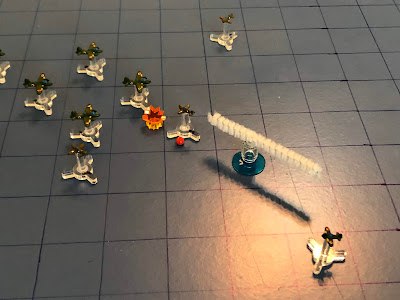
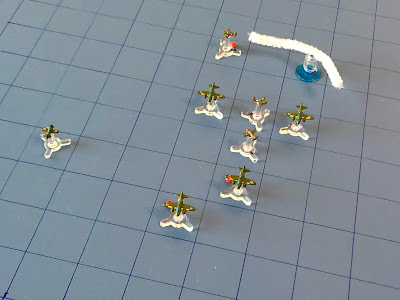
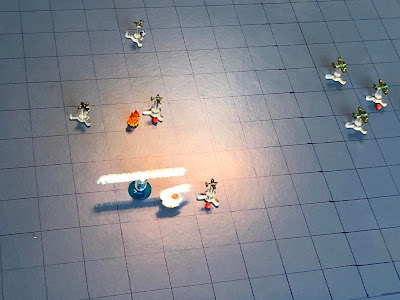
This is my arena for aerial combat; simple, yet durable and, to me, beautiful (in a simple, durable way). I'm using tiny aircraft designed by my buddy Thomaston; not sure what size they are, just that they are much smaller than 1/600. They're 3D printed models that I mounted on cut-down bases from Litko, and I'm using a very simple rules system called "Battle of Britain," which I found for free over on The Miniatures Page (I've already played a good 20 or so fights with them). Left is north, with the Japanese strike group there, and the American interceptors at right.
The US CAP, from top right:
2nd Lt Clifton, a Regular
Major Jordan, an Ace
2nd Lt Becht, a Regular
1st Lt Daniel, an Ace
2nd Lt Lageman, a Veteran
US Bomber targets are:
POL Storage (25/30)
Warehouse Yard
Wewak Airfield
The Japanese strike group, from top left:
Zero 01, an Ace
Betty 06 Betty 03
Betty 04 Betty 01
Betty 05 Betty 02
Targets:
Harbor Facilities: Destroyed
Marshalling Area: 22/30
Airfield
We fast forward through the first two turns in order to bring you straight into the action.
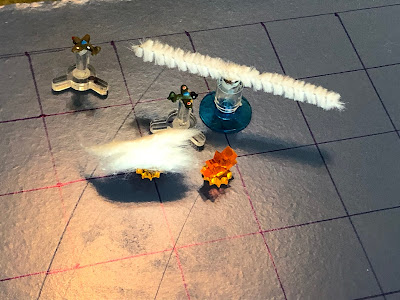
Zero 01, the enemy Ace, jinks past Major Jordan (left) and goes head to head with Lt Clifton. Both pilots open fire at point blank range...
But the Japanese Ace is the one that scores, forcing the American to bail out, then looping around to machine gun Lt Clifton in his parachute, killing him!
Zero 02 jinks over to take a frontal aspect shot on Lt Daniel...
He misses and comes right, staring down Lt Lageman (right).
Major Jordan, tears in his eyes after watching his young wingman get machine-gunned to death, sputters ahead, straight and level.
As does Lt Daniel, apparently shaken up by his close call with death at the hands of Zero 02 (bottom right).
*Both US Aces barely move, eh? What the hell is going on?
Up top, Lt Becht is looking for revenge: he cuts right and takes a shot at Zero 01...
But he misses and flashes past.
As Lt Lageman zooms straight in, going head to head with Zero 02. Both pilots fire...
But the Japanese pilot gets the better of the exchange, damaging Lt Lageman's P-40 as he comes right.
The Japanese bombers push south.
Zero 01 pulls an Immelman, clamping onto Lt Becht's tail.
As does Zero 02, pulling alongside Lt Lageman, but also in good shape on Lt Daniel (left).
Lt Daniel sputters right, looking to line up on the Bettys.
While Lt Lageman says 'hell with it' and charges straight in on Betty 01, opening fire...
He pounds Betty 01 into submission, then continues his charge, straight into Betty 03, guns blazing...
Betty 03 goes down in flames as Lt Lageman pulls left and goes head to head with Betty 04. He continues firing, braving defensive fire...
Lt Lageman damages Betty 04 ,then streams past, taking defensive fire from her rear gunners as well, though they miss.
Amazed, Major Jordan charges straight in on Betty 02 and commences firing, but only manages to damage the enemy bomber.
Up top, Lt Becht is in bad shape, got Zero 01 right on his tail, and he panics, cutting left, probably dead meat...
The Japanese bombers move up, their nose, tail, and waist gunners spewing lead in every direction, but not hitting anything.
Zero 01 curses his luck, the plucky little Lt Becht has outmaneuvered him! He jinks over, but can't line up a shot, so he tries to box him in.
And Zero 02 is looking straight up Lt Daniel's skirt (left, below and to right of Lt Lageman, the red bead at far left), but he chokes! He pushes too hard on the throttle and slips off, accidentally lowering the landing gear, sputtering straight ahead!
Lt Daniel cuts right to get at the bombers, but he's probably not far enough to escape Zero 04 (bottom left).
So Lt Lageman comes left to dissuade Zero 04 (far left) from coming after his buddy.
Major Jordan cuts a lazy left, running through defensive fire from betty 05.
Lt Becht cuts left, again spoiling Zero 01's shot.
And the Japanese bombers push south.
Zero 01 is tired of screwing with Lt Becht (top right), so he leaves him, covering some serious ground to come left and pull in behind Major Jordan. Zero 01 opens fire and chews up the Major's tail, damaging his P-40.
And then Zero 02 comes hard right and goes head to head with Major Jordan, looking to finish him off. Both pilots fire...
But the Japanese pilot wins, knocking down the Chickenhawks' squadron leader! The squadron mates hear the Major's 'Mayday' and see him bail out, floating down under a silk 'chute, but no one knows what happened to him after that. He's listed as Missing in Action.
Lt Becht comes left to try and get in the fight.
And Lt Lageman comes around, looking to get onto Zero 02's tail, or maybe the bombers.
But the bombers are running away, becoming mere specks on the horizon, nearing the target area.
Zero 01 comes hard right, going head to head with Lt Lageman, screaming as he opens fire, instinctively ducking behind his dashboard as Lt Lageman's tracers come in...
And Lt Lageman's burst causes the enemy Ace's Zero to explode!!!
Zero 01 is Lt Lageman's fifth kill of the war, he is now an Ace!
But Zero 02 immediately jinks over onto Lt Daniel's tail and opens fire...
The P-40 is damaged and Zero 02 comes off left.
Lt Daniel pulls hard right, after the bombers.
While Lt Lageman goes after them too.
And Lt Becht comes left, coming closest to the Bettys...
As they push south.
Zero 02 comes right, keeping his options open, not really scared by any of the American fighters.
Lt Becht zooms in on Betty 05's tail and opens fire, dodging defensive fire...
He misses and flashes by, but the Japanese tail gunners don't! Smoke belches from his cowling, but he presses home the attack, now on Betty 02's tail, dodging defensive fire from her and Betty 05, but everybody misses!!!
*Unbelievable, Becht missed two straight tail shots, needing 3+ to hit...
Lt Daniel jinks over next to Zero 02, looking to occupy the Japanese fighter pilot so his compatriots can take care of the bombers.
As Lt Lageman pushes his damaged P-40 to catch up with the Bettys.
The Bettys move up, spouting defensive fire but not hitting anything, and Lt Becht damages Betty 05.
Zero 02 pushes ahead strong, hoping to escape Lt Daniel (far left) and get Lieutenants Becht (right) and Lageman (bottom center right) off his bombers.
But Lt Daniel pushes right up alongside him again.
As Lt Becht pulls left to make a run on Betty 06's tail, taking defensive fire from her and Betty 05 (center right), but again everybody misses!
Lt Lageman jinks in behind Betty 05 and opens fire...
Splashing her for his fourth kill of the day!
The Japanese bombers, now down to three aircraft (two of which are damaged, but they never seem to turn back), push south, nearing the finish line.
Zero 02 jinks right, defensive, trying to get away from the relentless Lt Daniel.
Despite Lt Daniel's best efforts (far left), Lt Becht is still a bit too concerned about Zero 02 on his tail (just right of Lt Daniel), and he ends up sputtering ahead, straight and level.
Lt Lageman pushes ahead, dodging defensive fire from Betty 04...
He gets onto Betty 02's tail, braving defensive fire...
To plant the Japanese bomber in the jungles below!
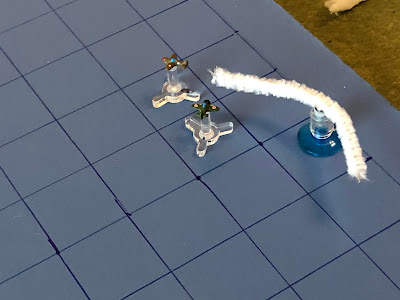
The bombers run south, this is the last chance.
Zero 02 says 'ta hell with Lt Daniel' (far left) and comes left, into a perfect tailing position on Lt Becht, who sort of made his own nightmare come true.
20mm cannon rounds pound Lt Becht's P-40 to pieces and Zero 02 comes right, pointed at Lt Lageman's tail. Lt Becht is able to bail out and be picked up by friendly forces, but he took a lot of shrapnel and will be out of action for a couple months.
Lt Daniel pushes straight in on Zero 02, but he can't get enough power out of his damaged bird.
Lt Lageman swings left onto Betty 06's tail, dodging and weaving through the defensive fire...
To put a burst right into Betty 06's belly, blowing her up!
But Betty 04 pushes ahead and reaches the target area, beginning her bombing run.
Zero 02 turns around to head home, as Lt Daniel and Lt Lageman do the same. "Dude, you were fabulous, how the hell did you do that"? "I dunno man, I woke up feelin' pretty dangerous, was more in the zone than anything." "I still can't believe what I just saw, you're gonna get the Congressional Medal of Honor!" "Pshaw..." But Lt Daniel was absolutely correct.
But what about the lone Japanese bomber? He made his run, and he put his bombs dead on target, scoring as many points as he possible could (6 on a D6), but it wasn't enough. It brought the damage total on the Allied Marshalling Area to 28, just two shy of destruction, so that was cool for the Yanks. And they're real proud of whacking a Zero and five Bettys, but the big problem is that they lost three P-40s and, even worse, one pilot was wounded, one was killed, and their Squadron Leader is MIA!
2nd Lt Clifton was shot down and killed in action
Major Jordan was shot down and is listed as Missing in Action
2nd Lt Becht was shot down and bailed out but was wounded and will be out for 70 days
1st Lt Daniel failed to score
2nd Lt Lageman scored six kills, becoming an Ace and winning him the Medal of Honor.
Here's the campaign breakdown:
Chickenhawks sorties: 37
Friendly bomber sorties: 17
Chickenhawks losses: 14 P-40s (two by Betty defensive fire)
Friendly bomber losses: 6 B-25s
Chickenhawks sorties: 37
Friendly bomber sorties: 17
Chickenhawks losses: 14 P-40s (two by Betty defensive fire)
Friendly bomber losses: 6 B-25s
Enemy fighter losses: 11 Zeros (though four were to bomber defensive fire)
Enemy bomber losses: 13 Bettys
Awards: 2nd Lt Lageman was awarded the Medal of Honor, 1st Lt Daniel was awarded the Distinguished Flying Cross
Awards: 2nd Lt Lageman was awarded the Medal of Honor, 1st Lt Daniel was awarded the Distinguished Flying Cross
The Chickenhawks lost 14 of their 18 aircraft, had six pilots WIA, three KIA (including an Ace), and one MIA (also an Ace, as well as their Squadron Leader). At this point the 565th Tactical Fighter Squadron, after only 25 days of action, are completely combat ineffective, and thus they are being pulled back to Brisbane, Australia, for some rest and recuperation.
More to come.
V/R,
Jack
More to come.
V/R,
Jack











And a great rest and recuperation they will have too, having picked such a great place to do so!
ReplyDeleteIndeed, Sir! I told them the party is at your house; don't worry, it will be tame, they're Army ;)
DeleteV/R,
Jack