All,
1425 local time
4 June 1942
Midway
It's 4 June 1942, the dawn of the epic "Battle of Midway," a clash of giants, three US carriers vs four Japanese carriers that proved to be the turning point of the war in the Pacific. For more information, both real-life and how I'm running this campaign, please check here:
https://oldleadbreed.blogspot.com/2019/11/battle-of-midway-campaign-plan.html
Yesterday at 0900 a US Navy PBY Catalina spotted Japanese ships 500nm west southwest of Midway; B-17s from the island were dispatched but failed to hit anything. US Navy PBYs continued to shadow the Japanese surface force, and actually attacked at 0100 this morning, scoring a torpedo hit on a Japanese merchant ship. Unbeknownst to US personnel, the Japanese carrier task force, as yet still unspotted, launched its first strike group against Midway at 0430. At 0530, the PBYs spotted the Japanese carriers, and noted their strike group inbound.
At 0610, the VMF-343 "Dirt Divers" scrambled six F4F Wildcats to intercept an inbound group of six D3A "Val" dive bombers escorted by four A6M "Zeros," but were roughly handled, having three Wildcats shot down and the other three damaged, as the Japanese lost one Zero and one Val. The Japanese aerial attack caused 18/30 damage points.
At 0625, Captain Haynes led six Wildcats to intercept an inbound group of six B5N "Kate" torpedo bombers escorted by four A6M "Zeros." Again it was rough: the Marines lost five of six aircraft, with one pilot KIA, one MIA, and two WIA, while the Japanese lost four of their six torpedo bombers, which did light damage to Midway's shore installations (26/30, total).
At 0645, Major Chandler led four Dirt Divers in escort of a flight of six TBF torpedo bombers to attack the Japanese carriers, running right into the Japanese CAP of six Zeros, and it was a debacle: the Americans lost one Wildcat and five TBFs, the last being damaged and forced to return to base without even spotting the Japanese carriers. Oh, and the Japanese did lose two Zeros, but they were both to the TBFs!!!
At 0715, 2nd Lt Herman led a flight of four Wildcats in escort of six SBD Dauntless dive bombers from Marine Scouting-Bombing Squadron 241 (VMSB-241), up against six Zeros of the Japanese Combat Air Patrol. The mission was sort of a success: five Zeros were downed (two by SBDs!) and the sixth was shot up, no Wildcats were lost, only three Dauntlesses were lost, but no hits were scored on the enemy carriers.
At 0800, Major Chandler is led a flight of four Wildcats on an escort mission for four US Army Air Corps B-26s specially modified to carry torpedoes. The Marines lost two Wildcats and had another damaged, and two B-26s, with another damaged, while the Japanese lost all four CAP Zeros, though one was shot down by a US bomber. The lone B-26 to reach the Japanese fleet missed on its torpedo run and, to add insult to injury, Major Chandler was one of the Marines shot down, and he was badly wounded.
At 1010, LtCmdr Case, the Ace squadron leader of the Killer Pelicans and winner of the Medal of Honor, lead a flight of four Wildcats in escort of six TBD Devastators against the Japanese carriers. They faced six Zeros, and it wasn't pretty: Ensigne Warren was shot down, two more Wildcats were damaged, and all six Devastators were shot down, at the cost of only three Zeros, two of which were shot down by the torpedo bombers!
At 1025, Lt (jg) Dahgren led a flight of four Wildcats in escort of six SBD Dauntless dive bombers, hoping to replicate what their real life predecessors did ("Scratch Four Flattops!"). They faced a Japanese CAP of four Zeros and couldn't quite live up to history: only one Dauntless got through, managing to put a 1000-lb bomb into the deck of the Kaga, but four others were shot down and the last had to return to base. The Wildcats didn't do much better, shooting down one Zero and damaging another (the Dauntlesses managed to shoot down one Zero themselves) while having one of their own shot down and one more damaged.
At 1035, Lt Cmdr Case re-formed a group of three Wildcats and lead the final strike of six SBD Dauntless dive bombers from VB-6 ("Bombing Six"). They shot down both Zeros they faced, the Dauntlesses sunk a carrier all by themselves (in addition to the other three that went down), and Lt French became an Ace!
At 1200, the Japanese strike group found the USS Yorktown! Ensign Manly managed to shoot down a Japanese super Ace, and the Wildcats were able to damage the remaining three Zeros and one Val, but five of six American fighters were shot down, the last was damaged and forced to return to base, and three pilots were killed or missing. The disaster was capped off by the Yorktown suffering two direct hits and a near miss.
It's now 1425, and a flight of B5N "Kate" torpedo bombers is inbound, escorted by four Zeros. Lt Fitzsimmons, the Squadron XO, leads the six-ship CAP up to meet them.
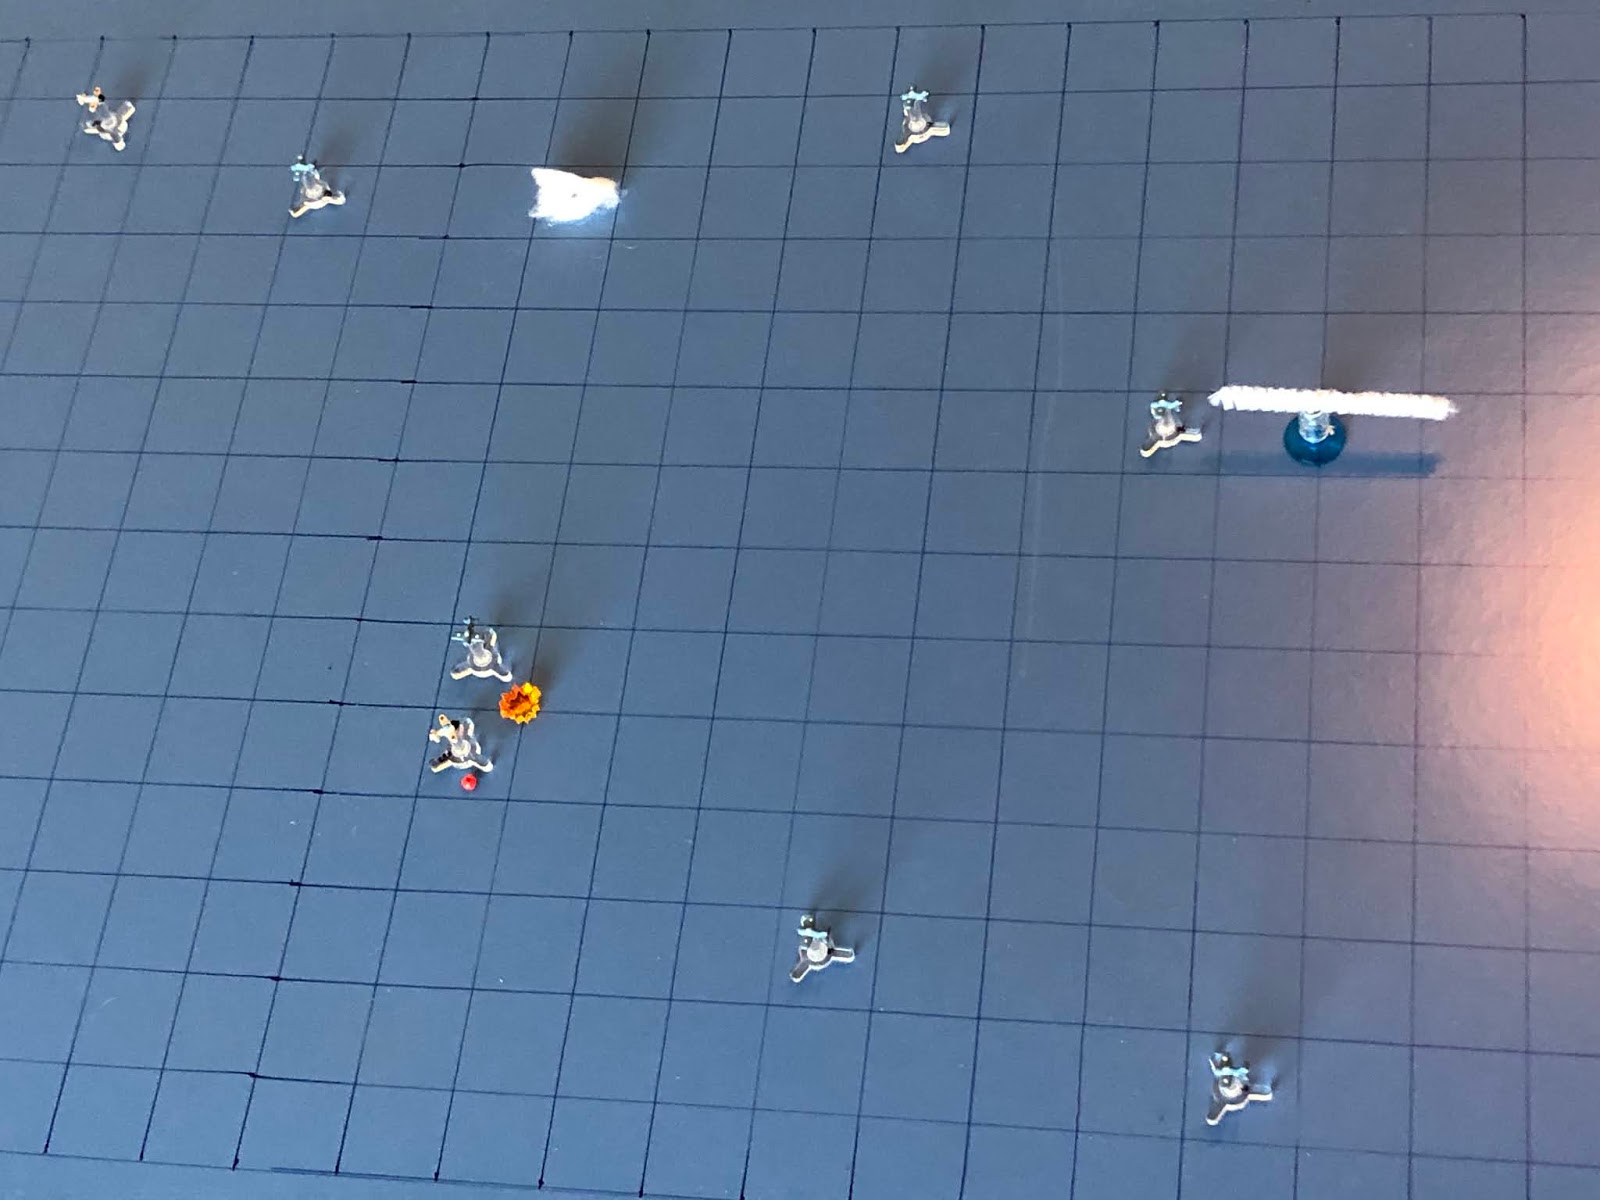
This is my arena for aerial combat; simple, yet durable and, to me, beautiful (in a simple, durable way). I'm using tiny aircraft designed by my buddy Thomaston; not sure what size they are, just that they are much smaller than 1/600. They're 3D printed models that I mounted on cut-down bases from Litko, and I'm using a very simple rules system called "Battle of Britain," which I found for free over on The Miniatures Page (I've already played a good 20 or so fights with them). Left is north, with the Japanese strike group there, and the American CAP at right.
The American CAP, from top left to bottom:
Ensign Mayhew, a Rookie on his first combat mission
Lt Allen, a Veteran with four kills on four sorties
Ensign Cartwright, a Rookie on his first combat mission
Lt Fitzsimmons, a Veteran with three kills on three sorties
Lt (jg) Head, a Veteran with four and one half kills on five sorties
Ensign Mitchell, a Rookie on his first combat mission
The Yorktown lays in the background, having already been ravaged by Japanese bombs...
The Japanese strike group, from top right to bottom left:
Zero 02, an Ace
Zero 01, an Ace
Kate 06 Kate 03
Kate 04 Kate 01
Kate 05 Kate 02
Zero 03, an Ace
Zero 04, a Regular
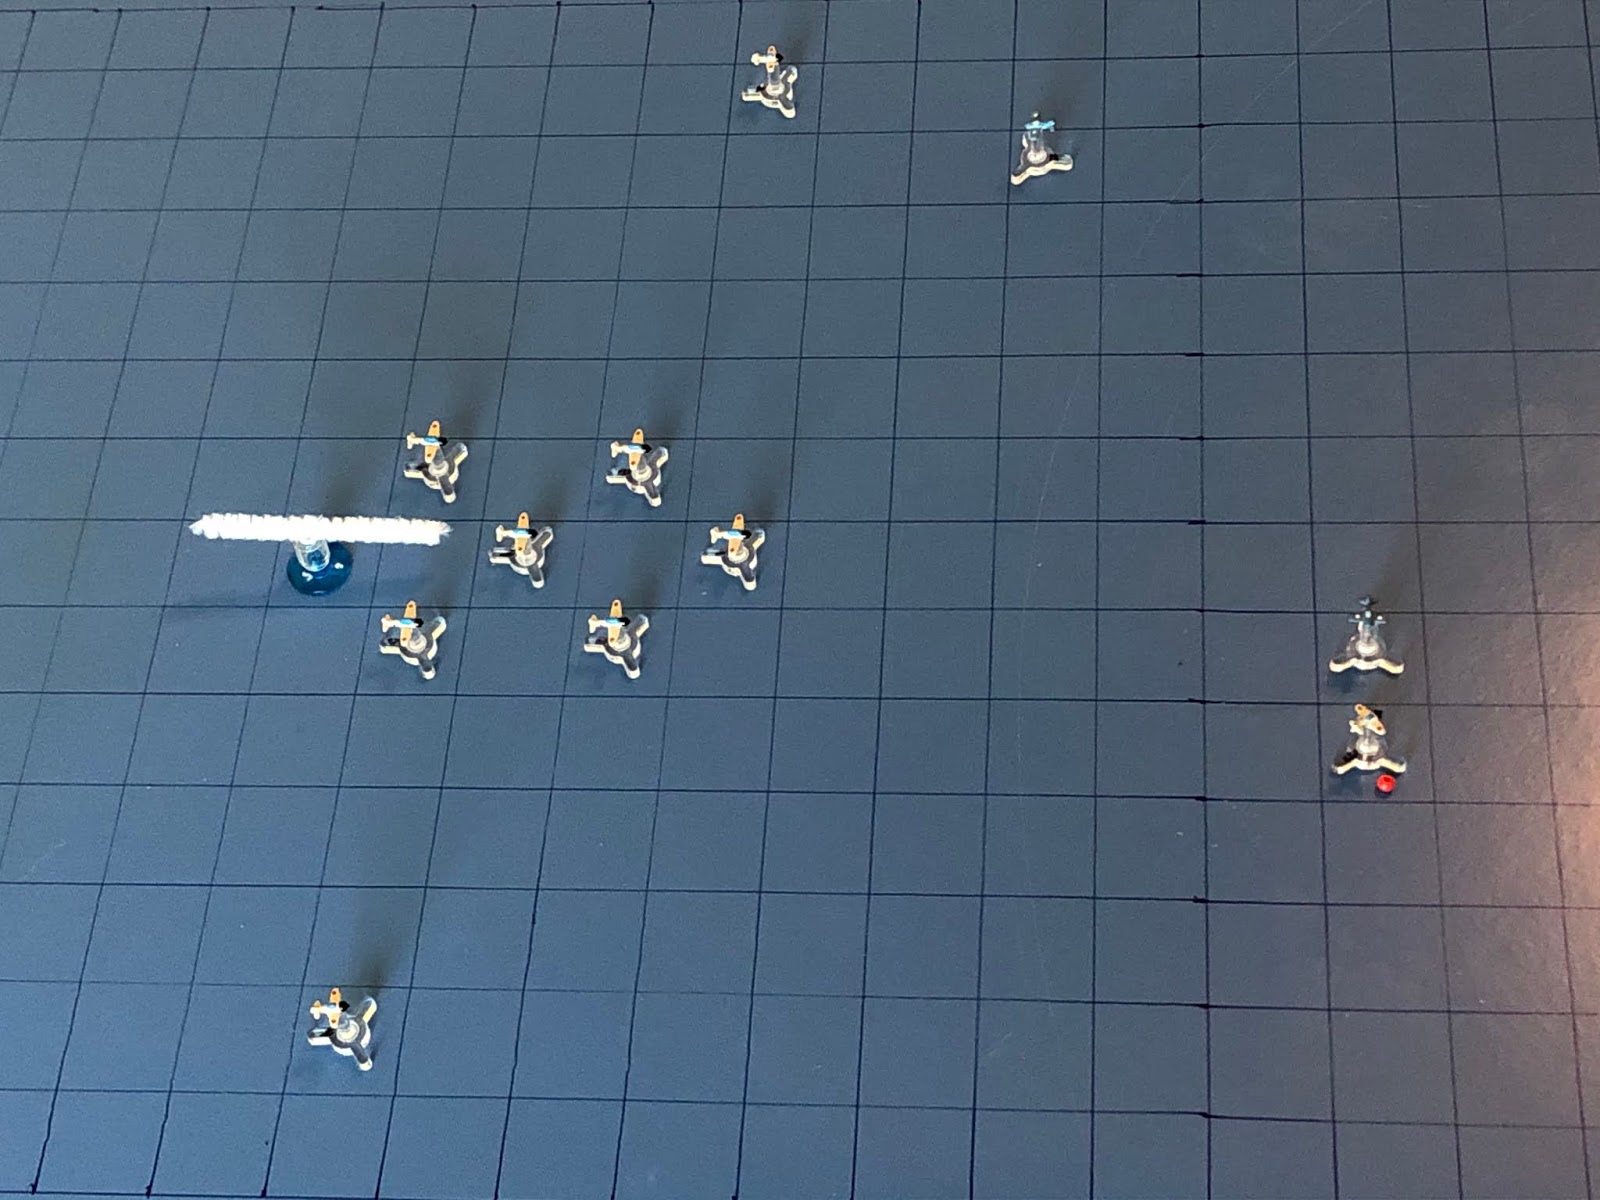
Well, mostly. Here's a wide look.
And then after Zero 03 moves, but Zero 01 (left top, the inside guy) still needs to go.
And he runs straight in on Lt Allen! Both pilots grit their teeth and squeeze the triggers, wincing as tracers zip past their heads...
Lt Allen scores, swatting down the Japanese fighter and becoming the Squadron's third Ace!
Lt Allen cruises past, waiting to see how froggy Zero 02 (top left) is feeling.
As Lt Fitzsimmons, the Squadron XO, cuts hard left and takes a high-deflection shot on Zero 03, damaging the enemy fighter!
Lt (jg) Head (bottom center left) and Ens Mitchell (bottom right) move up, but can't help.
Ensigns Mayhew (top center, with Lt Allen at top left and Lt Fitzsimmons at center left bottom) and Cartwright work to catch up.
The Kates push south.
Zero 03 is okay (of course, I swear they pass 99% of their damage rolls), so he cuts right and takes a high-deflection shot on Lt (jg) Head...
He misses, flashes past, then loops back in to take the same shot on Ensign Mitchell, before missing a second time!
Zero 04 cuts left, looking to get between Lt Fitzsimmons (center) and the Kates (far left).
Zero 02 loops in and takes a high-deflection shot on Lt Allen...
But misses and cuts left.
Ens Mayhew continues dillying...
Which kinda sucks, because Lt Allen needs help: he cuts left, turning his tail to Zero 02 (top right), to go after the torpedo bombers. He takes a high-deflection shot on Kate 03...
But misses and zooms all the way to the other side of the enemy formation.
Ens Cartwright sputters ahead, looking to get into the fight sometime in 1944...
As Lt Fitzsimmons cuts right, intent on getting after the Kates, but wary of Zero 04 (bottom left), too.
Lt (jg) Head sputters in, waiting to see what Zero 04 (bottom left) is going to do.
Maybe we should quit waiting to see what Zero 04 is going to do and go do something to him?
Ens Mitchell cuts right, defensive, against the damaged Zero 03.
As the Kates push south.
Ensign Cartwright (bottom right) looks on as Zero 02 runs straight in, head to head, on Ens Mayhew. Both pilots open fire...
But both pilots miss, and Zero 02 cuts hard right, getting into shape on Ens Cartwright (bottom center).
Zero 03 pulls an Immelman and coasts up alongside Ens Mitchell, attempting to get a good, closeup look at one of these Yankee Sky-Pirates.
Zero 04 runs straight in on Lt Fitzsimmons and takes a high-deflection shot...
Fitzsimmons' Wildcat shudders under the impact of 20mm and 7.7mm rounds, damaging it, as Zero 04 flashes past.
Lt Fitzsimmons's aircraft is okay and he charges straight in on Kate 02, braving defensive fire as he pulls the trigger...
The Kate's right wing comes off and it dives into the ocean as he pushes straight into Kate 05, both pilots firing at each other...
Lt Fitzsimmons' lets out a triumphal shout as he splashes his second Kate and zooms by!
Lt Allen calls "Nice shootin', Tex," into the radio as he flips an Immelman to get back into tailing position on the Kates. "You just became an Ace!" Lt Fitzsimmons smiled to himself.
"Hey, I can do that, too! Watch this!" called out Lt (jg) Head as he cut right, onto the tail of Zero 04. He pulled the trigger, adjusting for deflection, and walked his tracers onto the Zero...
Until it nosed over, trailing thick, black smoke, and plunged into the sea! Lt Allen called out: "Yeah, Head, you're an Ace now, too!"
Ens Mitchell again pulls right, defensive, continuing his turning dogfight with Zero 03. "I could use a little help here, gentlemen."
Ens Cartwright was next: "Please keep that bogey (Zero 02, top right) off my tail, I'm going after the Kates!" He drove in, cut left, and opened fire on Kate 01, but missed.
As Ens Mayhew cut hard left, even with Zero 02, hoping to dissuade him from jumping on Cartwright's tail.
The Kates begin pushing south, with Kate 03's pilot opening fire at point blank range on Ensign Cartwright...
Cartwright is hit in the throat, and as he clutches at the wound his Wildcat touches the surface of the ocean and cartwheels, killing him...
Ensign Mitchell (bottom right) wins out, at least temporarily; tired of dogfighting, Zero 03 disengages and pulls into tailing position on Lt (jg) Head.
As Zero 02 runs up and cuts right to take a high-deflection shot on Head...
Zero 03 misses, then cuts right and passes through the Kates, looking to get after Lieutenants Allen and Fitzsimmons (top left).
Lt Fitzsimmons pulls all the way around to get after the Kates.
And Lt Allen forms up on him, eyeballing Zero 02 (right bottom).
As Ens Mayhew cuts right and to take a high-deflection shot on Kate 03, but misses.
Ens Mitchell pulls left, letting out a sigh of relief at having fought off Zero 04.
Lt (jg) Head cuts hard left and goes head to head with Kate 04. Both pilots cut loose...
Both sets of tracers slam home, and both aircraft go down!!! Lt (jg) Head manages to bail out and is soon after picked up, though he's a bit roughed up from the bail out (lost a few teeth!) and would be out of action for the next ten days.
The torpedo bombers push south.
Zero 02 loops left and takes a front quarter shot on Lt Allen...
Damaging his Wildcat, before performing a beautiful maneuver to roll over onto Lt Fitzsimons' tail! The Zeros guns thunder...
And Fitzsimmons' Wildcat goes down in flames! Lt Allen saw Fitz parachute out, but he was never seen nor heard from again, a very bitter pill to swallow given his popularity in the squadron and his recent success.
Zero 03 loops all the way around to come onto Ens Mayhew's tail, where he opens fire on the Rookie...
Mayhew's Wildcat is damaged and the Japanese pilot pulls off to the right.
*This is ridiculous! I'm really pissed about losing Fitzsimmons, and I'm really pissed about winning this fight then having it turn on me in a split second. The Japanese started with three damn Aces, and the two pilots left are both Aces, and they both just rolled 6s for their maneuver rolls, which gave them a whopping 8 movement points, which is why they've been running circles around my guys...
Ens Mayhew's Wildcat is alright, and so he pulls left onto Kate 01's tail, dodging defensive fire to press home the attack...
The Kate explodes and the pieces drift down to the ocean like confetti. He peers over his shoulder to watch as his Wildcat zooms past.
Ens Mitchell sputters ahead, looking to get at the Kates (center top).
Lt Allen zooms in and cuts left, dodging defensive fire from Kate 06 as he takes a high-deflection shot on Zero 03...
The .50-cal HMG rounds pulverize the Zero and it sort of just settles into the ocean.
The two remaining Kates push south.
As the last remaining enemy fighter, Zero 02, cuts left and jumps on Lt Allen's tail, lining up a perfect, zero-deflection tail shot...
Which he promptly misses!
And Ens Mitchell continues to sputter...
*Three turns in a row Mitchell has rolled a '1' or his maneuver roll. I guess he used them all up during his rolling dogfight with Zero 03...
Ens Mayhew cuts left onto Kate 03's tail, dodging defensive fire as he opens up...
He damages his target, but then he cuts left, subjecting his aircraft to more defensive fire from both Kate 03 and Kate 06, though both miss.
Lt Allen performs an Immelman in order to face off with Zero 02, fairly sure he won't miss another easy tail shot.
Despite being damaged, Kate 03 continues to press home the attack, as she and Kate 06 push south. Kate 06 gets a shot at Ens Mayhew (left) but misses, and Ens Mitchell (bottom right) takes a full deflection shot at Kate 03 and misses.
Not happy with how things are looking against Lt Allen (top left), Zero 02 jinks over onto Ens Mayhew's tail and opens fire...
Knocking the Rookie from the sky. Ensign Mayhew was hit in the face by shell fragments, but luckily he was able to bail out. He was picked up almost immediately, but will be out of action for about a month.
Lt Allen cuts left, into Zero 02, defensive.
But Ens Mitchell cuts right, looking to stay with the Kates and hoping Lt Allen can keep Zero 02 (far left) off him.
The Kates are near their release point.
Lt Allen (far left) looks on helplessly as Zero 02 loops in on Ens Mitchell's tail and opens fire...
Ensign Mitchell bails out of his stricken Wildcat but is never seen again, as Zero 02 cuts back around to face Lt Allen.
*If you haven't been paying attention, Zero 02 is pretty much singlehandedly killing me. He's shot down Fitzsimmons, Mayhew, and Mitchell so far, now all I've got left is Allen. Zero 02's maneuver rolls have been off the charts, 5s and 6s, letting him literally run circles around my guys. Keep in mind, he started up by Allen (top left), swooped in and shot down Mitchell (bottom right), then cut back around to face Allen, all in one fell swoop.
Lt Allen does the valiant thing: rather than play defense against Zero 02 (bottom left), he cuts left, straight onto Kate 06's tail. Defensive tracers reach out to meet him as he opens fire...
But he completely misses, and the Kates press home their attack!
*For goodness' sake! He pretty much sacrifices himself to get one of the last two Kates, then screws that up!
And here he comes: Zero 02 swoops all the way around, in behind Lt Allen's damaged Wildcat, to line up a perfect, zero-deflection shot. He presses the triggers...
And Lt Allen's Wildcat goes down! Allen was able to bail out and was picked up soon thereafter, but he was hit in the shoulder by one of those 7.7mm rounds and is out of action for the next four months!
The Kates assume attack formation (too beat up and not enough of them to warrant trying hammer and anvil)… They make their runs but fail to score (only 6 damage points). Despite these guys missing, the Yorktown is in big trouble as she took torpedo hits during the raid.
Before forming up for the flight home. The only joy I get is from knowing that they will return to carriers that are either burning or not there, and will have to ditch in the ocean...
Damn man, that fight turned on a dime, and not in a good way. I was winning the fight, lost a couple Wildcats, had them down to only one Zero left, and then he goes nuts and shoots down four friggin' Wildcats all by himself. This fight made three new Aces for the Killer Pelicans, and all three were shot down, with one MIA and the other two wounded, one of them being out for four months! I'm flabbergasted; the whole squadron is now down to only Case, Chipman, Bryan, Dahlgren, and French, out of 18 pilots. That's the other issue: I can't believe how bad my 'shoot down' rolls have been, so many pilots KIA or MIA in this battle (all of Midway, not just this fight).
Lt Fitzsimmons scored two kills to become an Ace, but was shot down and is MIA. Received the Bronze Star w/V.*
Lt Allen scored two kills to become an Ace, but was shot down and badly WIA, out for 110 days. Received the Bronze Star w/V.
Lt (jg) Head scored two kills to become an Ace, but was shot down and WIA, out for 10 days. Received the Bronze Star w/V.
*I am seriously considering cheating and having Fitzsimmons found in a couple days, sunburnt and dehydrated, but alive. Whaddaya think?
Well, this has been incredibly ugly, and there's one more to go. The Japanese dive bomber and torpedo attacks damaged the Yorktown and Enterprise, but flight operations continue. The last Japanese carrier, the Hiryu has been sighted, and it's all hands on deck. The planes have launched, and we've got LtCmdr Case leading the last three Wildcats in escort of six SBD Dauntlesses.
V/R,
Jack


I vote for bringing back Fitzsimmons! He deserves it.
ReplyDeleteYou know, Kyote said the same thing! I believe we have a quorum, he shall again be added to the active rolls!
DeleteV/R,
Jack