All,
1200 local time
4 June 1942
Midway
It's 4 June 1942, the dawn of the epic "Battle of Midway," a clash of giants, three US carriers vs four Japanese carriers that proved to be the turning point of the war in the Pacific. For more information, both real-life and how I'm running this campaign, please check here:
https://oldleadbreed.blogspot.com/2019/11/battle-of-midway-campaign-plan.html
Yesterday at 0900 a US Navy PBY Catalina spotted Japanese ships 500nm west southwest of Midway; B-17s from the island were dispatched but failed to hit anything. US Navy PBYs continued to shadow the Japanese surface force, and actually attacked at 0100 this morning, scoring a torpedo hit on a Japanese merchant ship. Unbeknownst to US personnel, the Japanese carrier task force, as yet still unspotted, launched its first strike group against Midway at 0430. At 0530, the PBYs spotted the Japanese carriers, and noted their strike group inbound.
At 0610, the VMF-343 "Dirt Divers" scrambled six F4F Wildcats to intercept an inbound group of six D3A "Val" dive bombers escorted by four A6M "Zeros," but were roughly handled, having three Wildcats shot down and the other three damaged, as the Japanese lost one Zero and one Val. The Japanese aerial attack caused 18/30 damage points.
At 0625, Captain Haynes led six Wildcats to intercept an inbound group of six B5N "Kate" torpedo bombers escorted by four A6M "Zeros." Again it was rough: the Marines lost five of six aircraft, with one pilot KIA, one MIA, and two WIA, while the Japanese lost four of their six torpedo bombers, which did light damage to Midway's shore installations (26/30, total).
At 0645, Major Chandler led four Dirt Divers in escort of a flight of six TBF torpedo bombers to attack the Japanese carriers, running right into the Japanese CAP of six Zeros, and it was a debacle: the Americans lost one Wildcat and five TBFs, the last being damaged and forced to return to base without even spotting the Japanese carriers. Oh, and the Japanese did lose two Zeros, but they were both to the TBFs!!!
At 0715, 2nd Lt Herman led a flight of four Wildcats in escort of six SBD Dauntless dive bombers from Marine Scouting-Bombing Squadron 241 (VMSB-241), up against six Zeros of the Japanese Combat Air Patrol. The mission was sort of a success: five Zeros were downed (two by SBDs!) and the sixth was shot up, no Wildcats were lost, only three Dauntlesses were lost, but no hits were scored on the enemy carriers.
At 0800, Major Chandler is led a flight of four Wildcats on an escort mission for four US Army Air Corps B-26s specially modified to carry torpedoes. The Marines lost two Wildcats and had another damaged, and two B-26s, with another damaged, while the Japanese lost all four CAP Zeros, though one was shot down by a US bomber. The lone B-26 to reach the Japanese fleet missed on its torpedo run and, to add insult to injury, Major Chandler was one of the Marines shot down, and he was badly wounded.
At 1010, LtCmdr Case, the Ace squadron leader of the Killer Pelicans and winner of the Medal of Honor, lead a flight of four Wildcats in escort of six TBD Devastators against the Japanese carriers. They faced six Zeros, and it wasn't pretty: Ensigne Warren was shot down, two more Wildcats were damaged, and all six Devastators were shot down, at the cost of only three Zeros, two of which were shot down by the torpedo bombers!
At 1025, Lt (jg) Dahgren led a flight of four Wildcats in escort of six SBD Dauntless dive bombers, hoping to replicate what their real life predecessors did ("Scratch Four Flattops!"). They faced a Japanese CAP of four Zeros and couldn't quite live up to history: only one Dauntless got through, managing to put a 1000-lb bomb into the deck of the Kaga, but four others were shot down and the last had to return to base. The Wildcats didn't do much better, shooting down one Zero and damaging another (the Dauntlesses managed to shoot down one Zero themselves) while having one of their own shot down and one more damaged.
At 1035, Lt Cmdr Case re-formed a group of three Wildcats and lead the final strike of six SBD Dauntless dive bombers from VB-6 ("Bombing Six"). They shot down both Zeros they faced, the Dauntlesses sunk a carrier all by themselves (in addition to the other three that went down), and Lt French became an Ace!
It's now 1200, and the Japanese strike group has found the USS Yorktown! Lt (jg) Chipman leads a CAP of six F4F Wildcats over to intercept a flight of six D3A "Val" dive bombers escorted by four Zeros.
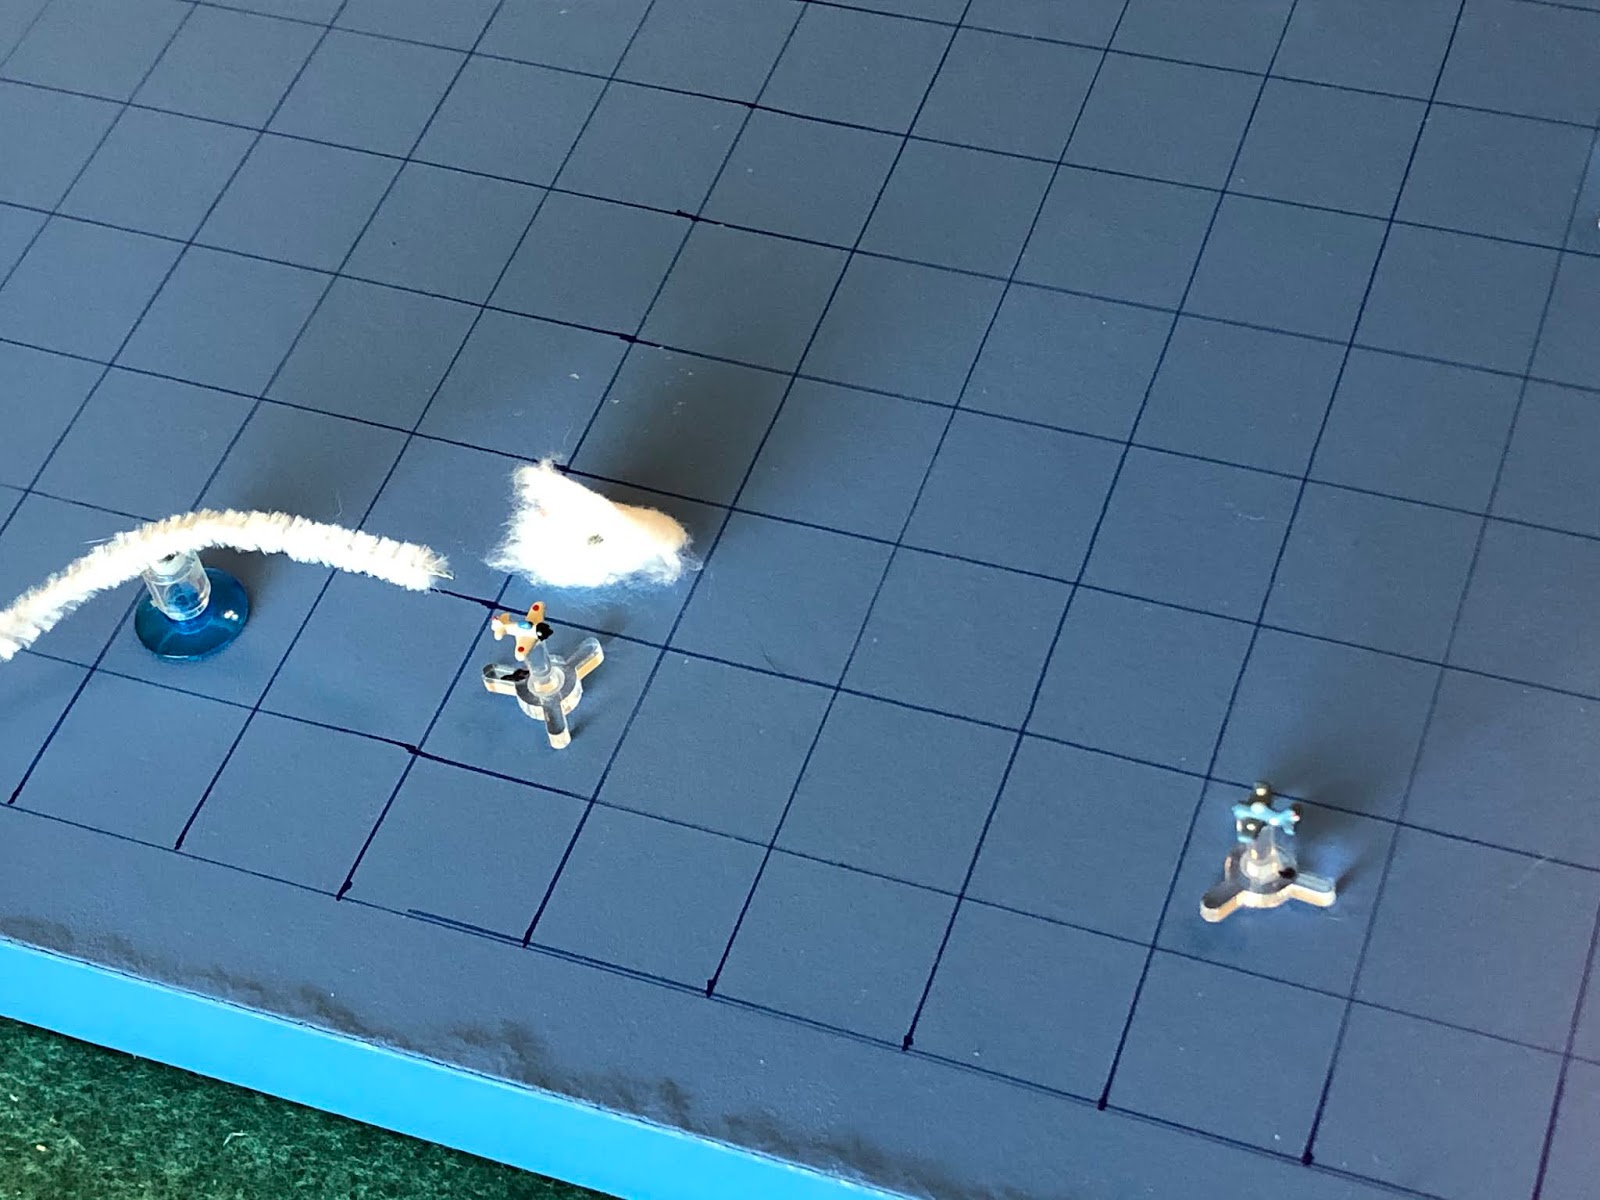
This is my arena for aerial combat; simple, yet durable and, to me, beautiful (in a simple, durable way). I'm using tiny aircraft designed by my buddy Thomaston; not sure what size they are, just that they are much smaller than 1/600. They're 3D printed models that I mounted on cut-down bases from Litko, and I'm using a very simple rules system called "Battle of Britain," which I found for free over on The Miniatures Page (I've already played a good 20 or so fights with them)
. Left is north, with the Japanese strike group there, and the American CAP at right.
Finally, no toes!
The American CAP, from top left to bottom:
Ensign Theisman, a Rookie that was shot down at Coral Sea on his first sortie
Lt (jg) Chipman, a Veteran with three kills on four sorties
Ensign Walton, a Rookie on his first combat mission
Lt (jg) Head, a Veteran with four and one half kills on four sorties
Ensign Manley, a Regular with one and one half kills on two sorties
Ensign Bowles, a Rookie on his first combat mission
The Yorktown lays in the background, hoping to not catch any Japanese bombs...
The Japanese strike group, from top right to bottom left:
Zero 02, a Veteran
Zero 01, an Ace
Val 06 Val 03
Val 04 Val 01
Val 05 Val 02
Zero 03, a Natural Born Killer
Zero 04, a Veteran
We fast forward through the first three turns in order to bring you straight into the action. Time to fight!
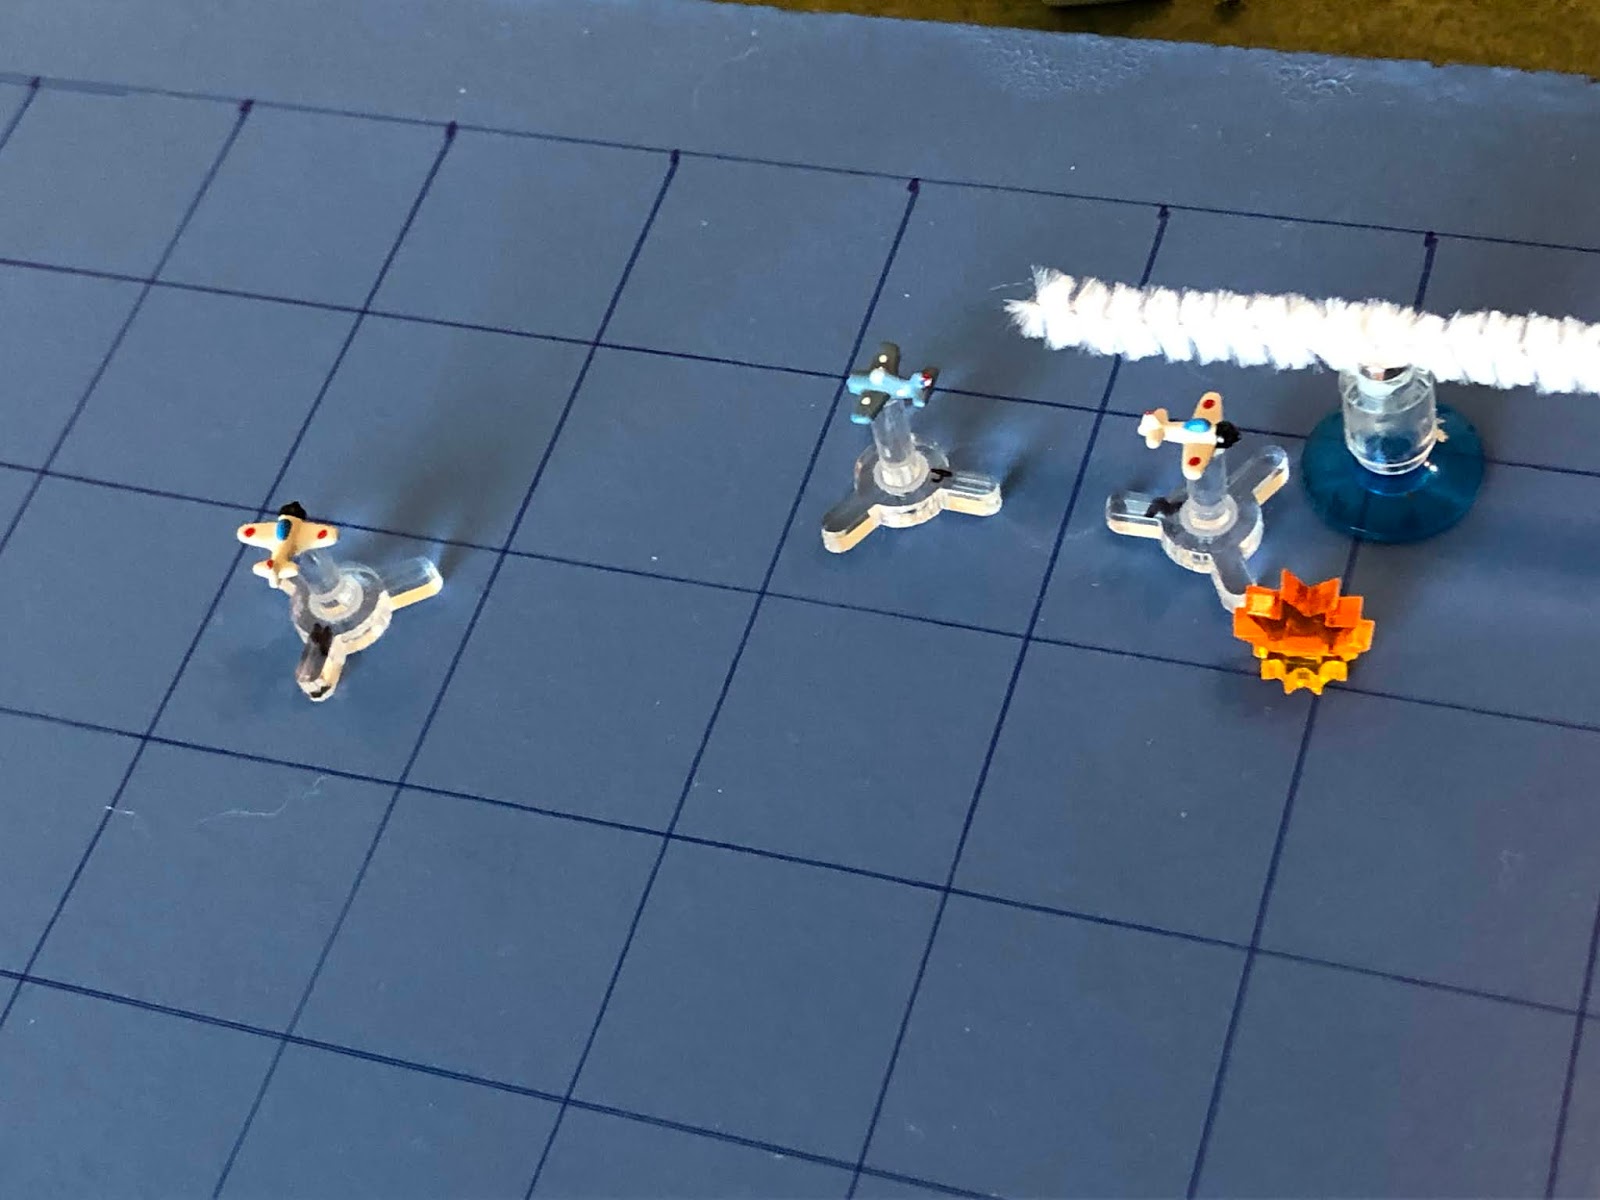
Zero 03, the Natural Born Killer, and Ensign Manley pull out of the clouds simultaneously to find themselves nose to nose! Both pilots stand on the triggers!
And Ens Manley scores, knocking down the Japanese super Ace!!!
Wow, that's never happened before; while 'fast-forwarding' through the first couple turns, two aircraft had such great maneuver rolls that they ended up nose to nose! I probably should have let Manley maneuver away (escorts go first, then interceptors), and by all accounts it should have been the youngster Manley going down in flames, but I'll take it!
Zero 04 immediately loops in, looking for revenge...
And he gets it, splashing Ens Manley then cutting back left, facing off with Ens Bowles (bottom right). Ens Manley was slightly injured while bailing out of his burning Wildcat, and though he was picked up, he'll be out of action for the next few weeks.
Zero 01 pushes south (top center) and Zero 02 follows.
Lt (jg) Chipman jinks over, looking to gain advantage.
While down below, Lt (jg) Head comes left and goes after Zero 04, but misses.
So the Rookie, Ensign Bowles runs straight in on him...
But this time the Japanese pilot comes out on top, with Zero 04 racking up his second kill of the fight! Unfortunately, Ensign Bowles went down with his aircraft, KIA.
Ensigns Theisman (top right) and Walton (center) work to catch up.
As the Vals push south.
Zero 04 cuts left, past Lt (jg) Head (bottom center) and into Ens Walton (right).
Zero 01 zooms in and cuts hard left, behind Lt (jg) Chipman.
While Zero 02 goes straight at him, taking a high-deflection shot and missing.
Ens Walton cuts right, looking to help, and the Rookie opens fire, damaging Zero 01!
As Ens Theisman continues screwing around. He was supposed to get in there and keep Zero 04 (bottom center left) off of Ens Walton's tail (top left), but because he didn't do his job it's quite likely Walton will soon be visiting Davey Jones' locker...
Lt (jg) Chipman shoots past the Zeros to bounce the Vals; he takes a high-deflection shot on Val 06 but misses.
Lt (jg) Head pulls an Immelman and ends up beautifully on Zero 04's tail.
*He can't shoot though, as I only let Aces and NBKs perform an Immelman/Split S then engage in the same turn...
The Vals push south.
And, as predicted, Zero 04 swoops onto Ens Walton's tail...
And splashes him! Good grief, the second Yank pilot has been killed in action...
Zero 01's pilot checks his gauges: he's alright (the damn Japanese somehow seem to always pass their damage checks), so he pushes over left and latches onto Lt (jg) Chipman's tail before opening fire, but he misses!!!
Zero 02 comes right, past Zero 04, looking to get at Ens Theisman.
Ens Theisman panics, wets his pants, and charges straight in on the Japanese veteran. Both pilots open fire...
And both pilots miss! Ens Theisman opens his eyes to find he's passed Zero 02 and is now near colliding with Zero 04.
Lt (jg) Head is too far away to help Ens Theisman (top right) or Lt (jg) Chipman (far left), so he cuts left and looks to get into the Japanese bomber formation.
Then Lt (jg) Chipman bravely (foolishly) ignores the damaged Zero 01 (top center) and cuts hard left in behind Zero 06, dodging defensive fire as he cuts loose, but he only manages to damage the enemy dive bomber...
The damaged Val turns and heads for home (top left, with Zero 01 below him) as the remaining Vals push south, where Lt (jg) Head (far right) opens fire on Val 01, missing his high-deflection shot.
Zero 01 pulls hard around onto Lt (jg) Chipman's tail and opens fire, damaging the stubby Wildcat.
As Zero 04 pulls an Immelman and heads straight for Lt (jg) Head (bottom center left), paying Ens Theisman (top center right) utterly no respect.
Zero 02 decides to be a good wingman, cutting left to cover Zero 04's tail, though this exposes him to Ens Theisman (top right)...
And Ens Theisman immediately rolls over and takes the tail shot on Zero 02...
But the Rookie misses and flashes past, harmlessly...
Lt (jg) cuts right and goes head to head with Zero 04! The American is dealing with head-on fire from the Zero, as well as defensive fire from Val 01!
The Zero and the Wildcat are damaged, then Lt (jg) Head kicks the rudder over and goes head to head with Zero 02! Both pilots open fire...
And both miss, with Lt (jg) Head cutting left afterwards.
Further north, Lt (jg) Chipman's aircraft is still airworthy, but he decides he's better pay more attention to Zero 01, so he pulls a Split-S and faces up to him.
And the Japanese dive bombers push south.
Happy he got Lt (jg) Chipman (far left) to turn away from the bombers (bottom right), Zero 01 chuckles as he shoots past, getting into a tailing position on Lt (jg) Head (top center right).
Zero 04's aircraft is still in fighting shape, so he comes right, after Lt (jg) Chipman (top left).
Zero 02 is feeling the heat, but is still confident, so he flips an Immelman to get onto Lt (jg) Head's tail.
But Lt (jg) Head's Wildcat is pretty beat up, so he pulls away, looking to disengage.
Lt (jg) pulls another Split-S, facing up to Zero 04 (center) and getting into tailing position on Zero 01 (top right). Oh yeah, he's supposed to be going after the bombers (bottom right)...
Eng Theisman is lost in the sauce; he cuts a lazy right, not accomplishing much, if anything...
The Vals push south, bringing the Yorktown into sight.
Zero 01 jinks over and takes a high-deflection shot on Ens Theisman...
He misses and flashes by.
As Zero 02 pulls an Immelman, pulling in behind Ens Theisman.
And Zero 04 cuts right, around Lt (jg) Chipman, defensive.
Lt (jg) Chipman decides to ignore Zero 04 (far left), kicking it in the ass and coming right to take a high-deflection shot on Zero 02, damaging it.
*I can't believe how many times I've hit Japanese aircraft without downing them...
Seeing Zero 02 getting roughed up by Lt (jg Chipman (left) and hoping she's going down, Ens Theisman takes a big risk, turning his tail to her as he cuts hard left and jumps on Val 04's tail. Theisman dodges defensive fire as he pulls the trigger...
Ens Theisman misses, but his Wildcat is hit and damaged as he comes left, running the same drill on Val 03. Tracers crisscross the sky...
Again Ens Theisman misses a perfect tail shot, and again his Wildcat absorbs rounds from a dive bomber's tail gun. Both Lt (jg) Chipman and Head saw a 'chute, but Ensign Theisman was never seen again.
The Vals push south.
Zero 02 is damaged and heads back to her carrier.
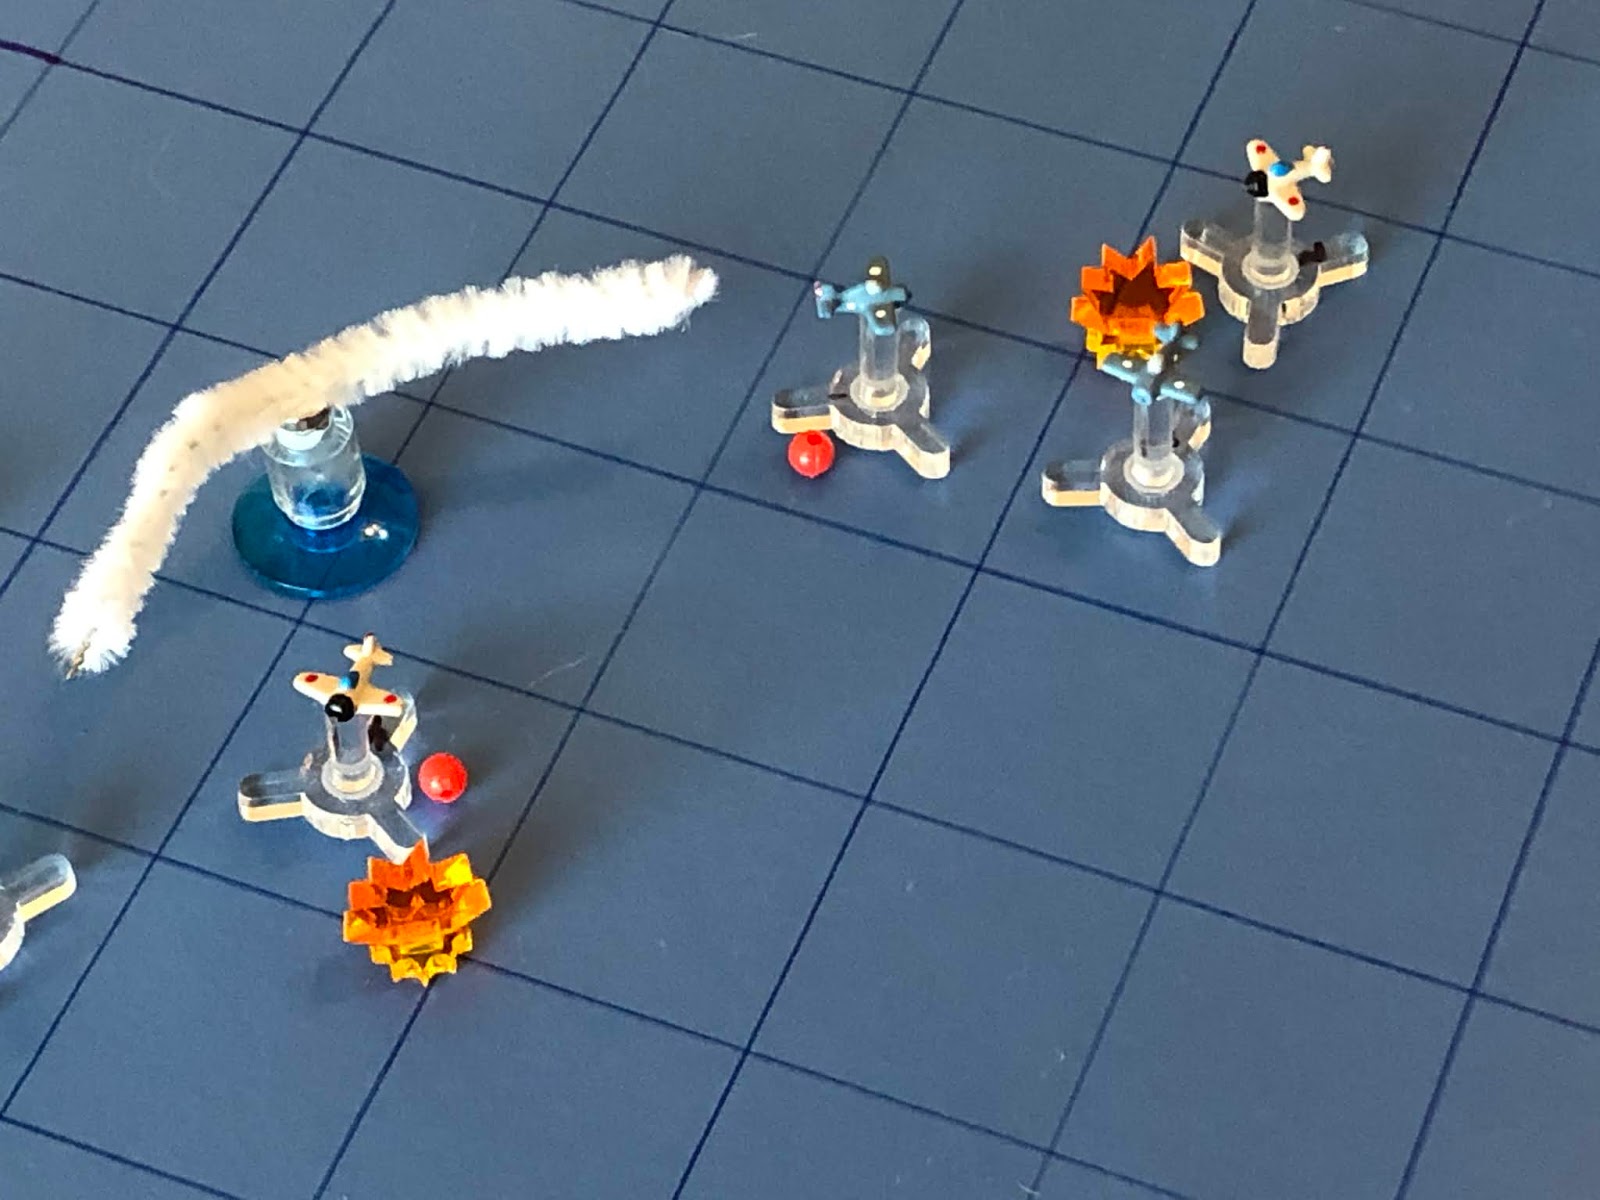
As Zero 04 pulls right, into a tailing position on the last remaining Wildcat, piloted by Lt (jg) Chipman.
But then the Japanese Ace, Zero 01, pulls hard right and runs in on Lt (jg) Chipman, taking a high-deflection shot...
20mm rounds pounded the sturdy Wildcat, forcing it down, though Lt (jg) Chipman was able to bail out. He was quickly picked up by a nearby friendly destroyer.
But that means the sky is now devoid of American fighter aircraft, so the Vals fan out into attack formation...
And make their runs on the Yorktown, planting several 550-pound bombs squarely on her flight deck! (25 damage points)
The Japanese pilots triumphantly form up for their return flight, unaware their carriers are either funeral pyres or at the bottom of the ocean. Damage control parties on the Yorktown immediately get to work, putting out the fires, some of which were below decks due to delayed fuses, and patching up the holes in the flight deck.
Well, that really sucked!!! I figured things were looking up when Manley knocked down the Natural Born Killer; I had no idea that would be my only kill of the whole damn fight!!! Those damage rolls absolutely killed me: keep in mind, the American pilots only killed Zero 03, but they damaged all three of the other Zeros, and one of the Vals. Life would have been much different had some of those damage rolls come up a bit different.
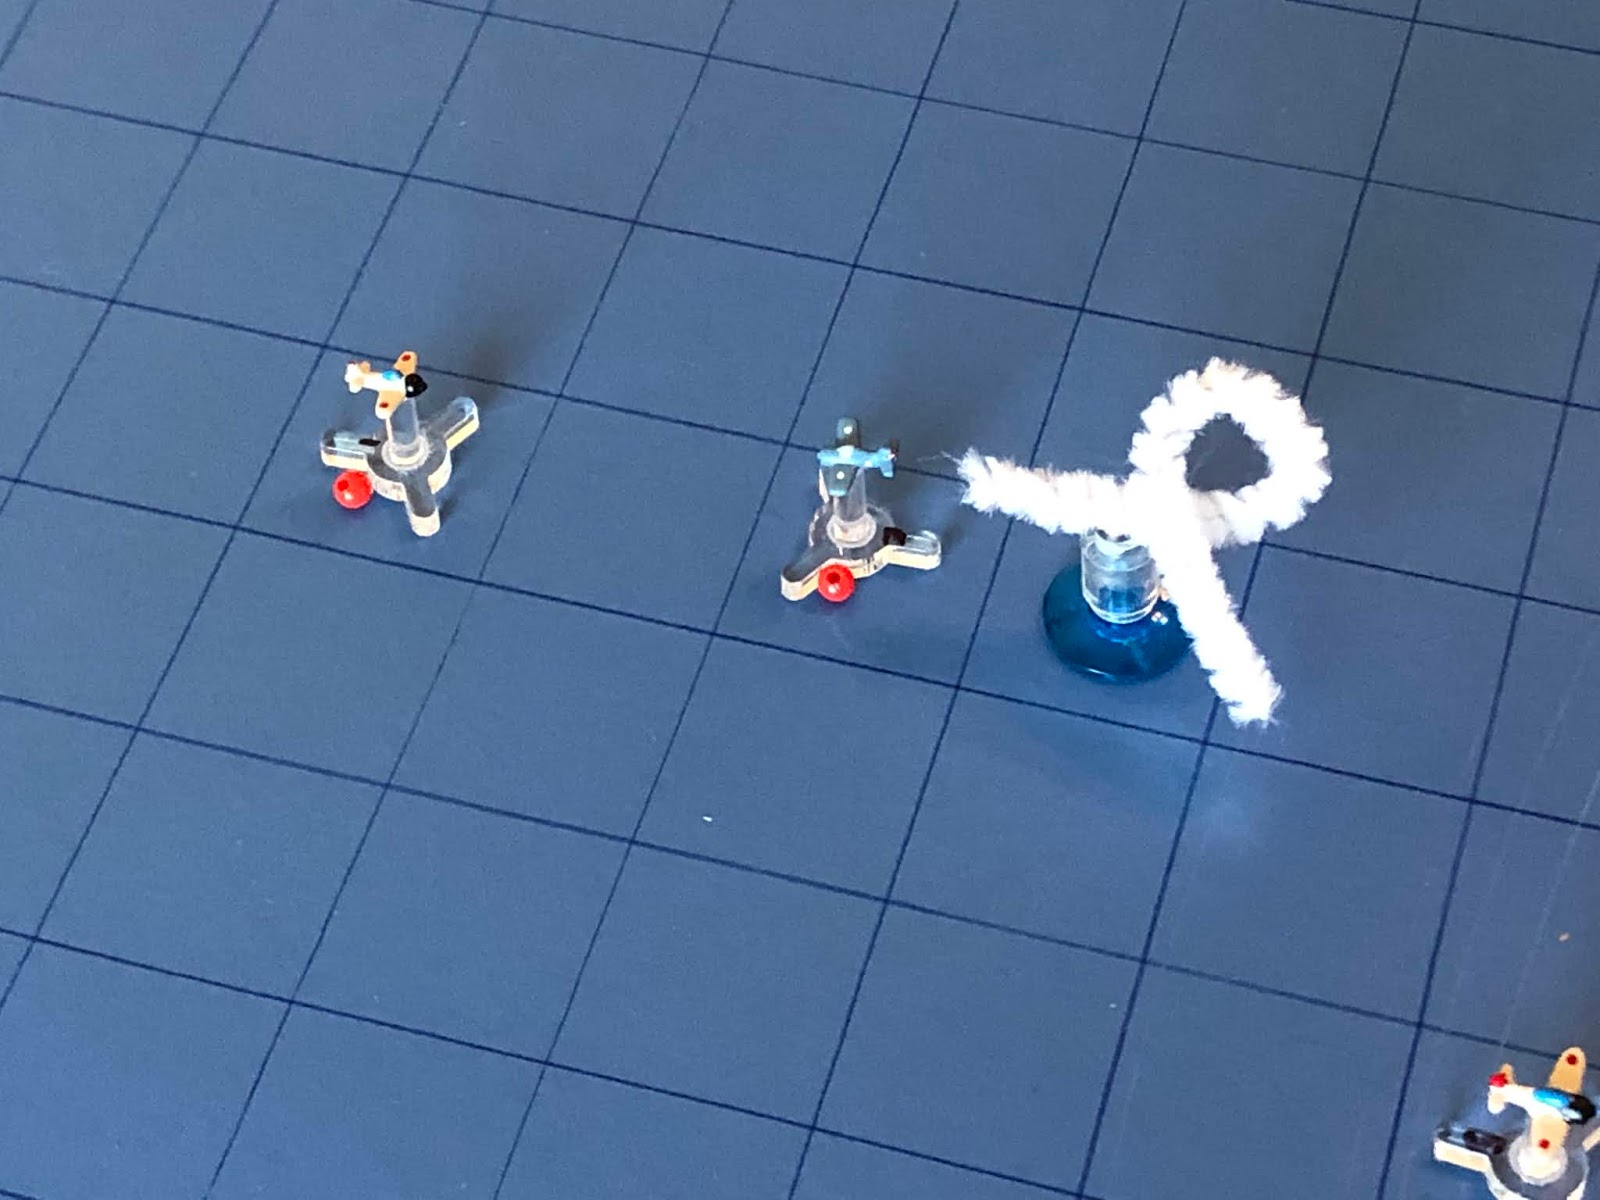
Lt (jg) Chipman was shot down but picked up
Lt (jg) Head failed to score, was shot up and had to disengage
Ensign Manley scored his 2.5 kill of the war but was shot down, picked up, and lightly wounded
Ensign Theisman was shot down and is Missing In Action
Ensign Walton was shot down, KIA
Ensign Bowles was shot down, KIA
Pretty damn rough, losing five of six Wildcats, three pilots gone forever, and the Yorktown burning. But things are looking up: for the moment, the skies are clear. Lt (jg) Head got to set his damaged Wildcat down, and the net set of CAP refueled and launched. A couple hours later the klaxons sounded again: inbound bogeys, this time a flight of Kates torpedo bombers!
V/R,
Jack


No toes in any pictures this time! Just posting so you now someone is reading them all. And yes, your dice rolling was slanted towards the wrong side this game.
ReplyDeleteHey Shaun, hope all is well! Yeah, I'm trying to do better about not getting appendages in the photos ;) This whole Midway campaign has seen some rather bad shooting dice for the Americans which, coupled with the Zero's greater maneuverability and the advantage in Japanese pilot skill, has made for a bloody and dispiriting campaign. But we shall endeavor to persevere!
DeleteV/R,
Jack