1035 local time
4 June 1942 Midway
It's 4 June 1942, the dawn of the epic "Battle of Midway," a clash of giants, three US carriers vs four Japanese carriers that proved to be the turning point of the war in the Pacific. For more information, both real-life and how I'm running this campaign, please check here:
https://oldleadbreed.blogspot.com/2019/11/battle-of-midway-campaign-plan.html
Yesterday at 0900 a US Navy PBY Catalina spotted Japanese ships 500nm west southwest of Midway; B-17s from the island were dispatched but failed to hit anything. US Navy PBYs continued to shadow the Japanese surface force, and actually attacked at 0100 this morning, scoring a torpedo hit on a Japanese merchant ship. Unbeknownst to US personnel, the Japanese carrier task force, as yet still unspotted, launched its first strike group against Midway at 0430. At 0530, the PBYs spotted the Japanese carriers, and noted their strike group inbound.
At 0610, the VMF-343 "Dirt Divers" scrambled six F4F Wildcats to intercept an inbound group of six D3A "Val" dive bombers escorted by four A6M "Zeros," but were roughly handled, having three Wildcats shot down and the other three damaged, as the Japanese lost one Zero and one Val. The Japanese aerial attack caused 18/30 damage points.
At 0625, Captain Haynes led six Wildcats to intercept an inbound group of six B5N "Kate" torpedo bombers escorted by four A6M "Zeros." Again it was rough: the Marines lost five of six aircraft, with one pilot KIA, one MIA, and two WIA, while the Japanese lost four of their six torpedo bombers, which did light damage to Midway's shore installations (26/30, total).
At 0645, Major Chandler led four Dirt Divers in escort of a flight of six TBF torpedo bombers to attack the Japanese carriers, running right into the Japanese CAP of six Zeros, and it was a debacle: the Americans lost one Wildcat and five TBFs, the last being damaged and forced to return to base without even spotting the Japanese carriers. Oh, and the Japanese did lose two Zeros, but they were both to the TBFs!!!
At 0715, 2nd Lt Herman led a flight of four Wildcats in escort of six SBD Dauntless dive bombers from Marine Scouting-Bombing Squadron 241 (VMSB-241), up against six Zeros of the Japanese Combat Air Patrol. The mission was sort of a success: five Zeros were downed (two by SBDs!) and the sixth was shot up, no Wildcats were lost, only three Dauntlesses were lost, but no hits were scored on the enemy carriers.
At 0800, Major Chandler is led a flight of four Wildcats on an escort mission for four US Army Air Corps B-26s specially modified to carry torpedoes. The Marines lost two Wildcats and had another damaged, and two B-26s, with another damaged, while the Japanese lost all four CAP Zeros, though one was shot down by a US bomber. The lone B-26 to reach the Japanese fleet missed on its torpedo run and, to add insult to injury, Major Chandler was one of the Marines shot down, and he was badly wounded.
At 1010, LtCmdr Case, the Ace squadron leader of the Killer Pelicans and winner of the Medal of Honor, lead a flight of four Wildcats in escort of six TBD Devastators against the Japanese carriers. They faced six Zeros, and it wasn't pretty: Ensigne Warren was shot down, two more Wildcats were damaged, and all six Devastators were shot down, at the cost of only three Zeros, two of which were shot down by the torpedo bombers!
At 1025, Lt (jg) Dahgren led a flight of four Wildcats in escort of six SBD Dauntless dive bombers, hoping to replicate what their real life predecessors did ("Scratch Four Flattops!"). They faced a Japanese CAP of four Zeros and couldn't quite live up to history: only one Dauntless got through, managing to put a 1000-lb bomb into the deck of the Kaga, but four others were shot down and the last had to return to base. The Wildcats didn't do much better, shooting down one Zero and damaging another (the Dauntlesses managed to shoot down one Zero themselves) while having one of their own shot down and one more damaged.
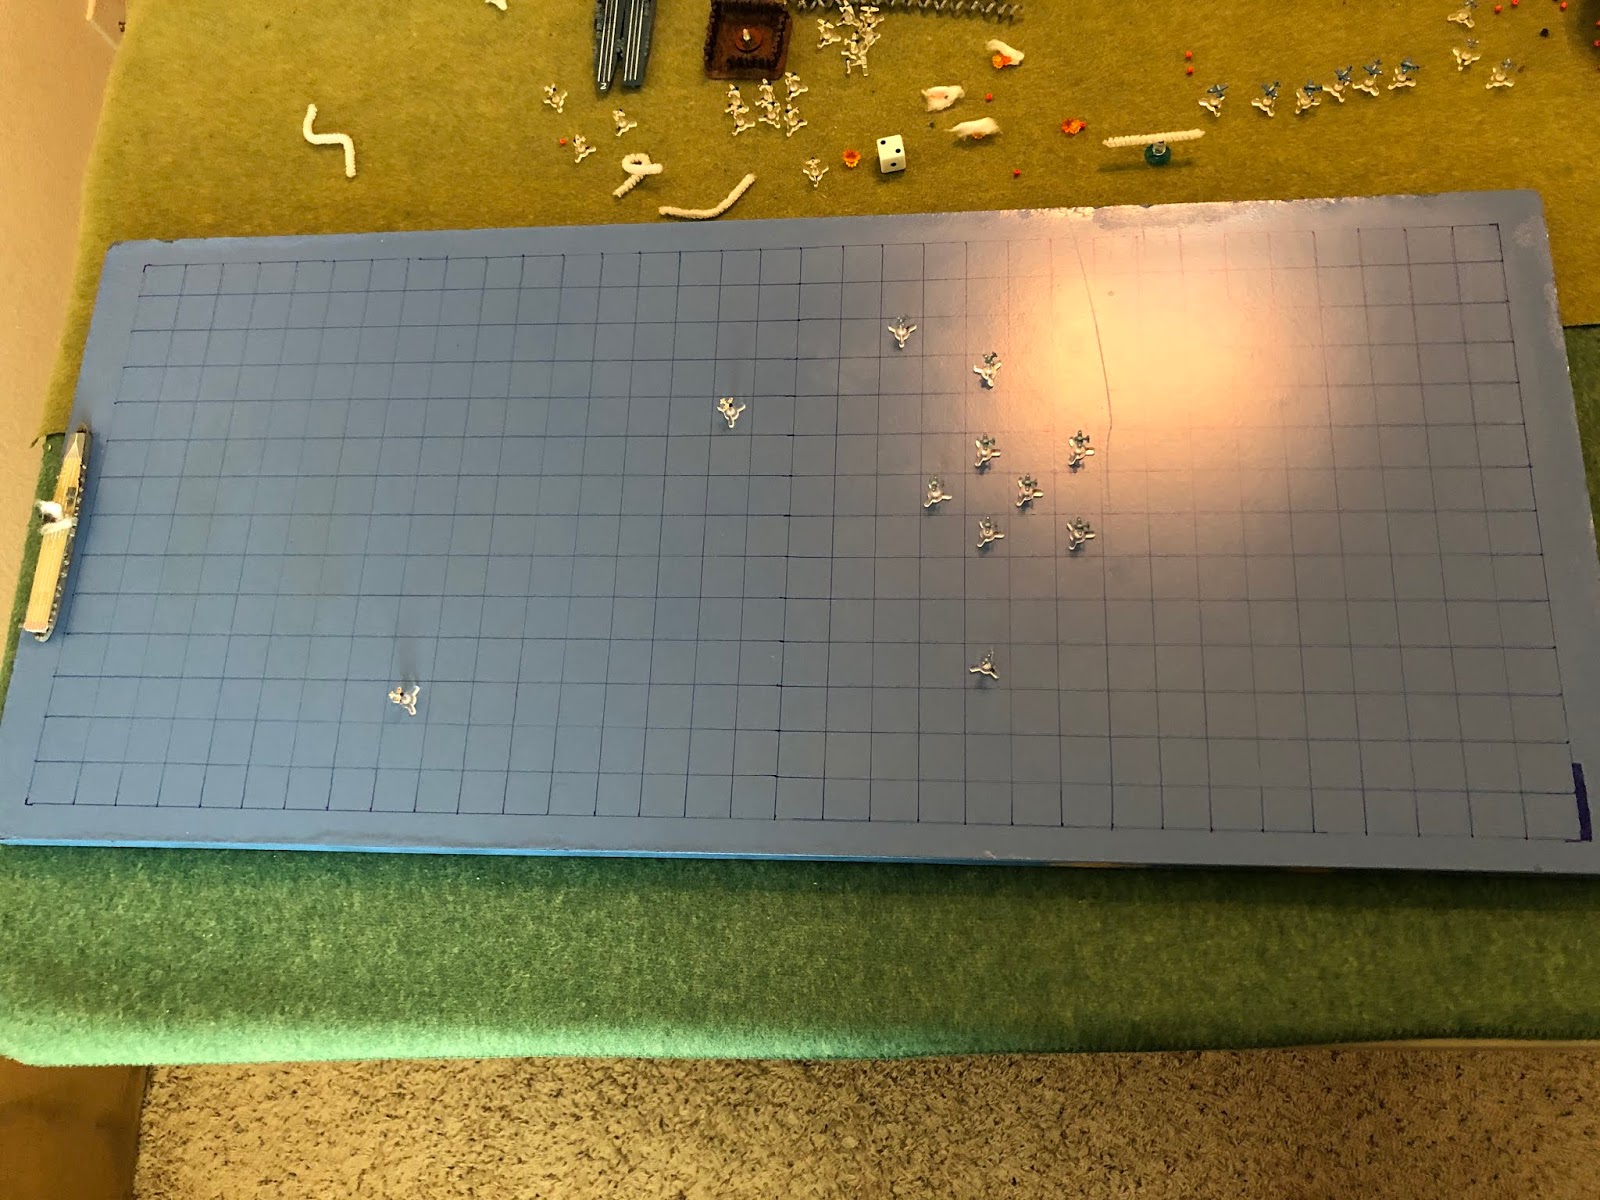
It's now 1035, and Lt Cmdr Case has re-formed a group of three Wildcats to lead the final strike of six SBD Dauntless dive bombers from VB-6 ("Bombing Six"), hoping to surpass the achievements of their compadres in Scouting Six. They are facing a reduced Japanese CAP of two Zeros.

This is my arena for aerial combat; simple, yet durable and, to me, beautiful (in a simple, durable way). I'm using tiny aircraft designed by my buddy Thomaston; not sure what size they are, just that they are much smaller than 1/600. They're 3D printed models that I mounted on cut-down bases from Litko, and I'm using a very simple rules system called "Battle of Britain," which I found for free over on The Miniatures Page (I've already played a good 20 or so fights with them). Left is north, with the Japanese CAP there, and the American strike group at right.
Finally, no toes! Nope, there they are, just made it in...

Ensign Bryant, a Regular with no kills on one sortie
Lt Cmdr Case, the Squadron Leader, Ace, and Medal of Honor winner, with 11 kills on 6 sorties
SBD 02 SBD 05
SBD 01 SBD 04
SBD 03 SBD 06
Lt (jg) French, a Veteran with four kills on three sorties

The Japanese CAP, from top right to bottom left:
Zero 01, a Veteran
Zero 02, a Veteran
The fleet carrier Kaga can be seen burning in the background, the victim of a 1000-lb bomb hit by Scouting Six.


Not a great showing by the Yanks; sure, two kills, but one was by a bomber, and they still managed to lose a bomber... Not very impressive, particularly given the experience on hand with LtCmdr Case (an Ace) and Lt French (a Veteran). The real bright side was that no Wildcats were lost and the Dauntlesses had some great damage rolls.
Lt Cmdr Case failed to score
Lt (jg) French got the mission's only fighter kill, racking up his 5th kill of the war to become the Pelicans' second Ace!
Ensign Bryant failed to scoreSo while these guys are cruising home, we're going to flip over to Lt Chipman leading a six-plane CAP, going up to intercept a flight of Japanese 'Val' dive bombers closing on the USS Yorktown.
V/R,
Jack
No comments:
Post a Comment