All,
0800 local time
4 June 1942
Midway
It's 4 June 1942, the dawn of the epic "Battle of Midway," a clash of giants, three US carriers vs four Japanese carriers that proved to be the turning point of the war in the Pacific. For more information, both real-life and how I'm running this campaign, please check here:
https://oldleadbreed.blogspot.com/2019/11/battle-of-midway-campaign-plan.html
Yesterday at 0900 a US Navy PBY Catalina spotted Japanese ships 500nm west southwest of Midway; B-17s from the island were dispatched but failed to hit anything. US Navy PBYs continued to shadow the Japanese surface force, and actually attacked at 0100 this morning, scoring a torpedo hit on a Japanese merchant ship. Unbeknownst to US personnel, the Japanese carrier task force, as yet still unspotted, launched its first strike group against Midway at 0430. At 0530, the PBYs spotted the Japanese carriers, and noted their strike group inbound.
At 0610, the VMF-343 "Dirt Divers" scrambled six F4F Wildcats to intercept an inbound group of six D3A "Val" dive bombers escorted by four A6M "Zeros," but were roughly handled, having three Wildcats shot down and the other three damaged, as the Japanese lost one Zero and one Val. The Japanese aerial attack caused 18/30 damage points.
At 0625, Captain Haynes led six Wildcats to intercept an inbound group of six B5N "Kate" torpedo bombers escorted by four A6M "Zeros." Again it was rough: the Marines lost five of six aircraft, with one pilot KIA, one MIA, and two WIA, while the Japanese lost four of their six torpedo bombers, which did light damage to Midway's shore installations (26/30, total).
At 0645, Major Chandler led four Dirt Divers in escort of a flight of six TBF torpedo bombers to attack the Japanese carriers, running right into the Japanese CAP of six Zeros, and it was a debacle: the Americans lost one Wildcat and five TBFs, the last being damaged and forced to return to base without even spotting the Japanese carriers. Oh, and the Japanese did lose two Zeros, but they were both to the TBFs!!!
At 0715, 2nd Lt Herman led a flight of four Wildcats in escort of six SBD Dauntless dive bombers from Marine Scouting-Bombing Squadron 241 (VMSB-241), up against six Zeros of the Japanese Combat Air Patrol. The mission was sort of a success: five Zeros were downed (two by SBDs!) and the sixth was shot up, no Wildcats were lost, only three Dauntlesses were lost, but no hits were scored on the enemy carriers.
It's now 0800, and Major Chandler is leading a flight of four Wildcats on an escort mission for four US Army Air Corps B-26s specially modified to carry torpedoes. The Marine escorts have done a pretty good job so far of beating up on the Japanese CAP, so that the enemy is only able to get four Zeros in the air to oppose them.
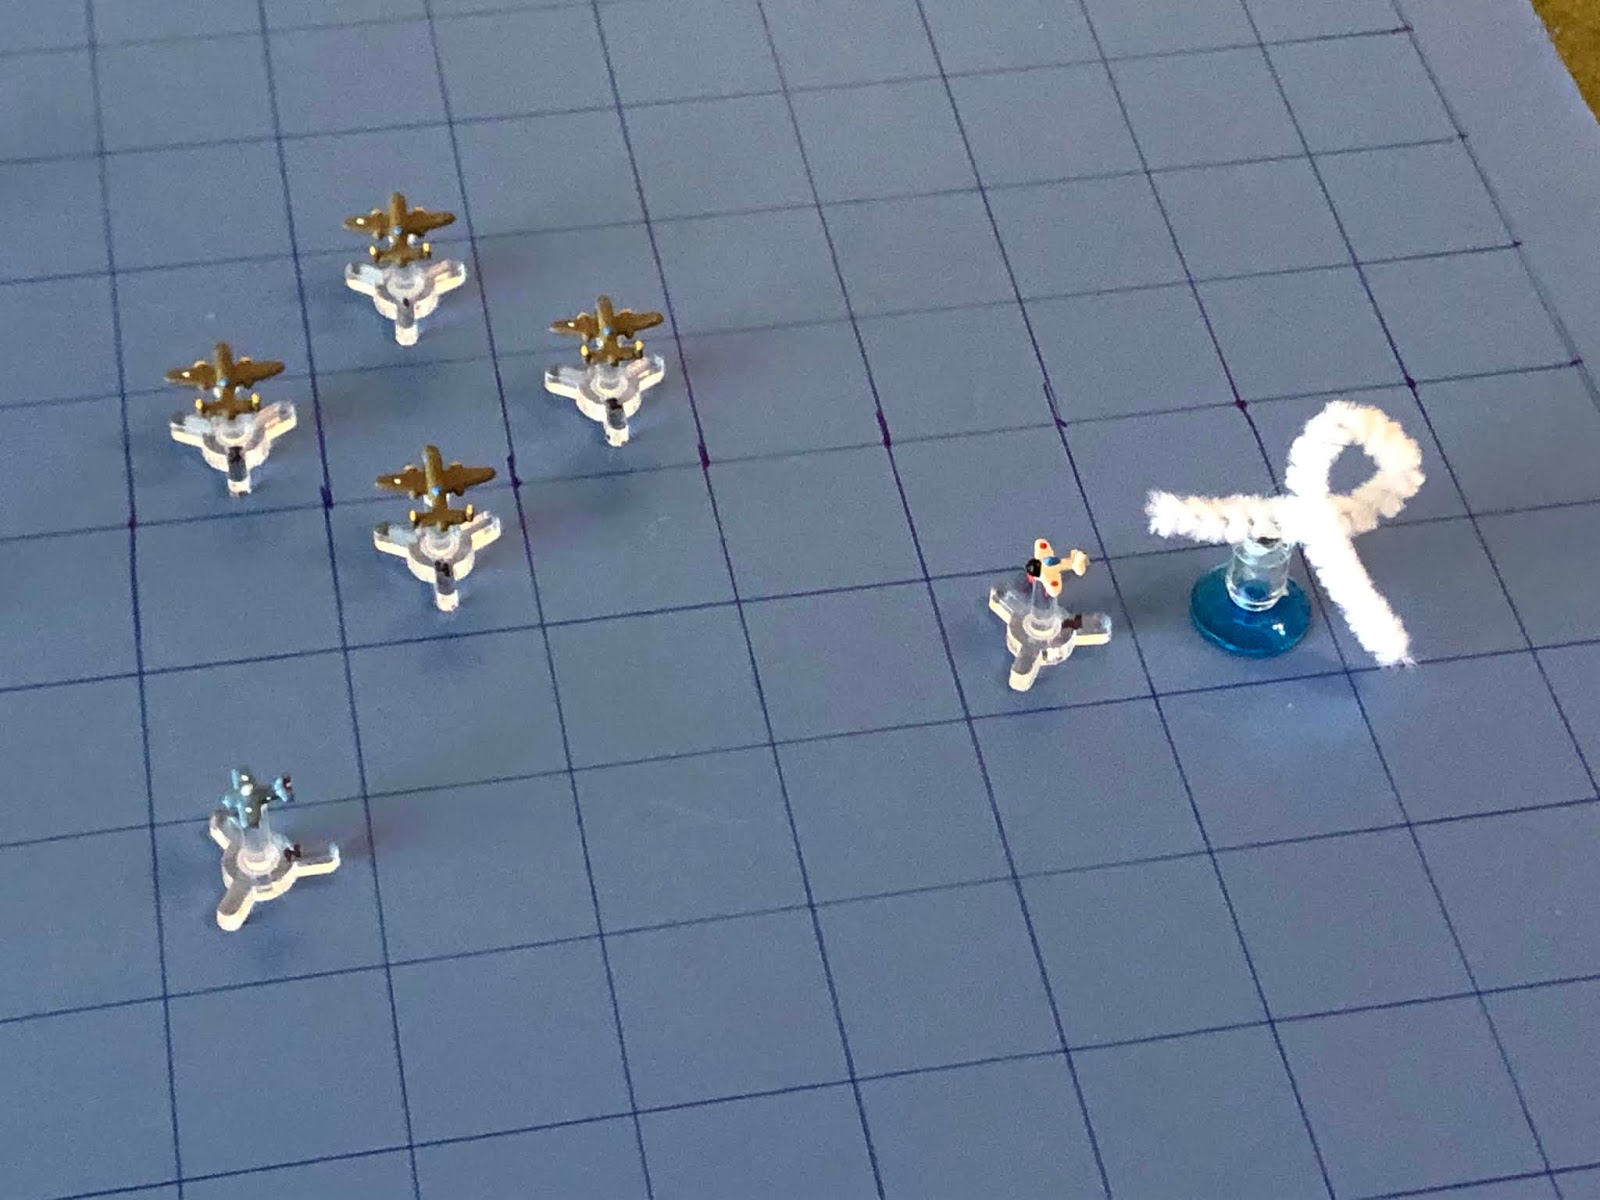
This is my arena for aerial combat; simple, yet durable and, to me, beautiful (in a simple, durable way). I'm using tiny aircraft designed by my buddy Thomaston; not sure what size they are, just that they are much smaller than 1/600. They're 3D printed models that I mounted on cut-down bases from Litko, and I'm using a very simple rules system called "Battle of Britain," which I found for free over on The Miniatures Page (I've already played a good 20 or so fights with them). Left is north, with the Japanese CAP there, and the American strike group at right.
The US strike group, from top to bottom:
2nd Lt Higbe, a Regular with one kill on two sorties
Major Chandler, a Veteran with two kills on four sorties
Marauder 02
Marauder 01
Marauder 04
Marauder 03
2nd Lt Herman, a Regular with one kill on one sortie
2nd Lt Cross,
a Regular with one kill on one sortie
The Japanese CAP, from top:
Zero 02, a Veteran
Zero 01, a Veteran
Zero 03, a Veteran
Zero 04, a Veteran
We fast forward through the first three turns in order to bring you straight into the action. Time to fight!
And we get straight to it, as the Dirt Divers' squadron commander, Major Chandler, charges straight in on Zero 01, the Japanese flight leader! Both pilots open fire...
Both pilots hit, and both aircraft go down!!! Major Chandler manages to bail out, and he's picked up a few hours later by a patrolling PBY, but he's badly wounded and will be out a little over three months!
Zero 02 moves up, staring down at the flotsam and jetsam of his fallen leader, tears in his eyes.
While the Zeros at the bottom move up, too.
The Army bombers push north.
Alone and dispirited due to the loss of his squadron leader, Lt Higbe sputters ahead, straight and level.
Lt Herman jinks over, eye-balling Zeros 3 and 4 (bottom left).
And Lt Cross half-heartedly pushes to catch up.
Zero 03 heads for the bombers.
And Zero 04 holds steady, going head to head with Lt Herman, to cover Zero 03's tail.
While up top, Zero 02 cuts over to go at the US bombers, totally disrespecting Lt Higbe (top left) by disregarding the threat he (should) pose...
And the bombers push ahead, running into two Japanese fighters. Zero 02 (top left) and Zero 03 (far left) both brave defensive fire in order to take head-on shots on the torpedo-laden B-26s, but all four aircraft miss!!!
Lt Higbe pulls hard left, at least pretending that he wants to get into the fight.
As Lt Herman jinks past Zero 04 to save his own skin, but leaving the Japanese pilot to either deal with Lt Cross (bottom left) all alone, or go after the bombers, as he pleases.
Lt Cross belatedly commits to engaging Zero 04, but doesn't quite get there...
Zero 04's pilot laughs and rolls his eyes at the Americans half-hearted efforts, then cuts left and runs in on Bomber 03 to take a high deflection shot....
He misses and pulls hard right, all the way back around to put him in good shape on Lt Cross's tail (far left, with Lt Herman above him).
Zero 03 doesn't really want to run the gauntlet of all the US bombers' nose, waist, and tail guns, so he whips his fighter back around, with an eye towards jumping on Lt Herman's tail (top left).
Zero 02 thinks the same thing, so he cuts hard left into Lt Higbe.
The US bombers push north, with Bomber 02's tail gunner taking a shot on Zero 02 (center right top) and damaging him!
Lt Higbe jinks around Zero 02 works in behind Zero 04 (left) and Zero 03 (center left), but it's probably too late.
Lt Cross comes shallow right, sort of defensive but probably not enough to keep Zero 04 (bottom center left) off his tail.
And then Lt Herman does the same, though his looks to be a little more effective.
Up top, the damaged Zero 02 pulls a Split-S to reverse course, back in behind the bombers.
As Zero 04 pulls right in behind Lt Cross. 20mm and 7.7mm tracers reach for the stubby Wildcat, damaging it.
And Zero 03 pulls in hard right, defensive against Lt Herman (top left), but still setting up a shot on the US bombers.
Which charge straight into Zero 03's guns, damaging Bomber 03.
Lt Cross's Wildcat is damaged badly that he needs to return to base, so he pulls back around and heads for the barn.
Lt Higbe pulls up and cuts hard right for a perfect, zero-deflection shot on Zero 04's tail. The .50 cal MGs thunder away at point-blank range!
He would hit on anything but a '1,' and guess what he rolled?
Lt Herman cuts hard right, defensive, but leaving the bombers all alone...
Zero 03 zigs right then cuts back left (braving two defensive fire rolls from Bomber 04, both of which missed), onto Bomber 02's tail, dodging defensive fire as he opens fire but only manages to damage the two-engine bomber.
Zero 04, laughing off Lt Higbe's easy miss (bottom right), ignores him and cuts right, running in on Bomber 03's tail and opening fire...
Tracers from the B-26's tail guns merge with the unarmored Zero as 20mm tracers clip the bomber's left wing, and both aircraft go down!
Zero 02 sputters right, unable to process what just happened to his comrade.
As the remaining three bombers push towards the Japanese carriers.
Lt Higbe pulls right, looking to get onto Zero 03's tail (center right, with Zero 02 at bottom center right).
And Lt Herman panics and sort of just stumbles into a head-on gunfight with Zero 02! Both pilots squeeze the triggers...
And both pilots find their mark and both aircraft go down! Lt Herman is able to bail out safely and is picked up a few hours later by a PBY out of Midway.
Zero 03 wastes no time in cutting right onto Bomber 04's tail and opening fire...
But he misses and comes off left!
*Wow, some very unimpressive shooting going on here!
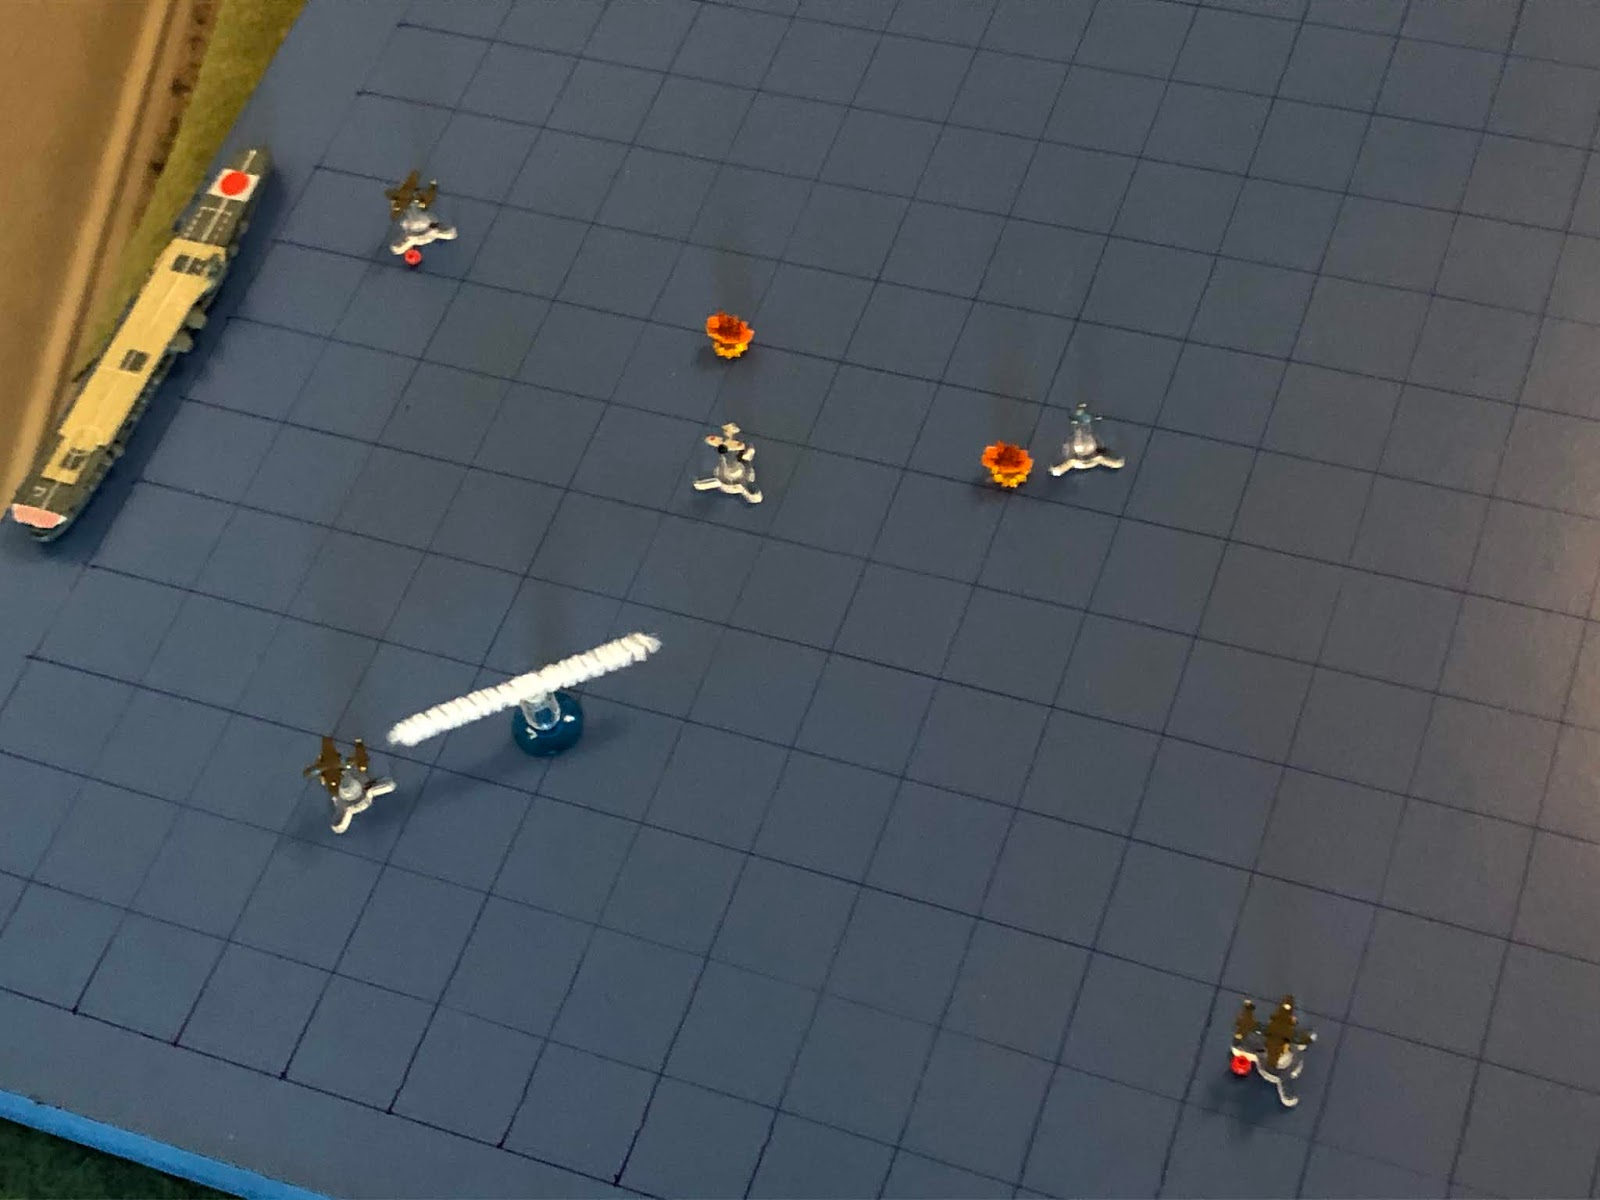
As the bombers press their attack, the Japanese carriers coming into view.
Lt Higbe dashes in on Zero 03's tail and opens fire...
But he misses and comes off right.
As Zero 03 runs out and cuts back right, laying into Bomber 04 with his 20mm cannons...
He misses, but presses home his attack, ending up between Bomber 04 (right) and Bomber 01 (left, with Bomber 02 above), dodging defensive fire from both as he opens fire on the lead B-26, damaging it.
And forcing it to turn about and head for home!
The US bombers push north, having to split their formation due to Zero 03's position.
As Lt Higbe ONCE AGAIN loops in to take a shot on Zero 03's tail...
And once again blows it, which allows Zero 03 to move in on the damaged Bomber 02's tail. Both sides open fire...
And both sides miss!
So Zero 03 cuts left, trying to line up on Bomber 04.
And the US bombers continue their run.
Lt Higbe jinks in onto Zero 03's tail and opens fire...
And misses on his third straight pass, flashing by.
So Zero 03 cuts back right and opens fire on Bomber 02, looking to finish her off...
And Zero 03 triumphantly cuts back left as the B-26 careens into the ocean.
The last remaining US bomber (04) cuts right, looking to straighten up for its run.
As Lt Higbe cuts right and opens fire with the last of his remaining machine gun ammo...
And finally he is able to smite Zero 03, sending the Japanese plane to Davey Jones' locker!
*He wasn't really out of ammo, I don't track ammo, that was just for dramatic effect ;)
Bomber 04 runs in and launches its torpedo at one of the Japanese carriers, and misses...
Bomber 04 pulls back around, forms up with Lt Higbe, and the two return to base, not particularly impressed with their own performance.
A rough fight, with heavy casualties and all for naught, pretty much like real life. The Americans lost two of four Wildcats and had another damaged, and lost two of four B-26s and had another damaged, while the Japanese lost all four Zeros assigned to their combat air patrol, though one of the kills was by a bomber that was simultaneously shot down. The Americans had some very bad maneuver rolls early on, which allowed the Japanese to run circles around them (I'm used to it by now), but what really hurt is that the middle of the fight saw the Americans get into position for several great shots, and blew all of them... The Japanese helped towards the end of the fight by missing several great shots, but let's be fair, it took Lt Higbe FOUR runs to finally splash Zero 03!
Major Chandler, scored his third kill of the war, but was shot down, badly wounded, and will miss the next 100 days
2nd Lt Higbe scored his second kill of the war
2nd Lt Herman scored his second kill of the war, but was shot down. Having said that, he's okay, bailed out safely and picked up
2nd Lt Cross did not score, had his aircraft damaged and was forced to return to base
So, not a great showing in the 'Dirt Divers' last mission at Midway, and probably not a great showing overall for the Marines which, again, kinda matches up with real life. But it did get some of their pilots some valuable experience that hopefully will show up when we get to Guadalcanal.
Next up, we're back to the US Navy's Killer Pelicans, which will see them carry out their (world famous) strikes on the Japanese carriers, then attempt to defend the Enterprise, Hornet, and Yorktown from the Japanese strikes. I expect the Navy pilots to do better, on two accounts: first, they have much more experienced pilots (having flown more sorties in the Dutch East Indies, and having fought at Coral Sea), and second, this is a campaign that is weighted towards the Americans, meaning the US forces had both the Dirt Divers and the Killer Pelicans committed, while the Japanese have considerably fewer fighters, and they've sustained significant losses in the first five fights.
Just saying the Marines did all the heavy lifting, so the Navy could slide in here and get four Japanese carriers ;)
V/R,
Jack


No comments:
Post a Comment